¶ Windows SASE Client Deployment using RMM (Intune)
SASE architecture allow IT to deliver networking and security to all locations, applications and users. This happens through tight integration of networking and security delivered through a single cloud platform. But one of the fundamental elements of SASE is its identity-based policy framework.
The identity of users and devices is the foundation of how SASE delivers its policy-driven access. Exium's SASE solution offers both user identity and device identity based access and policies. The two methods described below are part of the broader deployments methods described here.
The Windows installation commands provided here can be run locally on the machine or pushed via the Intune remote deployment tool.
¶ Method 3A: Include user information in the RMM
In this approach, each script is customized for an individual user and their information is passed as an input parameter with the script (see script example below). This user-specific script requires the inclusion of three essential inputs.
- The secret TOKEN. See the instructions at the end of this page on how to get this.
- The Workspace name - this is common to all users in that customer instance.
- The UserName - this is what makes the script specific to this user.
The MSP IT admin needs to make sure that correct user information is included when pushing the script to the devices. You may automate this process if you have information linking users to devices in your RMM system. Otherwise, it must be done one user at a time.
See the next section for an alternative Device-based method that can be used for large groups of users.
To obtain the script for a particular user, navigate to the Admin console page and choose the user as illustrated in the image below.
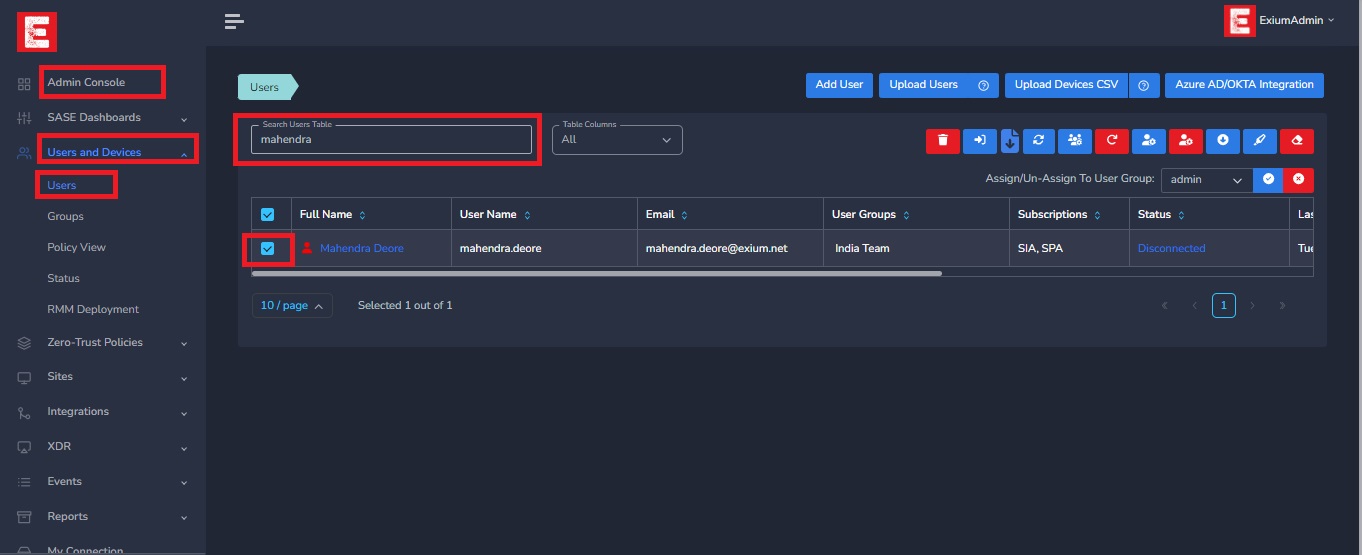
Now Scroll right and select Client Install Script shown in below picture.

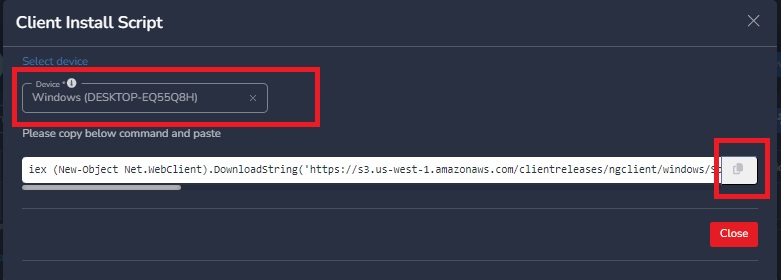
Once you click on The above shown Icon. A pop-up window will open you can see the script for windows. Click on copy icon to copy user based installation script.
Device Based Client Activation (Alternative)
Use this alternative “Device Based” installation method if you want to deploy multiple users at once with a single script. In this approach, Only workspace and auth token will be essential as inputs for the installation command.
The Device-based installation command can be obtained from the admin console, as depicted in the image below.
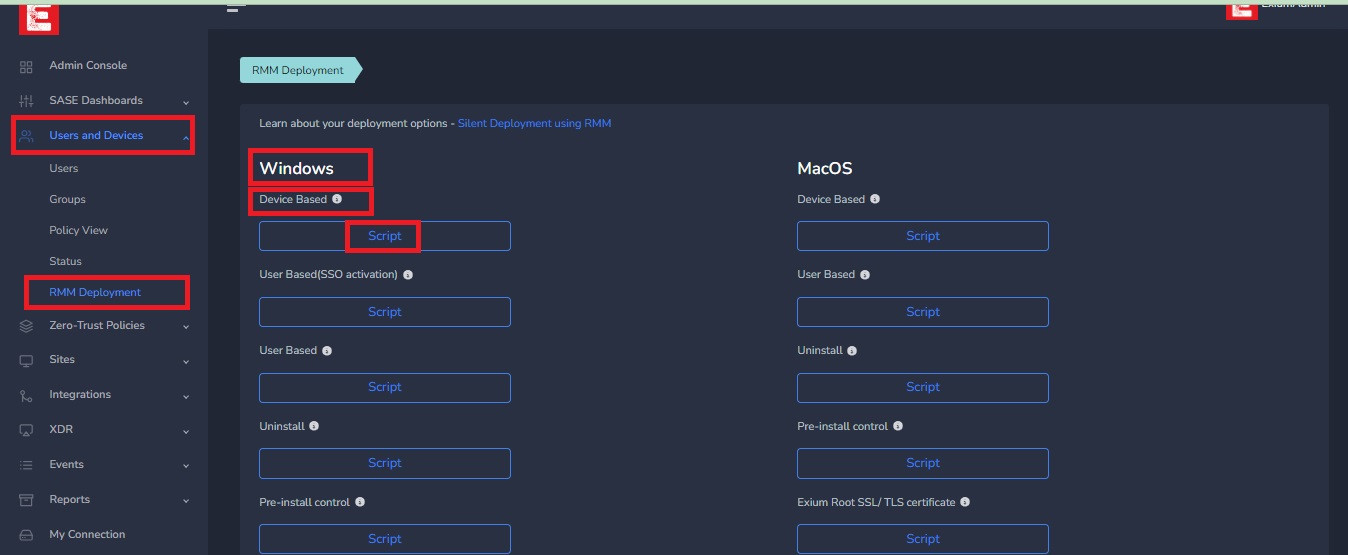
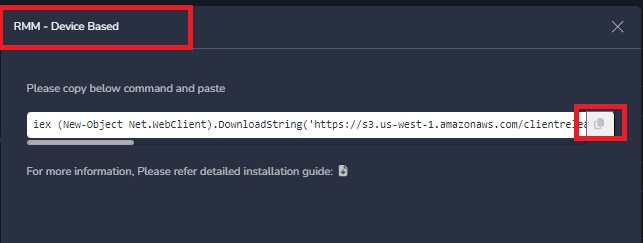
After clicking on the "Script" option, a window will open. Copy the Device-based installation script by selecting and clicking on the copy icon.
¶ Windows Client Deployment using Intune
This section details the steps to deploy Exium's client remotely to Windows using the Microsoft Intune Framework.
¶ Add installation command details
First Download the file name speerity-intune-installer.ps1 from here.
Once you open the file it looks as below.

Copy installation command as mentioned in above steps and paste into the file below the comment "#Paste installation command below". Once done, save the file.
Login to your Intune portal and go to the section mentioned below.
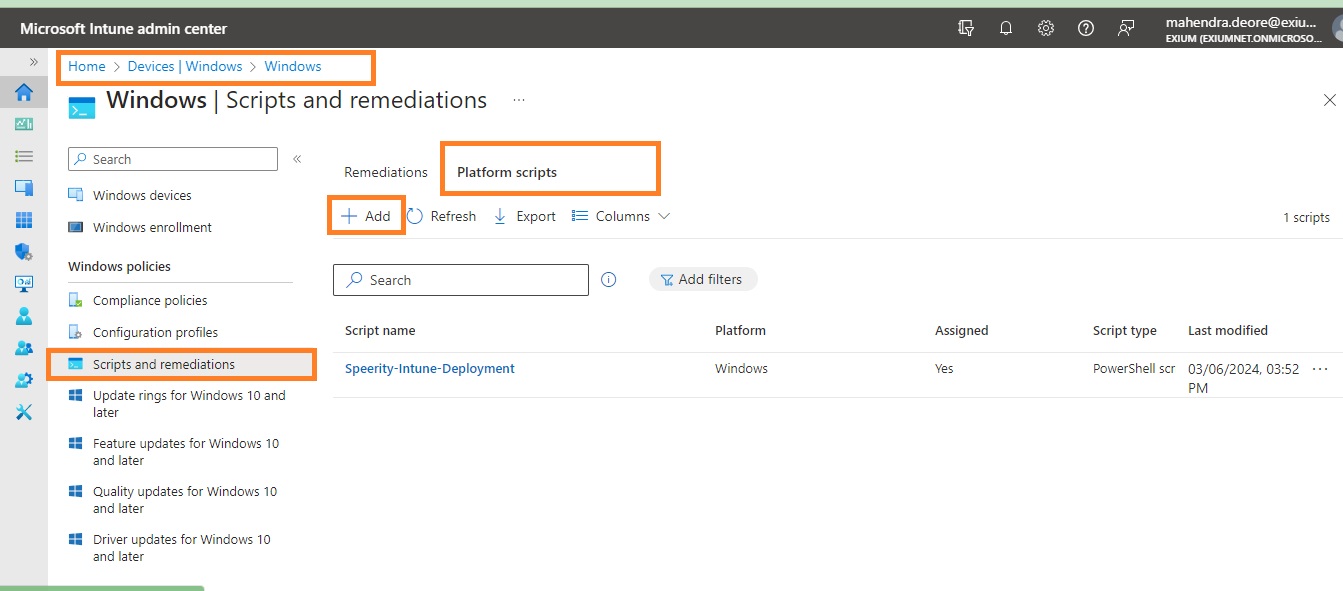
Select Devices > Windows>Scripts and remediations >Platform scripts> Add
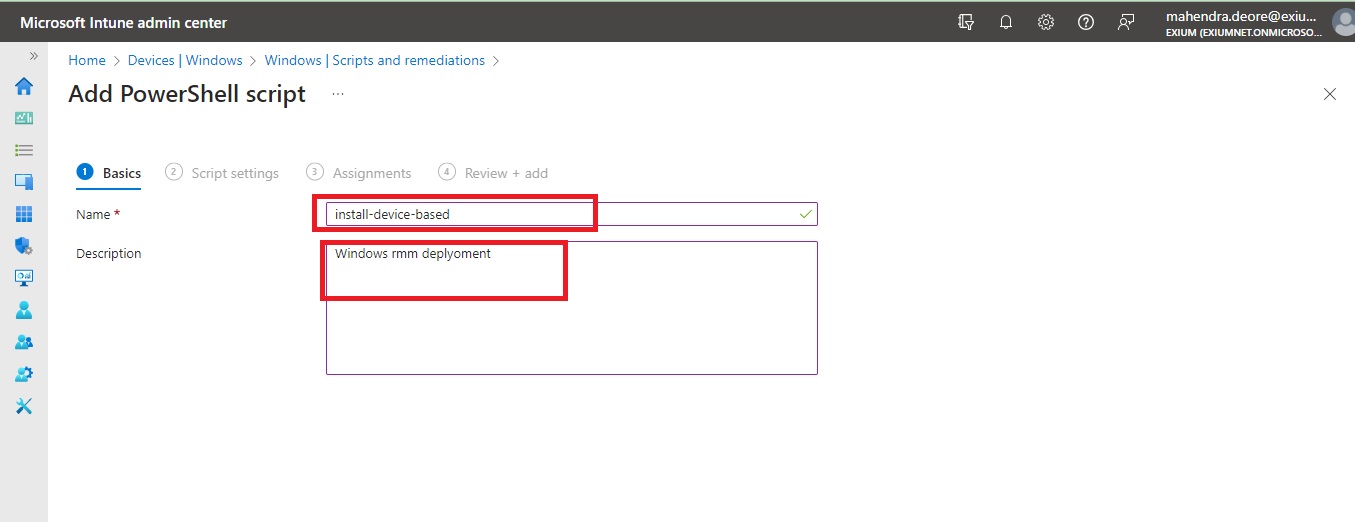
Basics: Enter the name of the script and add a description
Click on Next
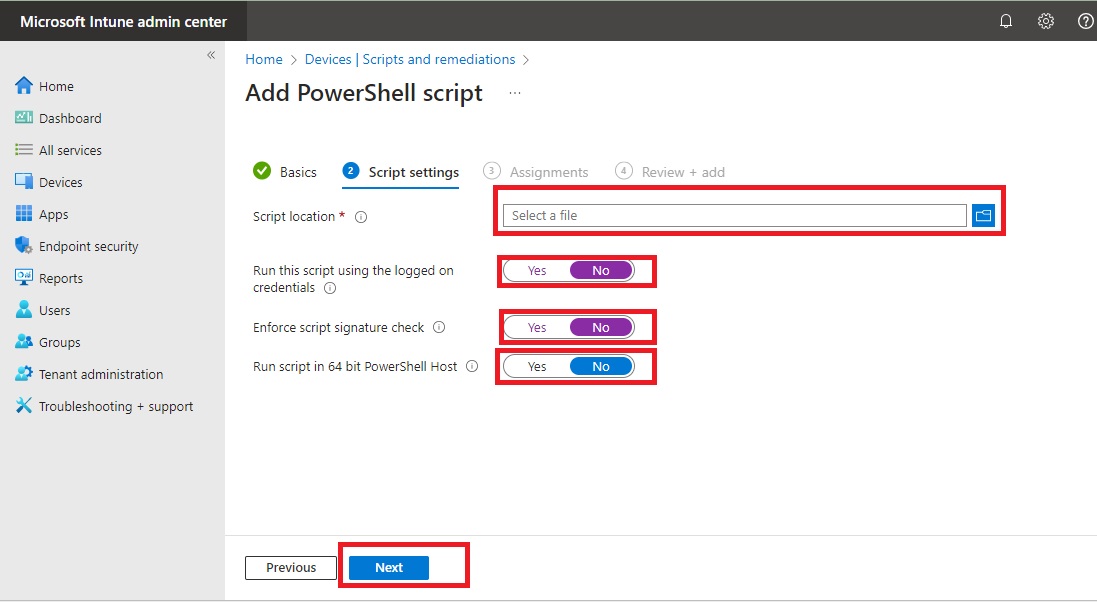
- Select the option as shown in the image.
- Select Assignments > Select groups to include.
- In Review + add, a summary is shown of the settings you configured. Select Add to save the script. When you select Add, the script policy is deployed to the groups you chose.
¶ Activate the Client
Once installation is completed, users will see “SASE App” on their Desktop as shown in the screenshot below. This App will be used by the user to activate/deactivate secure connection using Azure AD authentication.

Double-click on the "Exium App" icon as in the above screen shot, Azure AD login screen will pop up on the screen after a few seconds, as shown in the screenshot below. This may take few seconds, please wait while this login pop-up show up.
Note that in some cases, it may take up to a few minutes for the Azure AD prompt to show up. If you double-click again without waiting, multiple prompts may show up that you like to avoid.

Select Azure AD user from the list or add another account and complete the authentication procedure. Once authenticated, Exium service will be activated and the Verify Client Connection webpage will launch.
¶ Check service status
You can check if you are connected to Exium by navigating to the Secure Connection Status page.
¶ Uninstalling Exium SASE Agent
You can uninstall Exium SASE agent on the Windows endpoint by using the script below:
- Navigate to the MSP admin console -> Client Workspace
- Click on “Users and Devices” in the left menu bar -> RMM Deployment
- Copy and run the script via RMM or locally on the machine