¶ Azure AD SCIM/SAML Integration
Exium’s Intelligent Cybersecurity Mesh provides secure access to distributed workforce and IoT devices, protecting businesses from malware, ransomware, phishing, denial of service, and botnet infections in one easy to use cloud service.
From single sign-on to enhanced user provisioning Azure AD Exium integration handles users and groups seamless access to Exium. Administrators can easily attach Exium security policy groups to Azure AD user groups. Unique features of this integration are
- Simple steps to integrate Azure AD API with Exium
- Push New Users from Azure AD to Exium
- Push User Profile Updates from Azure AD to Exium
- Push User Groups from Azure AD to Exium
- Push User Deactivation from Azure AD to Exium
- Reactivate Users from Azure AD to Exium
- Single sign-on from Azure AD to sign-on to Exium
This note explains how to configure Azure AD Exium application settings and Exium Workspace settings so that Azure AD Users and User groups can be synced with Exium Workspace in real time and SSO from Azure AD can be used to sign-on to Exium Service.
Following steps elaborate Azure AD SCIM API Integration with Exium
¶ 1. Create Exium app on Azure AD
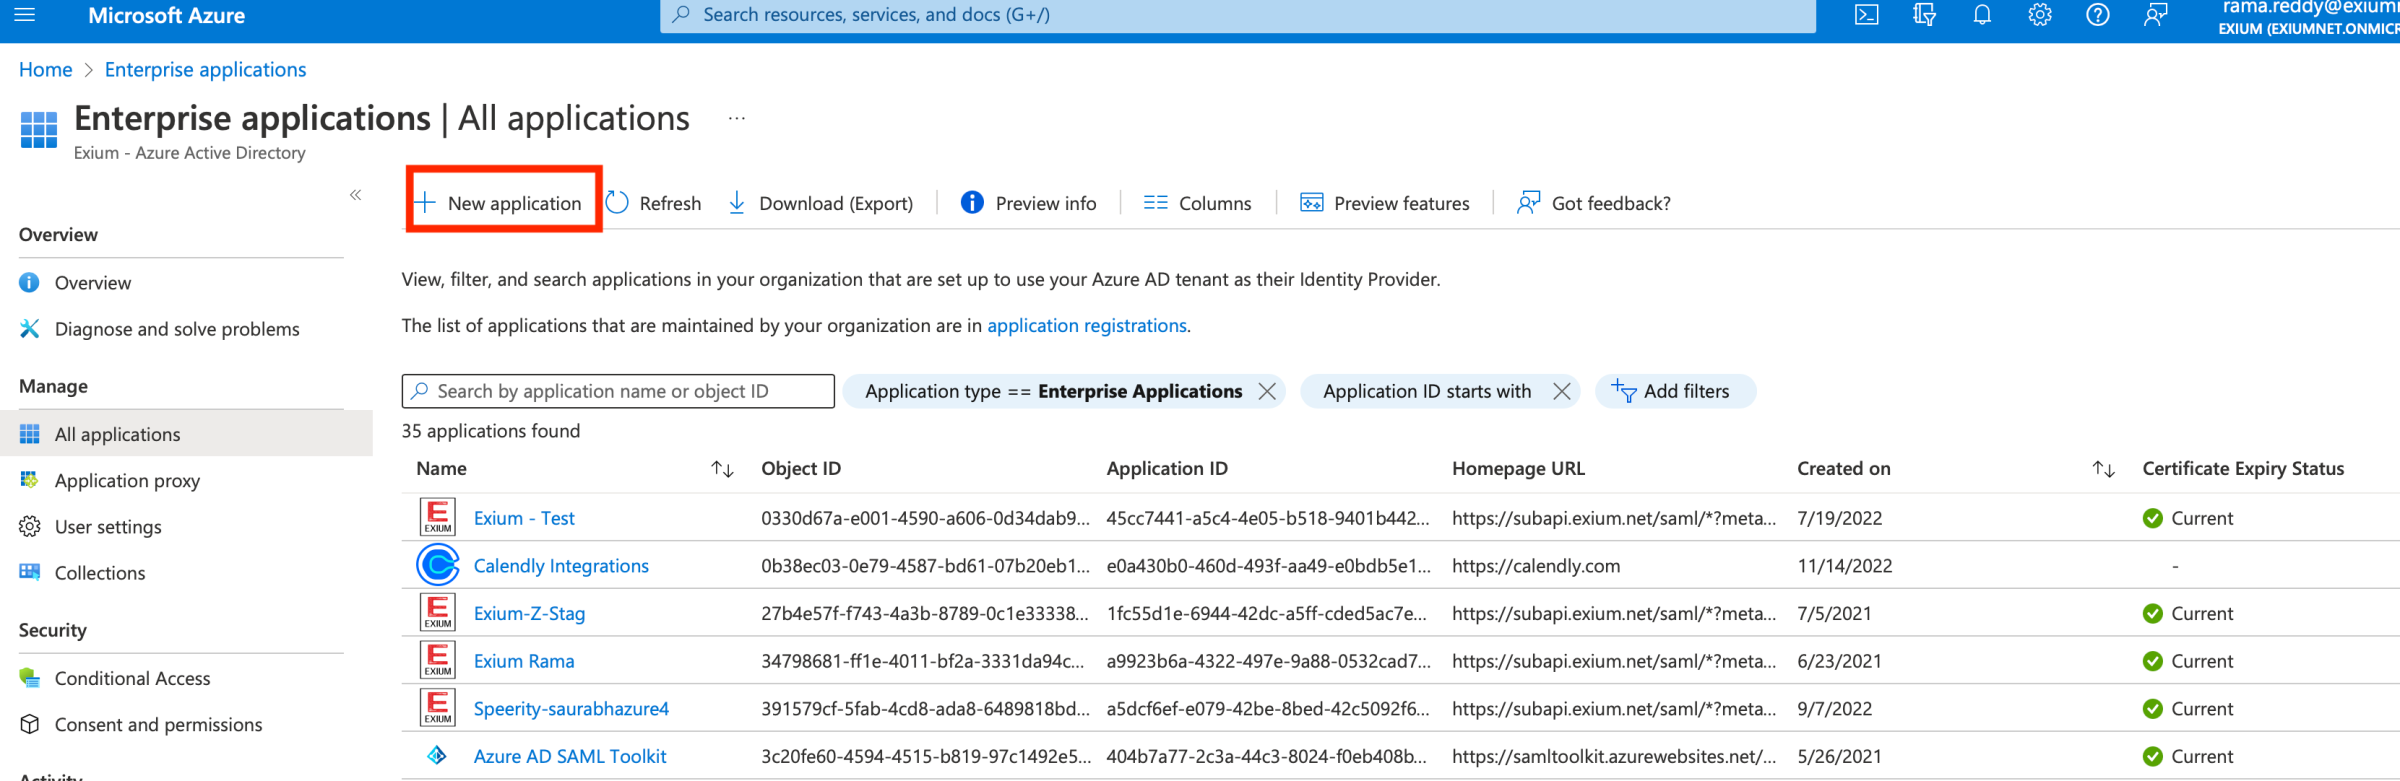
In Azure AD, you can add Exium application in your Azure AD account by browsing Azure AD Gallery and search for Exium app. Click on Enterprise applications on left navigation bar on your Azure AD home page. On Enterprise applications page, Click on New application button as shown below.
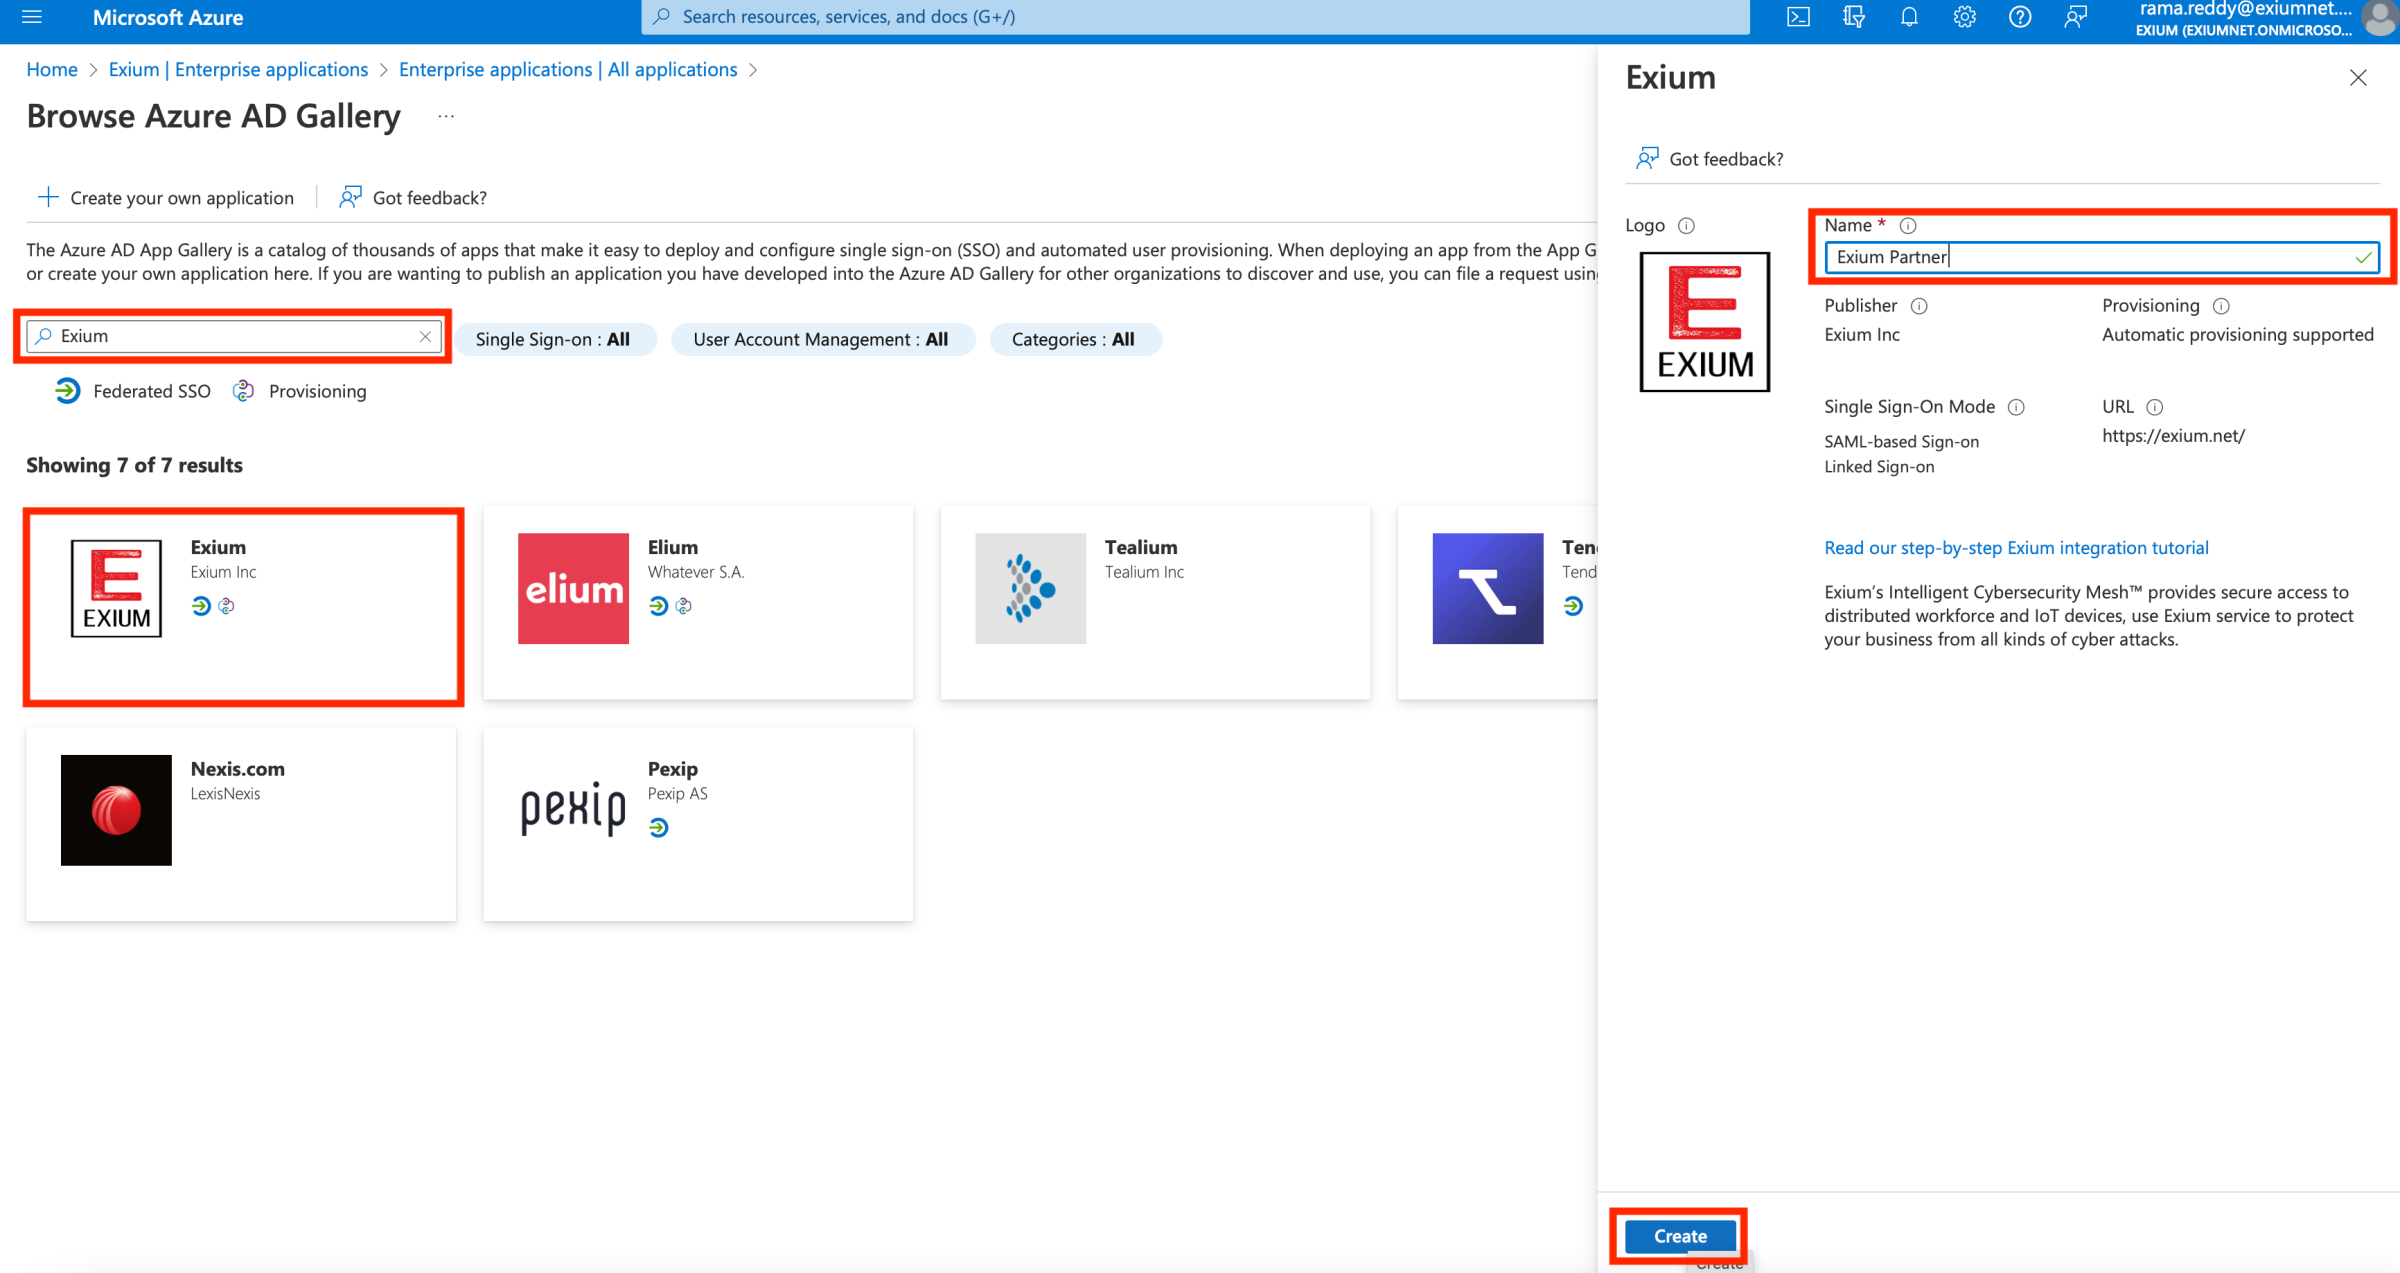
As a next step, search for Exium in search application bar of Browse Azure AD Gallery. It’ll show Exium app with logo. Click on Exium app with Logo as shown below.
On Left Panel By default, application name is shown as Exium. If you wish to change the app name, change the Name field as shown below. Click on Create.
¶ 1.1 Setup single sign on on Azure AD Exium app
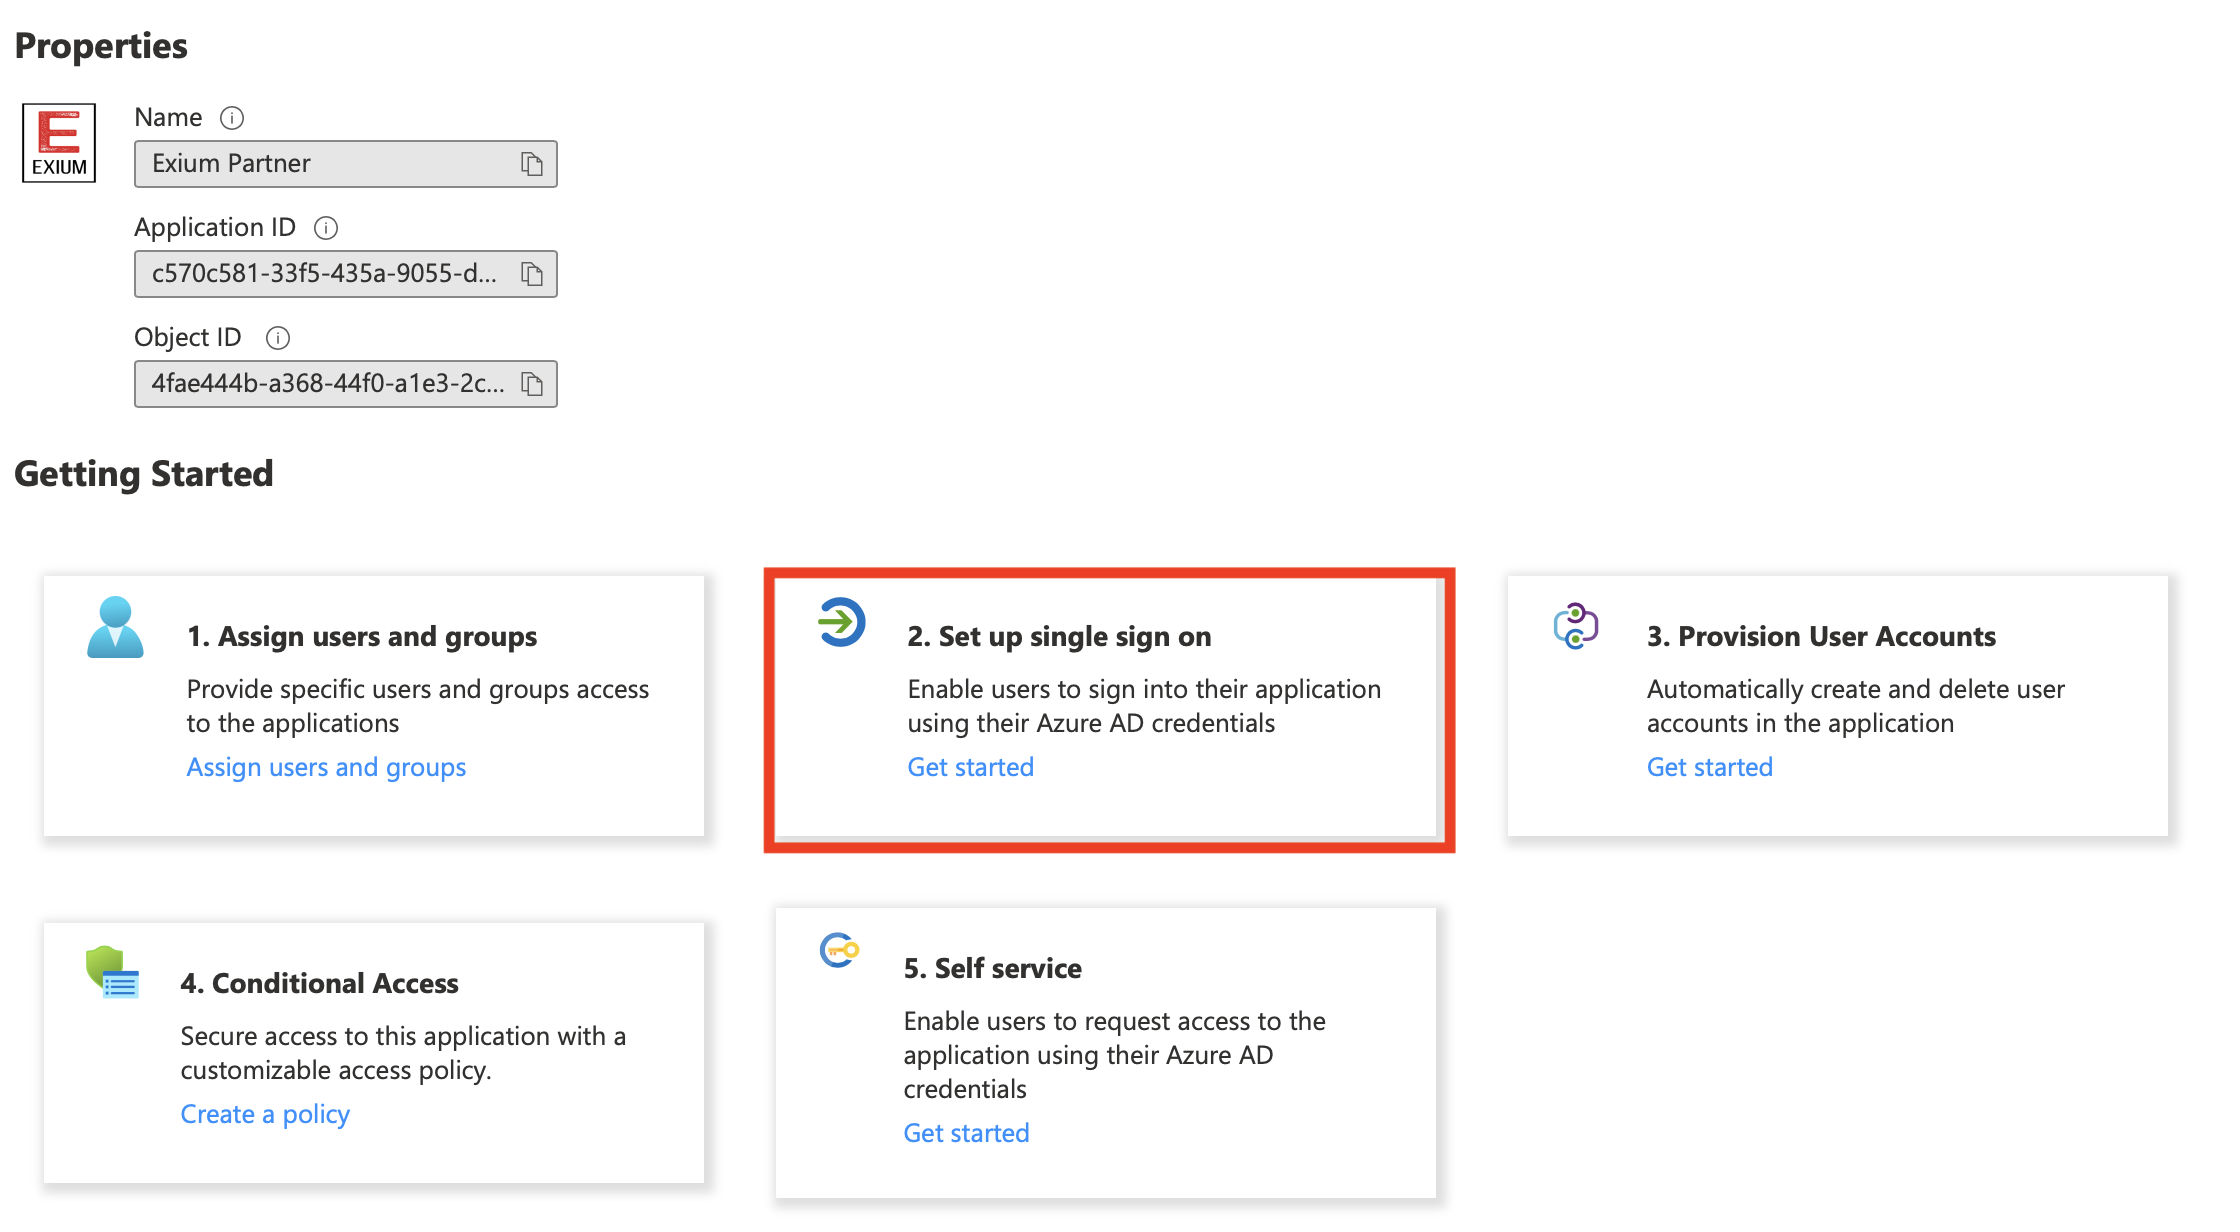
Click on Get Started on Set up single sign On box under newly created Exium app as shown below.
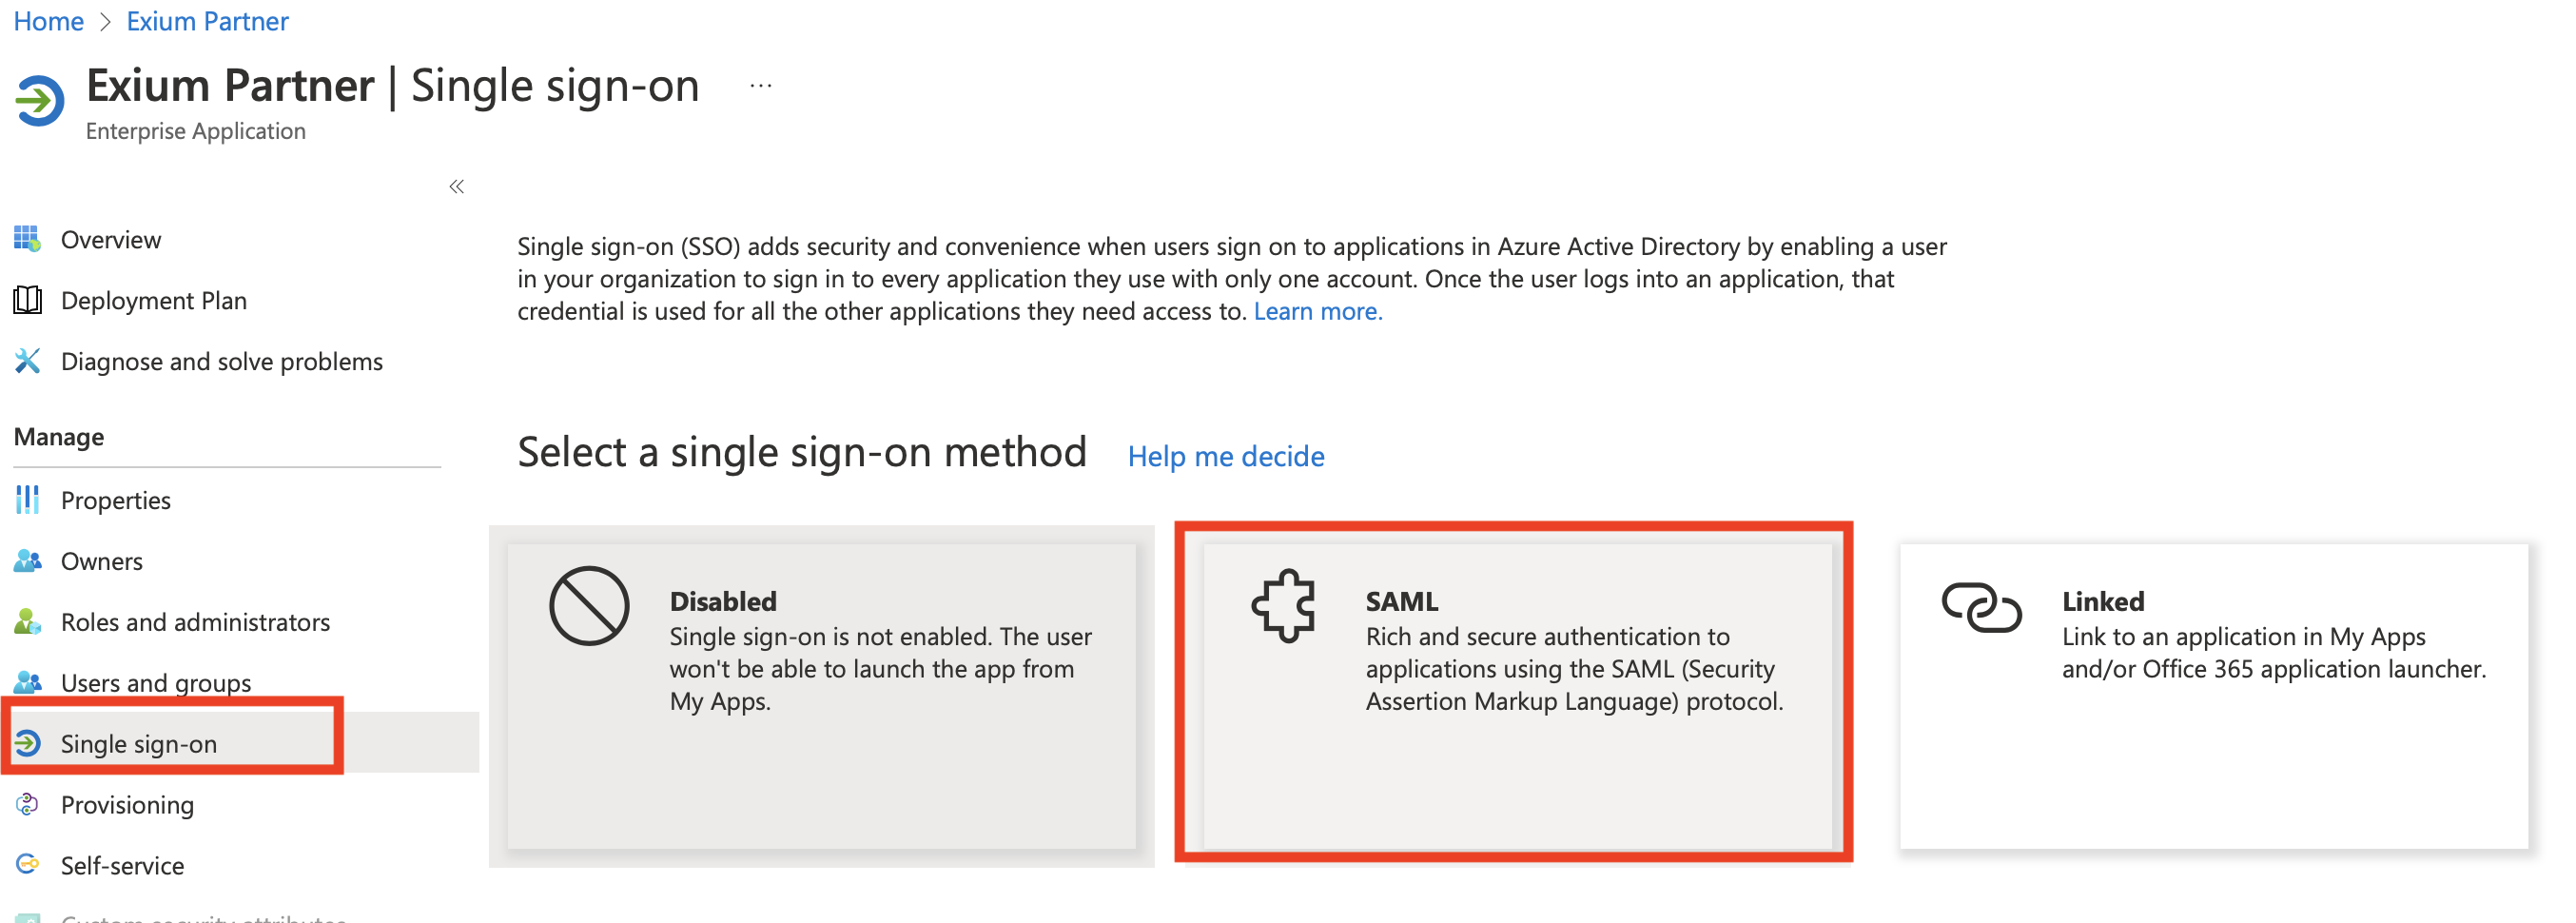
Click on SAML box under Single sign-on page of Exium app as shown below.
Click on Edit icon on Basic SAML Configuration on Set up Single Sign-On with SAML page.
¶ 2. Setup SSO SAML on Azure AD Exium App
As a next step, Single Sign-on SAML has to be configured on Azure AD Exium app by filling-in Identifier (Entity ID), Reply URL and Sign On URL. These fields are available on Exium Workspace Sign-in settings page. Following below steps elaborate on this.
¶ 2.1 Login to Exium Workspace
As a first step, you need to login to Exium Workspace on a separate browser tab and Navigate to SCIM/SAML SSO. Follow below steps.
- Navigate to the MSP admin console → Companies
- Click on Integrations → SCIM/SAML SSO
- Select Azure as Sign-In Type
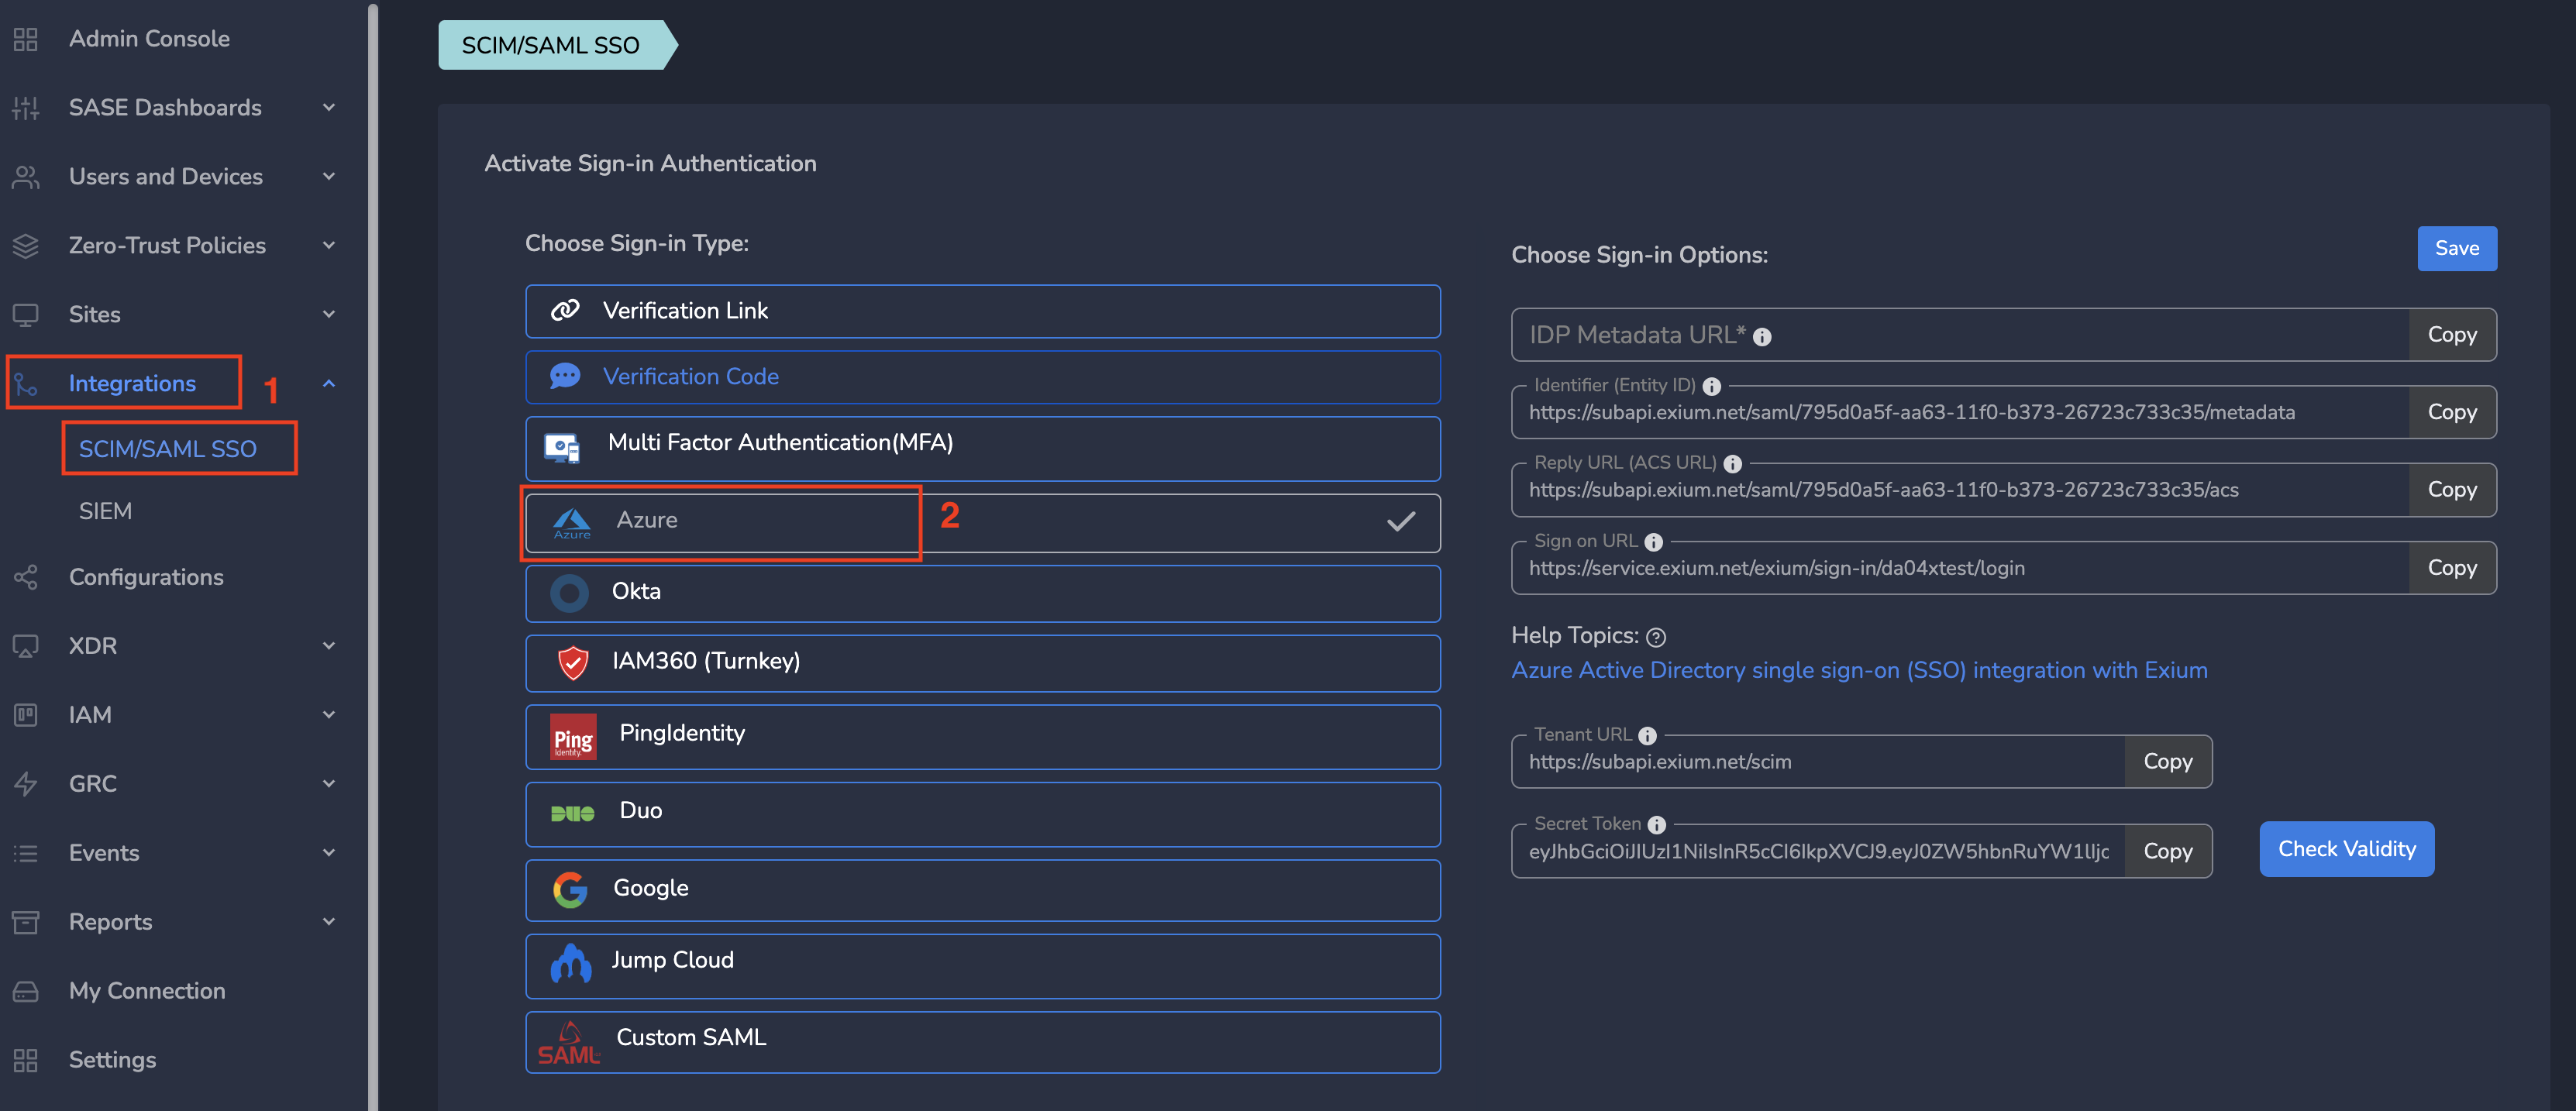
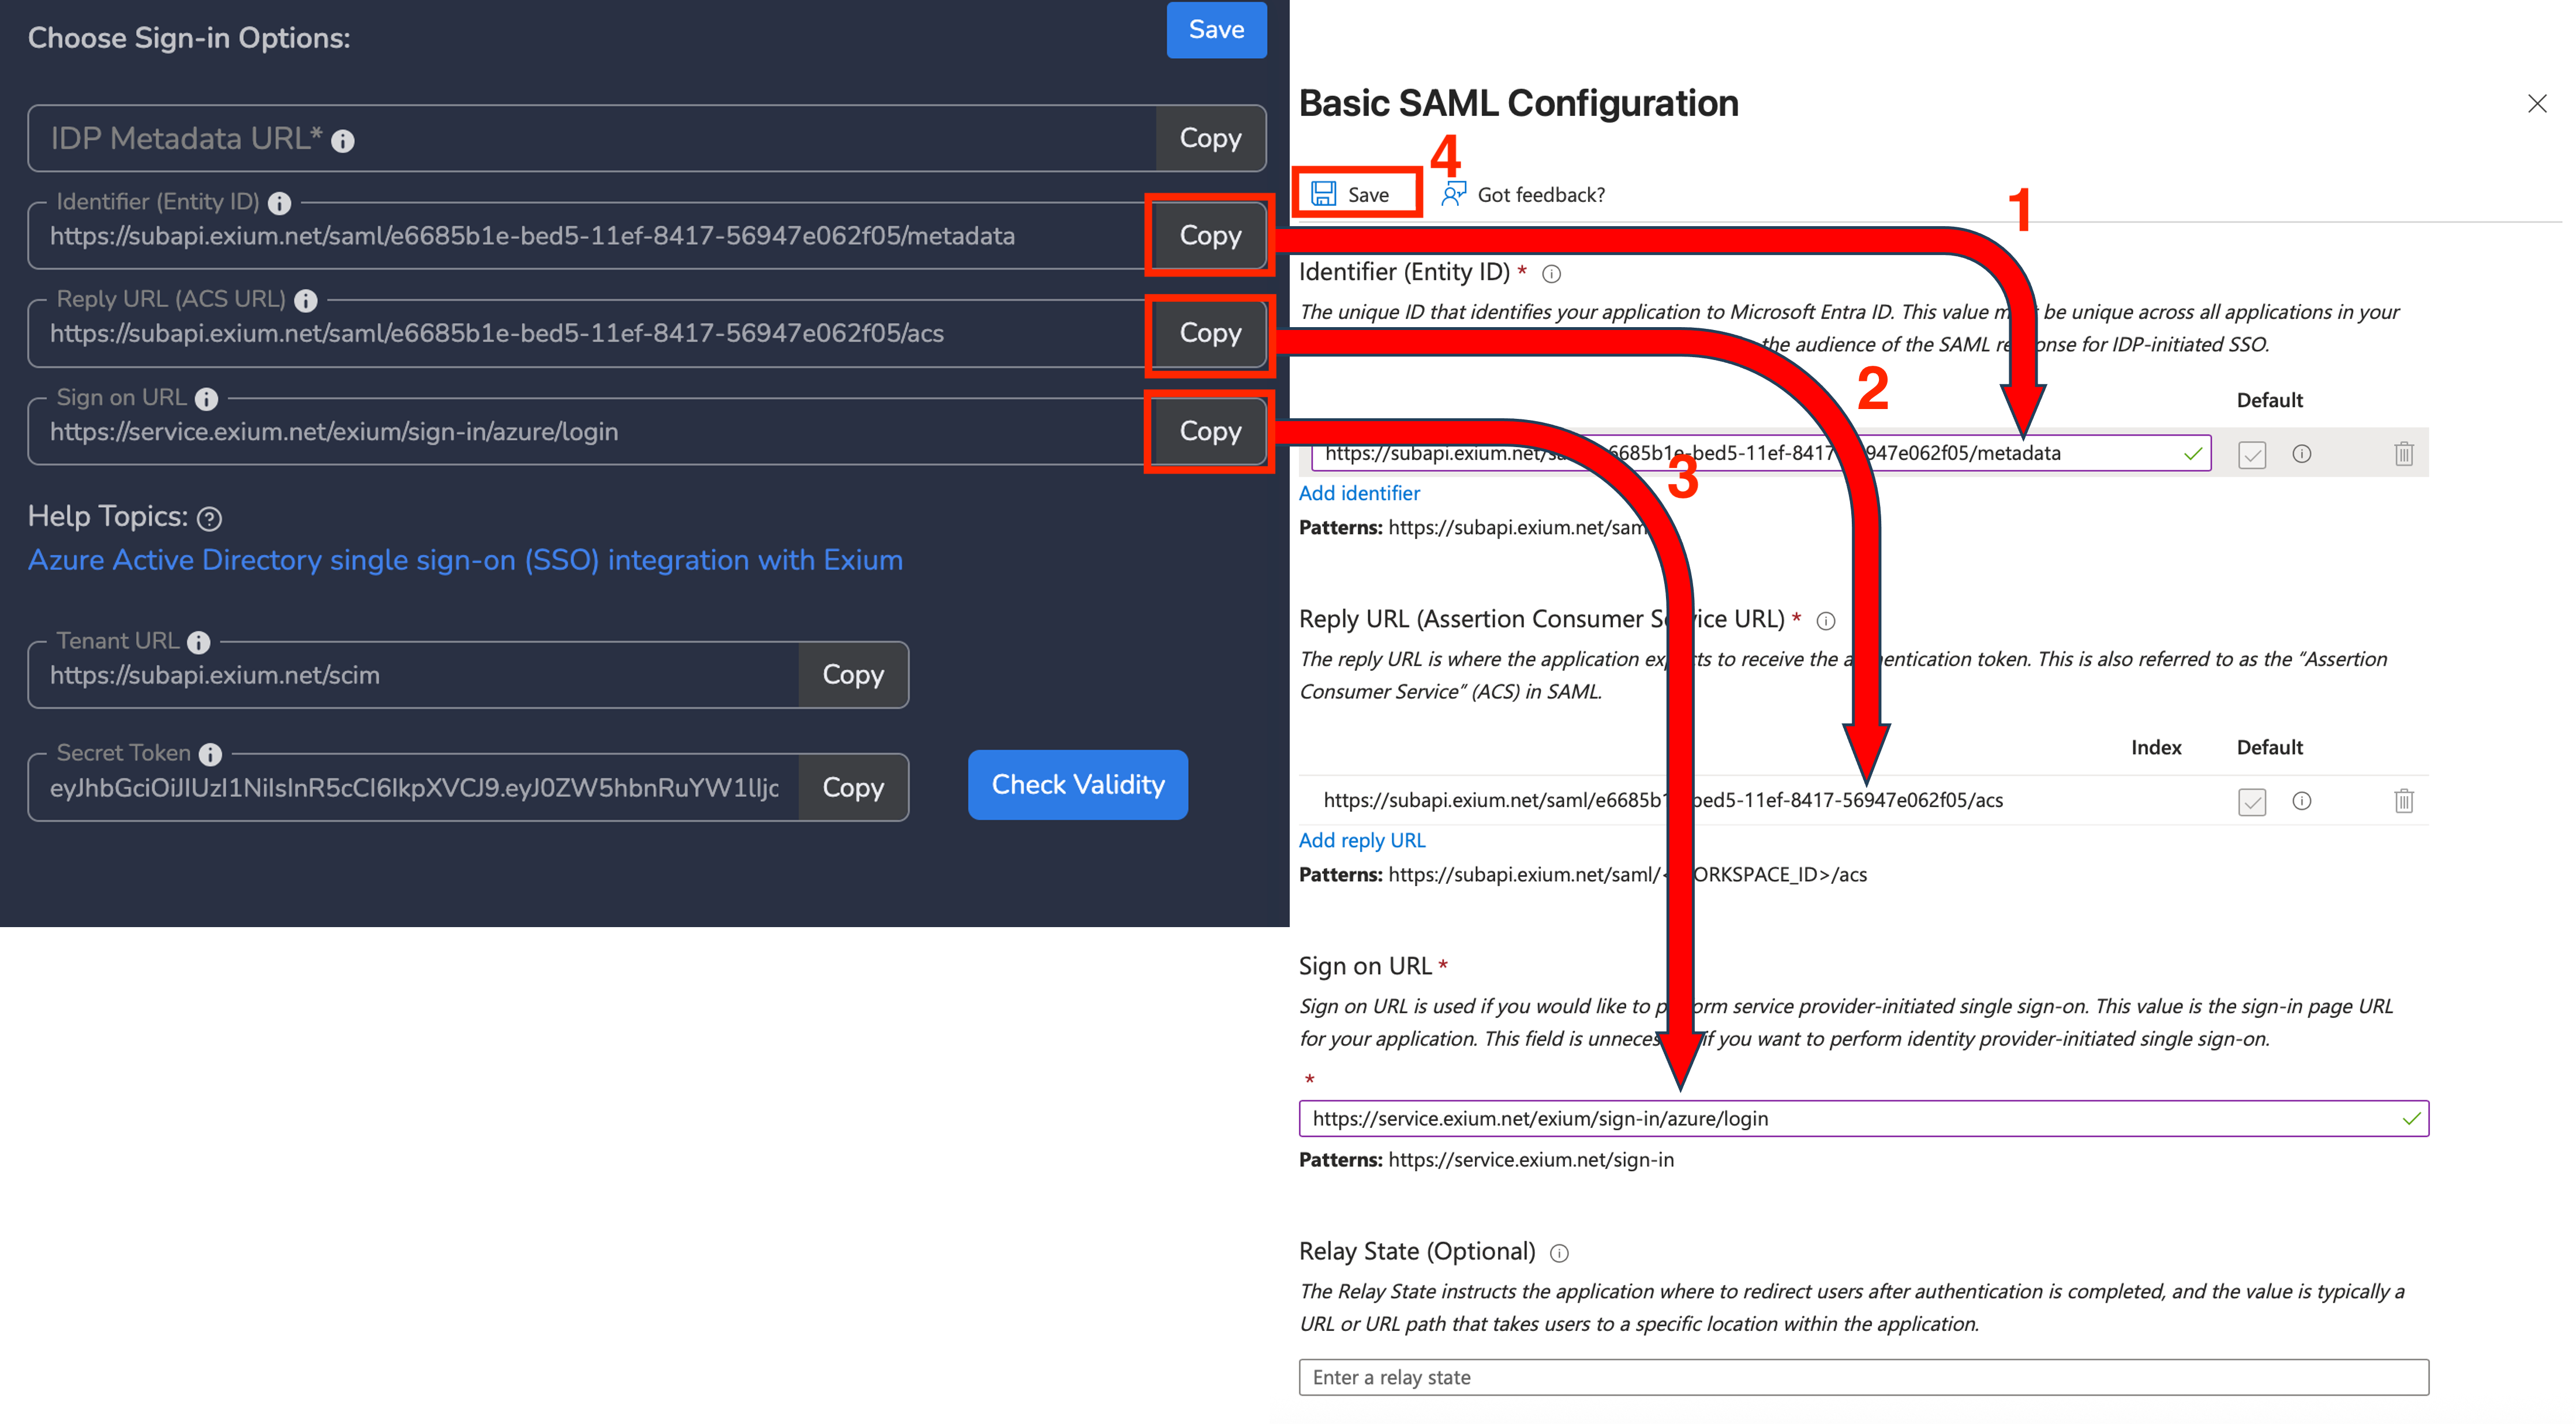
¶ 2.2 Copy Identifier (Entity ID), Reply URL and Sign On URL From Exium to Azure AD
- Click on Edit icon on Basic SAML Configuration on Set up Single Sign-On with SAML page.
- On right panel of Basic SAML Configuration, click on Add Identifier. Copy Identifier from Exium Console and paste as Identifier
- Click on Add reply URL. Copy Reply URL from Exium Console and paste as Reply URL.
- Copy Sign On URL from Exium Console and paste as Sign On URL.
- Click Save as shown below.
Warning: Ensure that the Identifier from the Exium portal is entered as the Identifier in the Azure AD Exium app, and the Reply URL is set correctly as the Reply URL. Swapping these values will result in an AAD Graph error when users attempt to sign in to Exium.
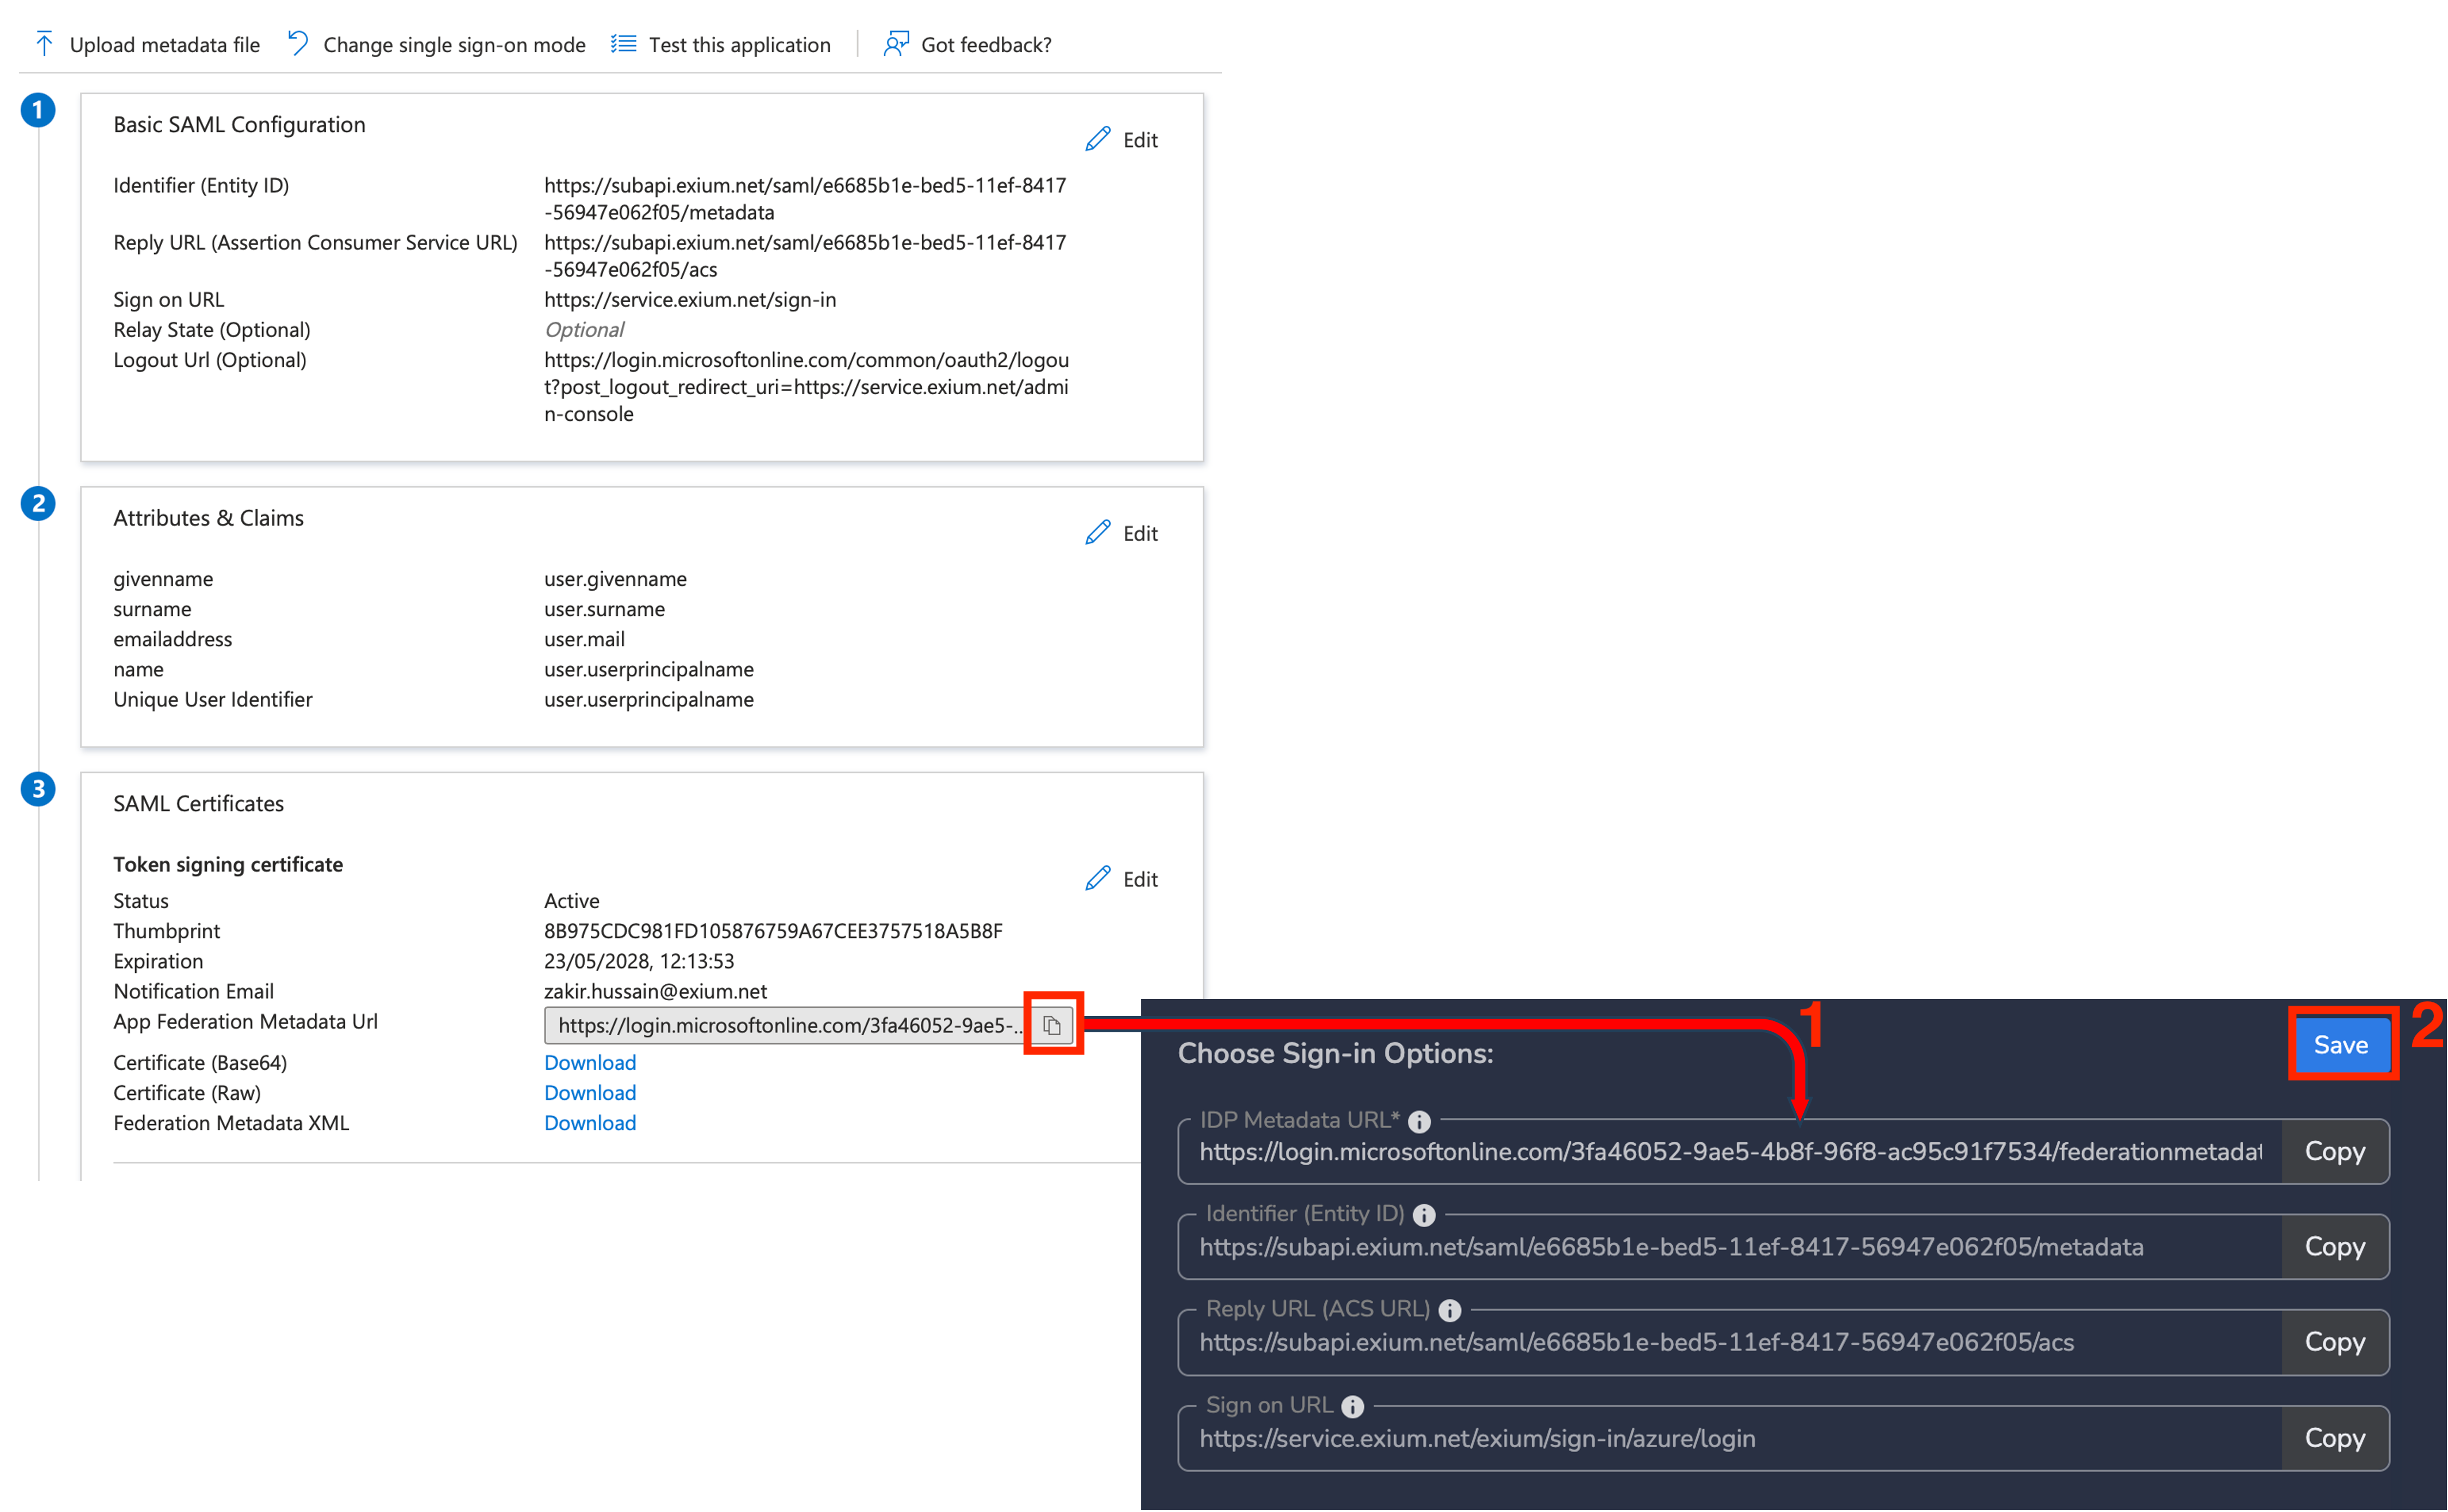
¶ 3. Setup Azure AD as Sign-in Option on Exium Portal
As a next step, Sign-in option on Exium Portal has to be saved by filling-in IDP Metadata URL. This URL is available on Exium Azure AD app. Following steps elaborate on this.
¶ 3.1 Copy App Federation Metadata Url from Azure AD Exium app to Exium Portal
- Click on Copy to clipboard icon next to App Federation Metadata Url on SAML certificates section on Single sign-on page on Exium app and Paste IDP Metadata URL on Exium Portal.
- Click on Save as shown below.
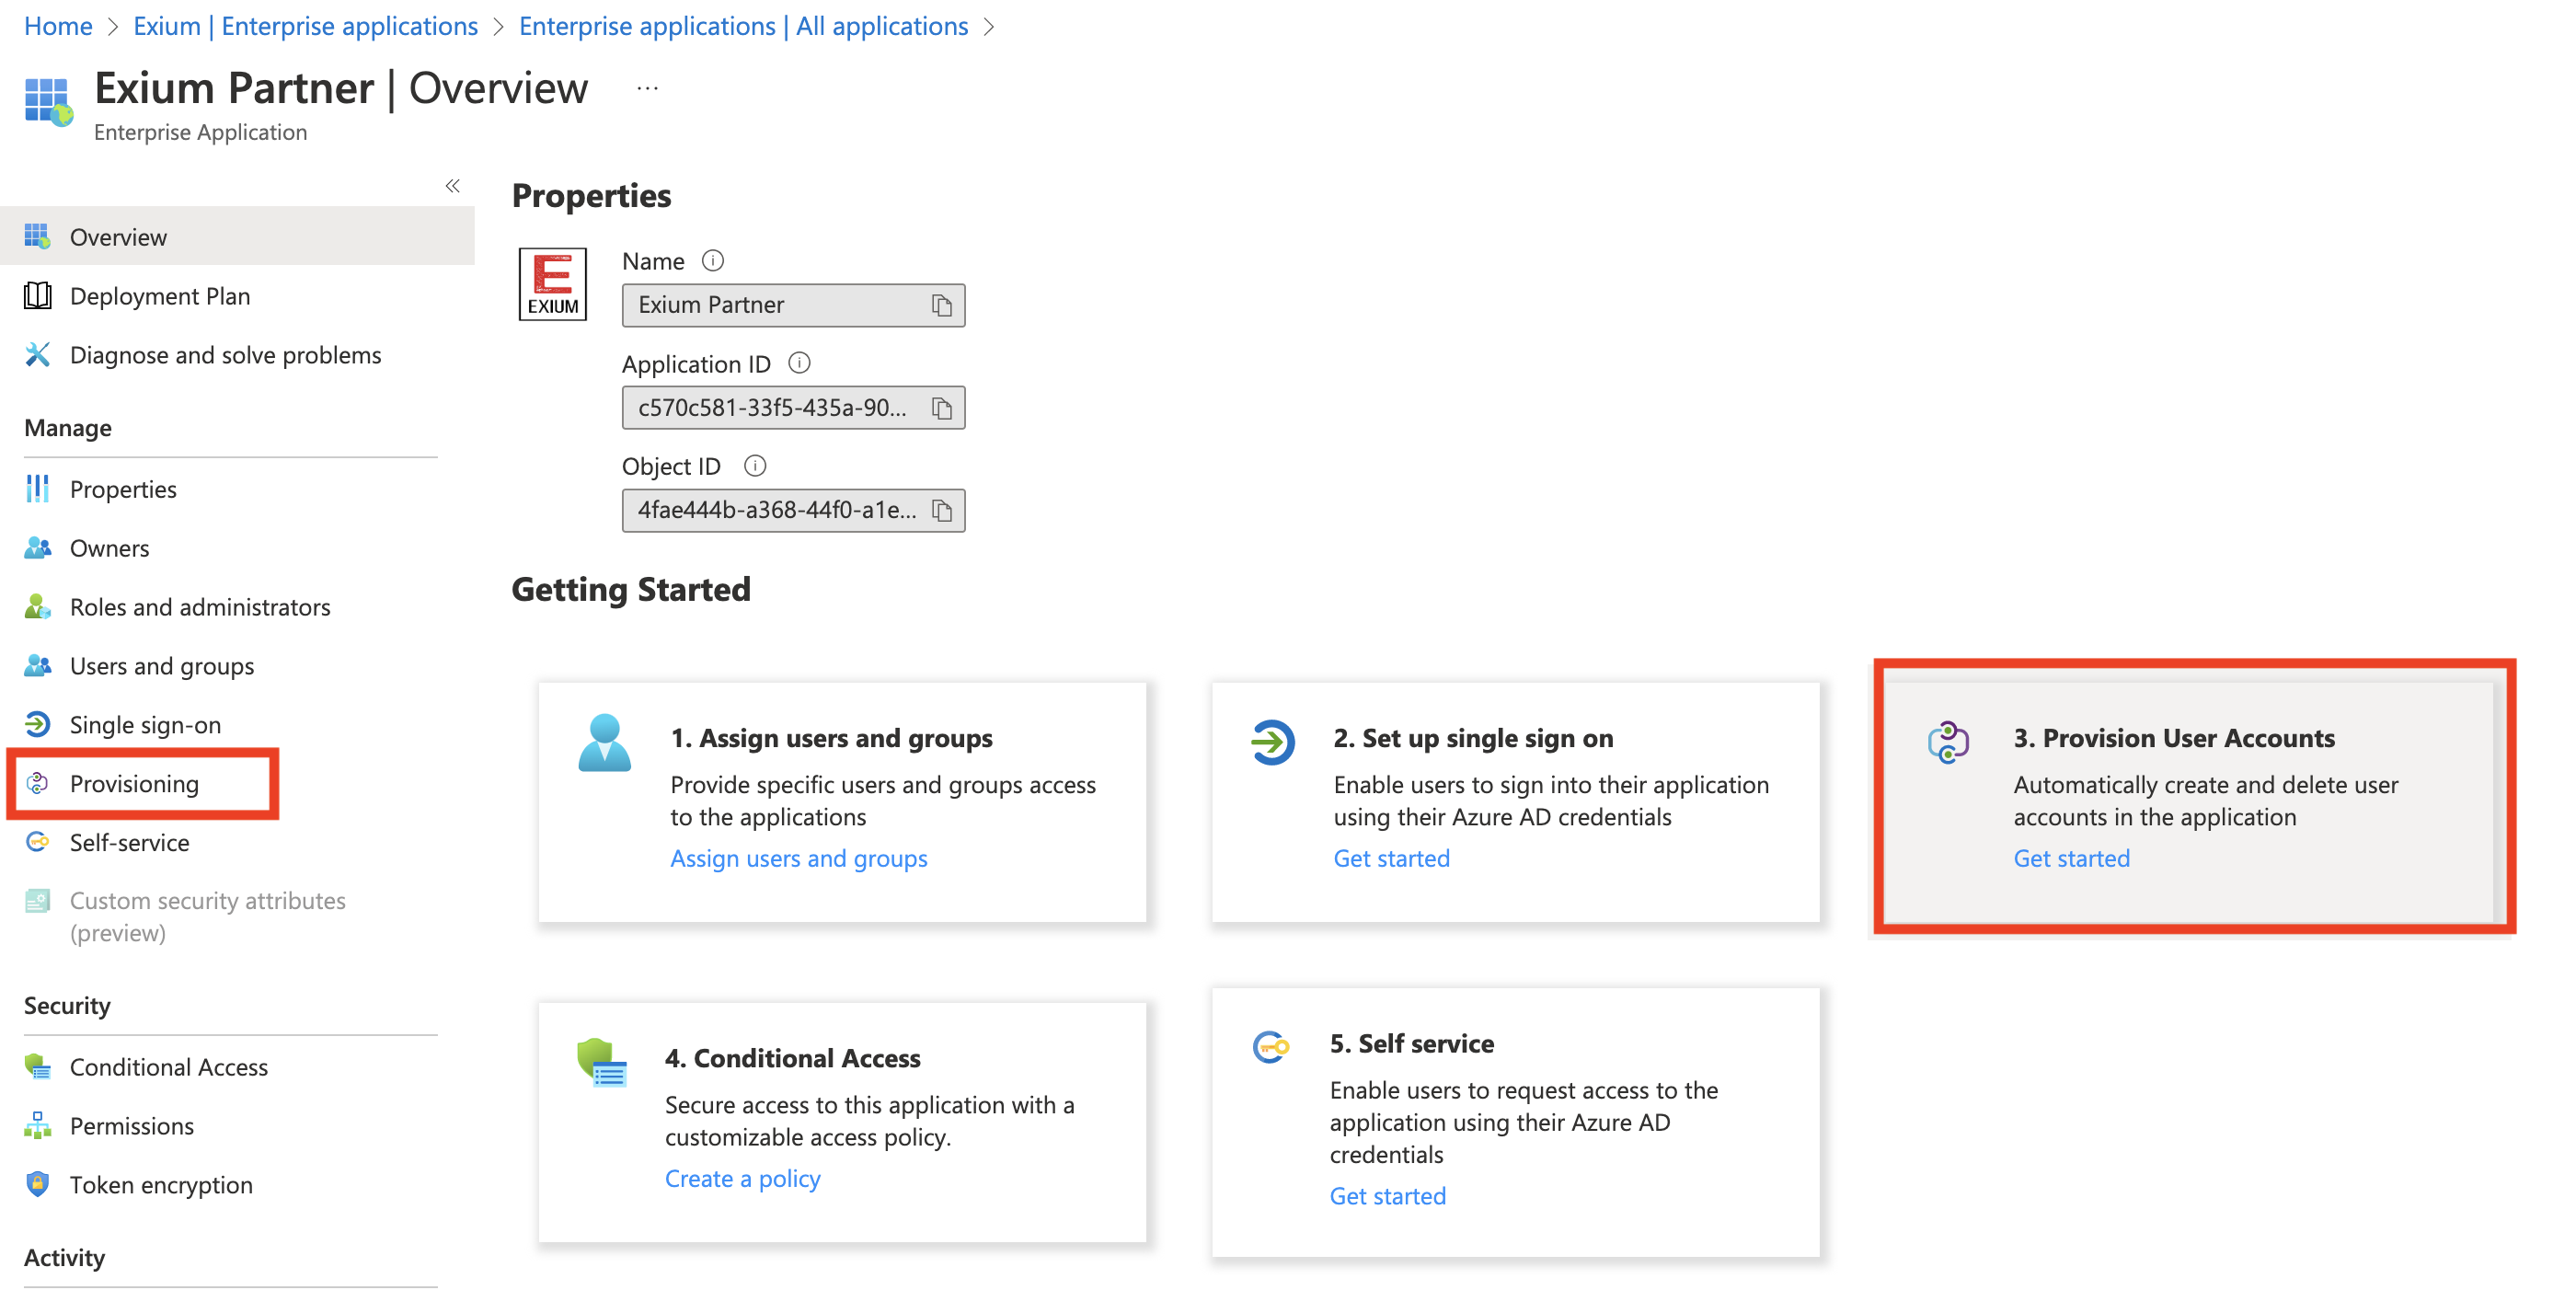
¶ 4. Provisioning Settings on Azure AD
For Azure AD SCIM Integration, Tenant URL and Secret Token has to be copied from Exium Workspace and same has to be pasted in Azure AD Exium app. Following steps elaborate this.
¶ 4.2 Update SCIM Bearer Token on Azure AD
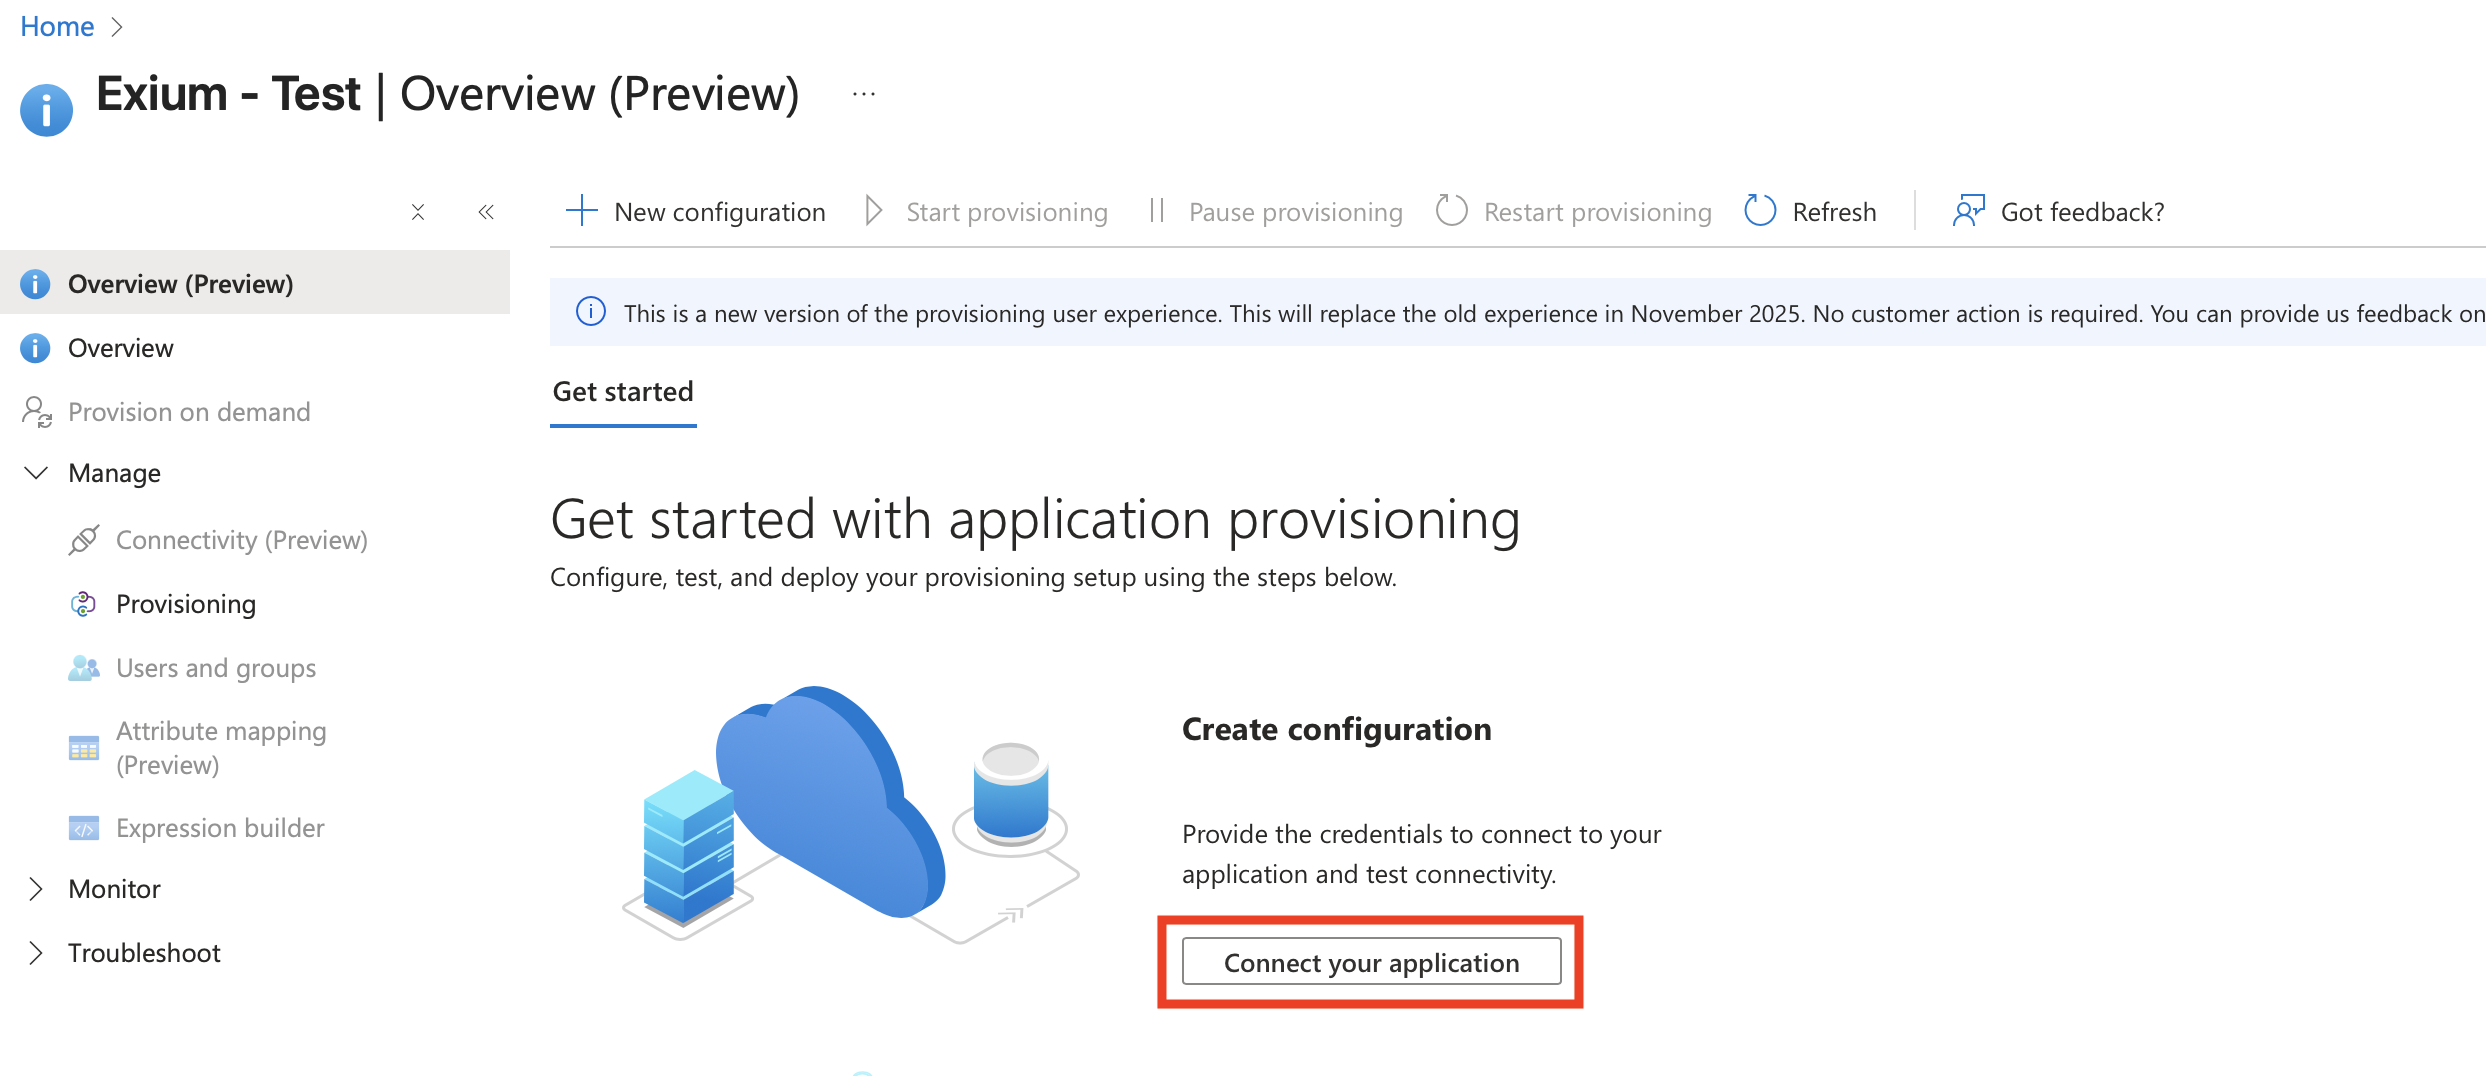
Under Exium app on Azure AD. Click on Provision User Accounts box as shown below.
Click on Connect your application under Create Configuration as shown below
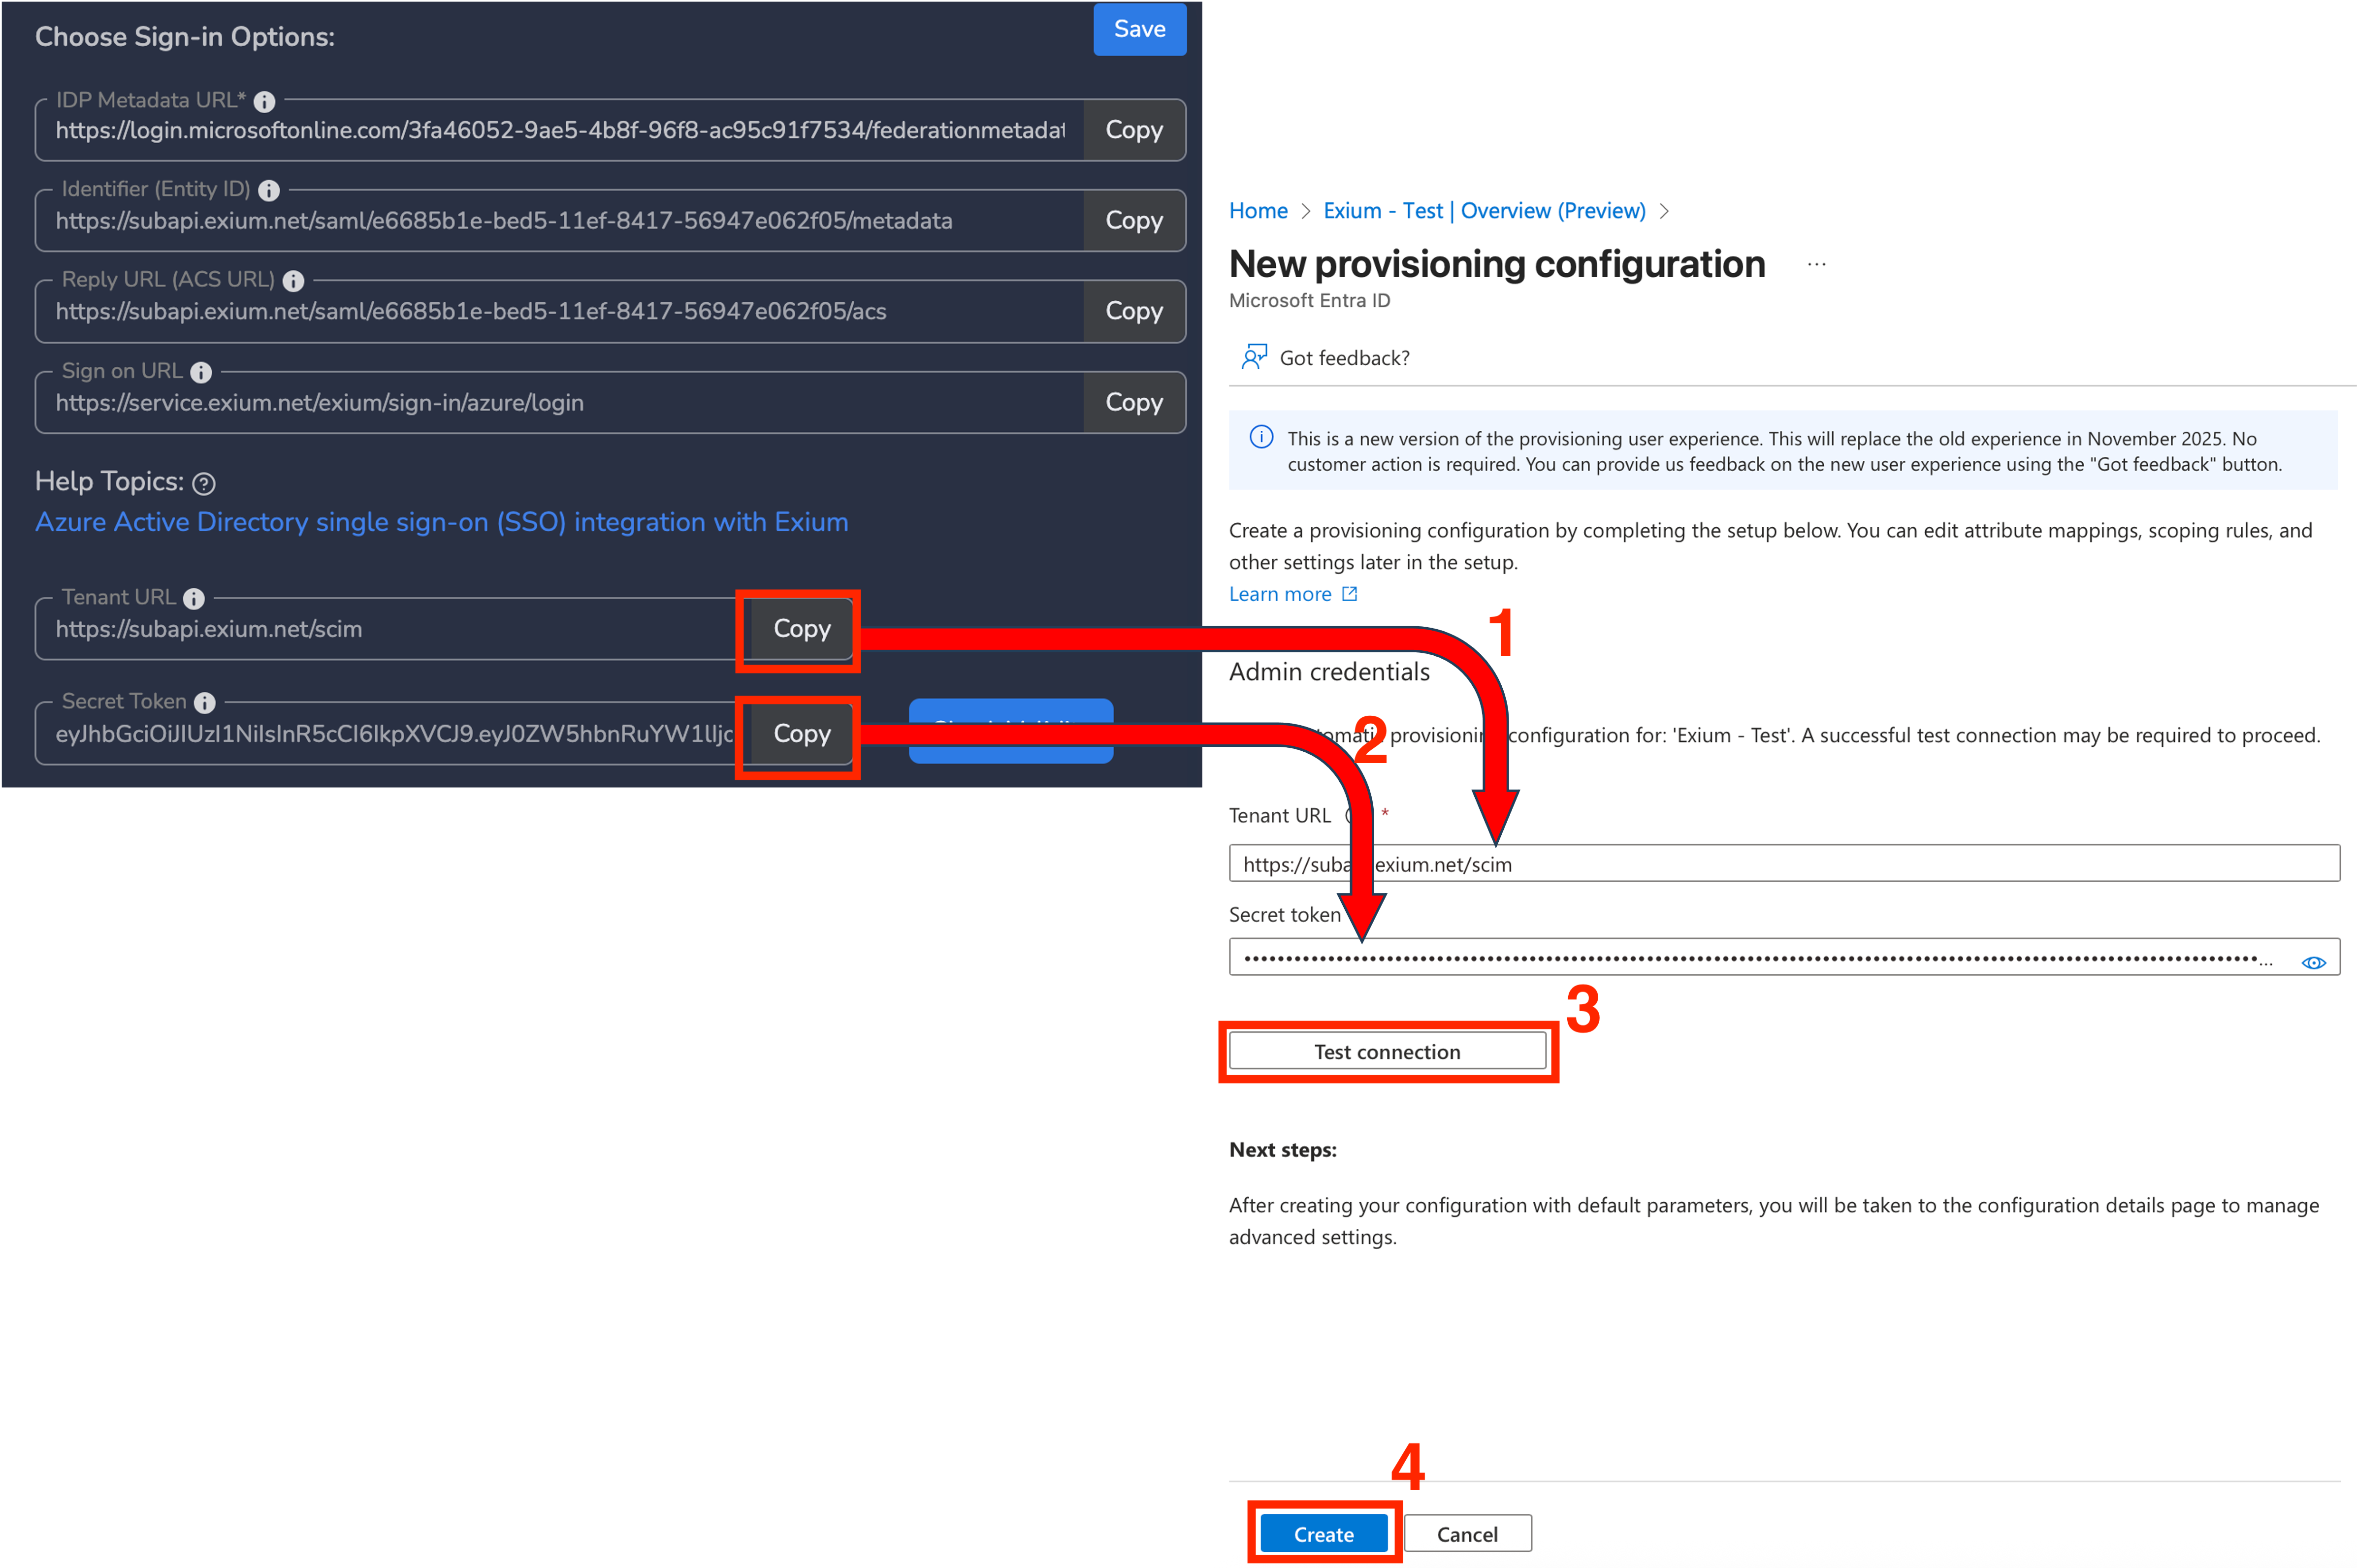
On New Provisioning Configuration page, Tenant URL and Secret Token as shown below. These settings are available on Exium Portal,
- Copy Tenant URL from Exium Console and Paste as Tenant URL
- Copy Secret Token from Exium Console and Paste as Secret Token
- Optionally, click on Test Connection to check if settings are correct and accepted
- Click Create as shown below.
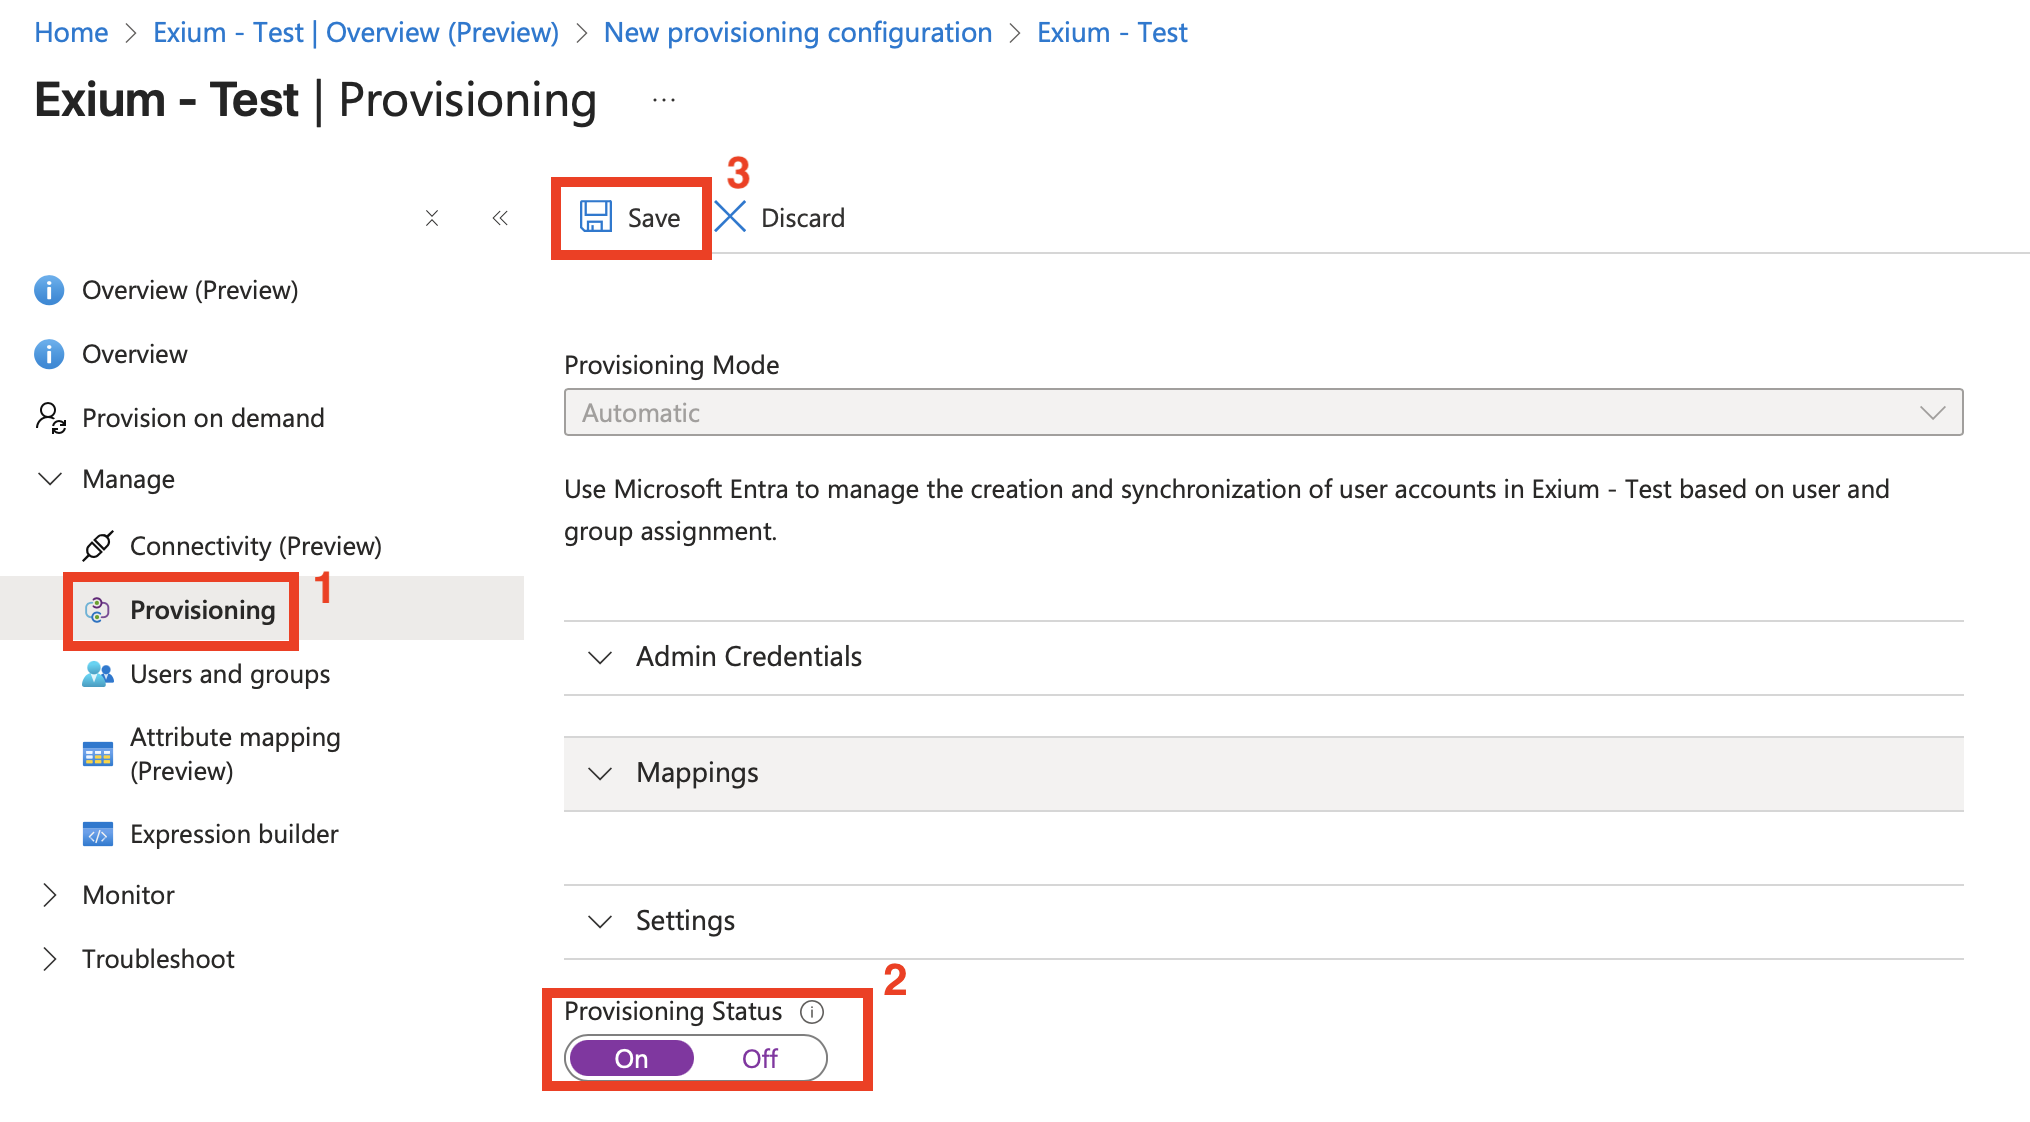
As a next step, Click on Provisioning tab on left nabber, Select On for Provisioning Status as shown below and Click on Save.
¶ 5. Assigning Users and User Groups on Azure AD
As a next step, you can assign users and groups to Exium app on Azure AD. This can be done whenever you wish to add more users or groups to Exium app. Click on Users and groups on left navigation bar under Exium app and Click on Add user/group as shown below.
Note: If you want to add a group that doesn’t already exist (for example, to create a group for SASE users) in your Entra ID, go to Entra ID > Groups > All groups, select + New group to create it, and then add members by opening the group and clicking + Add members.

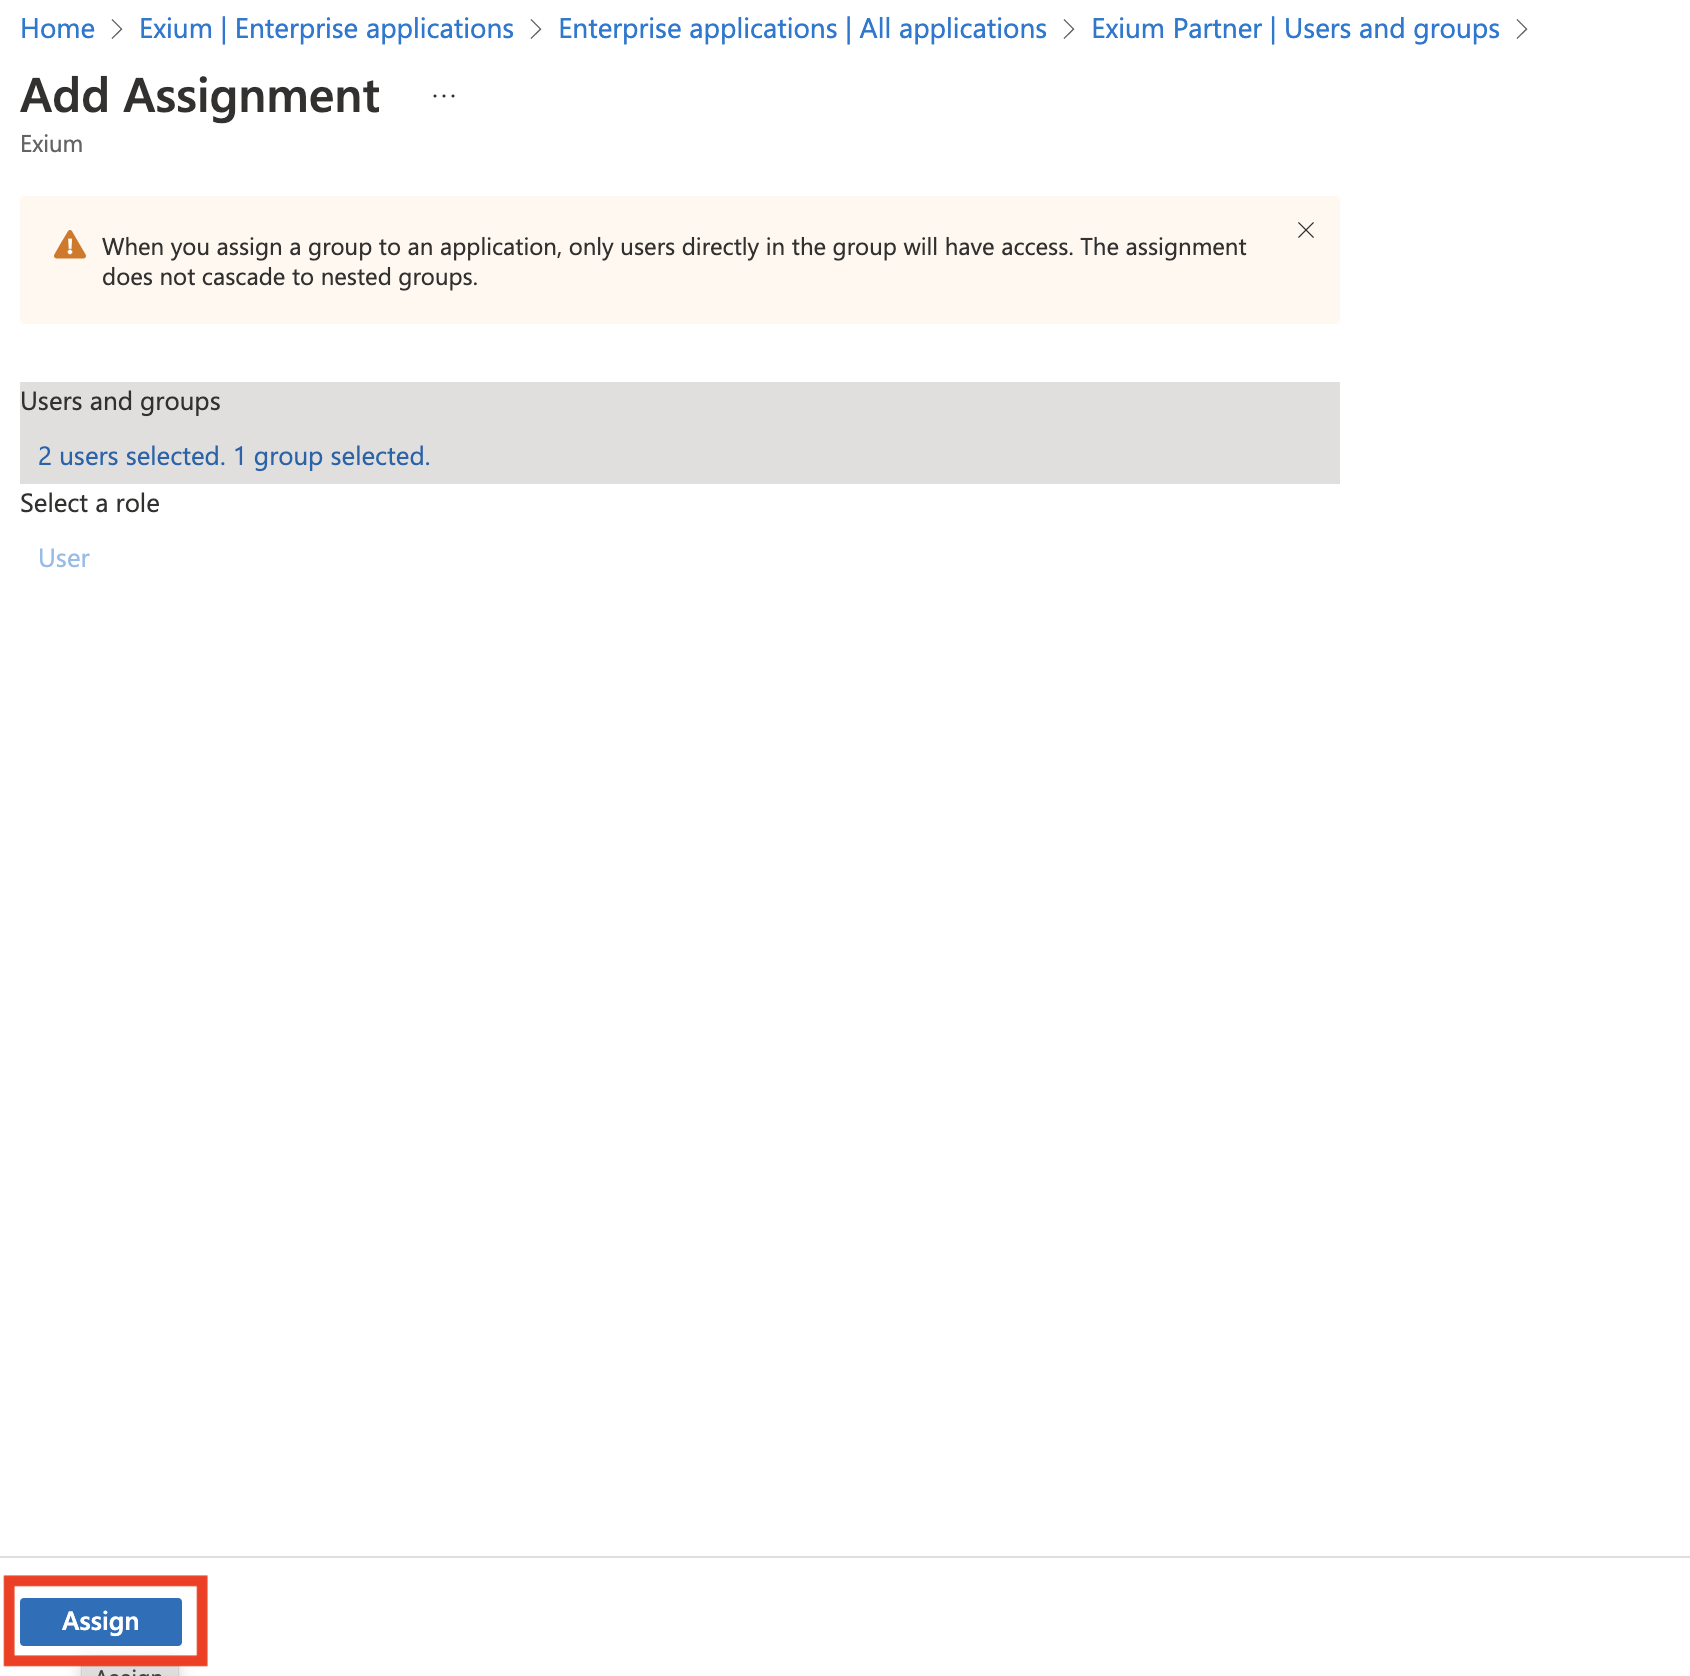
On Add Assignment page, click on None Selected. On right side users and groups panel, you can search and select users and groups. Click Select as shown below.
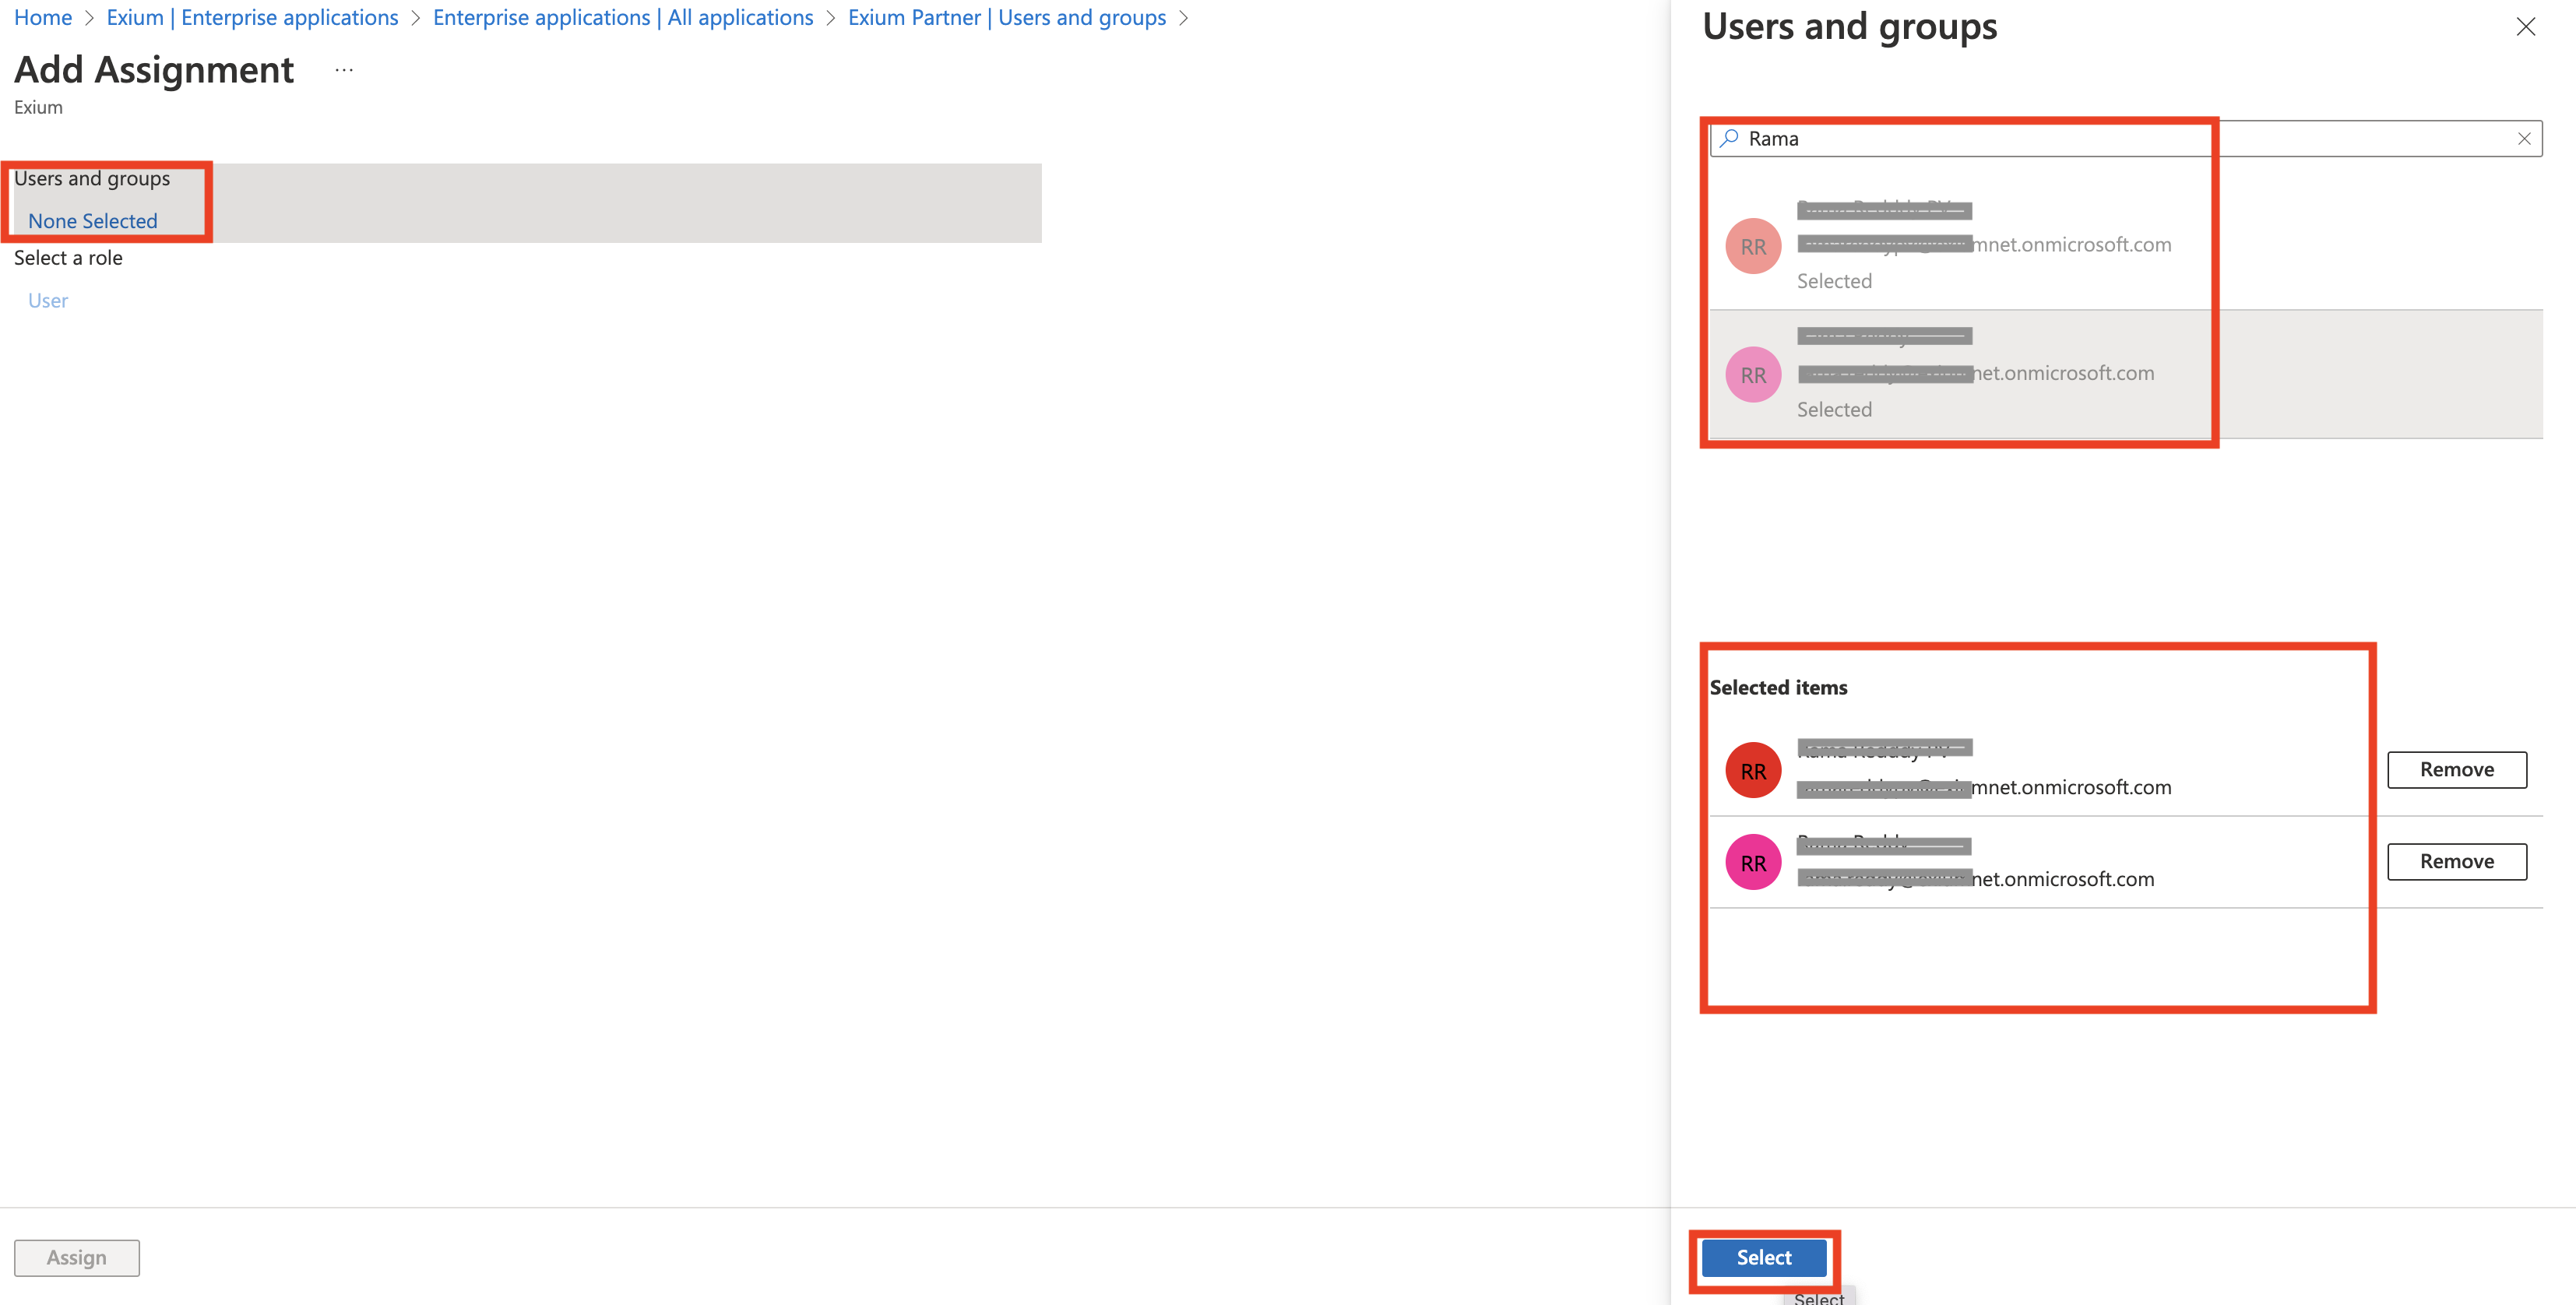
Finally, Click on Assign
¶ 6. Check Users and Groups on Exium
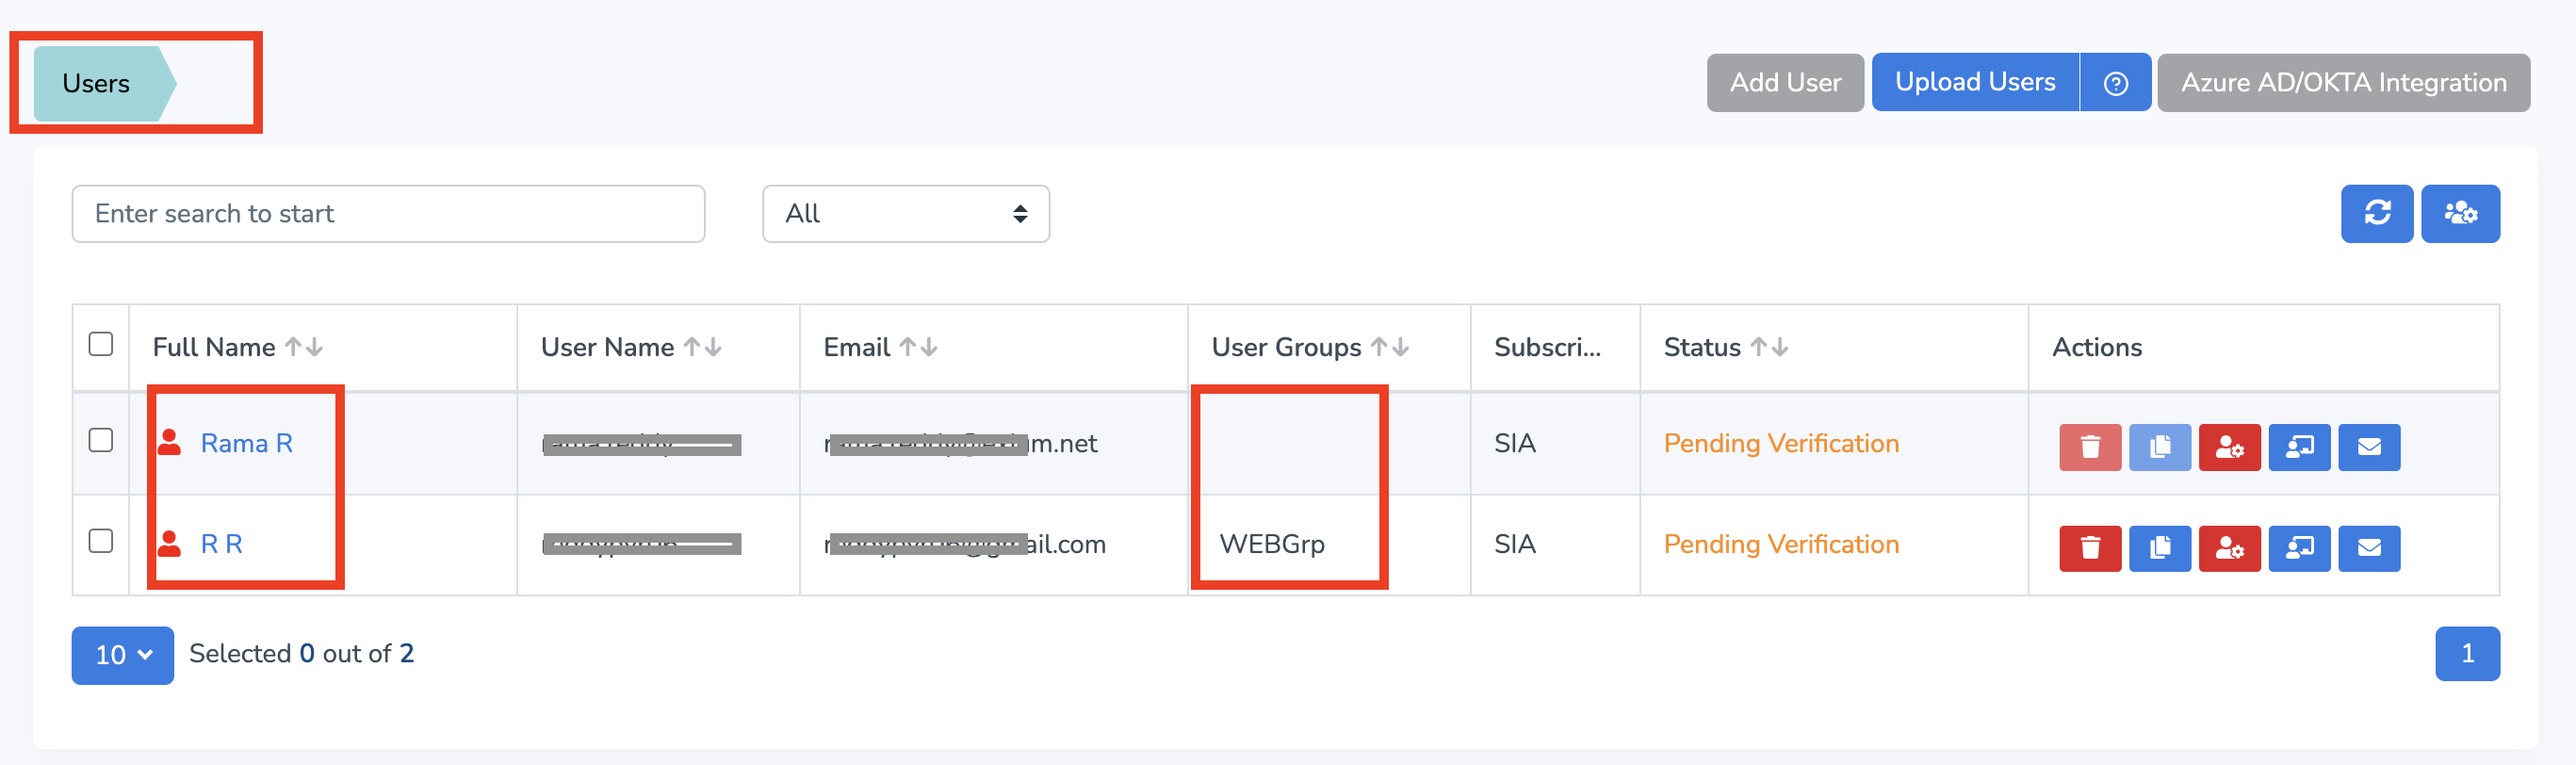
All the users and groups assigned to Exium app on Azure AD are synced through SCIM to Exium service. On Exium Admin Console, Click on Users box. Under Users page, you will see all the assigned users (with associated groups) are synced from Azure AD to Exium.
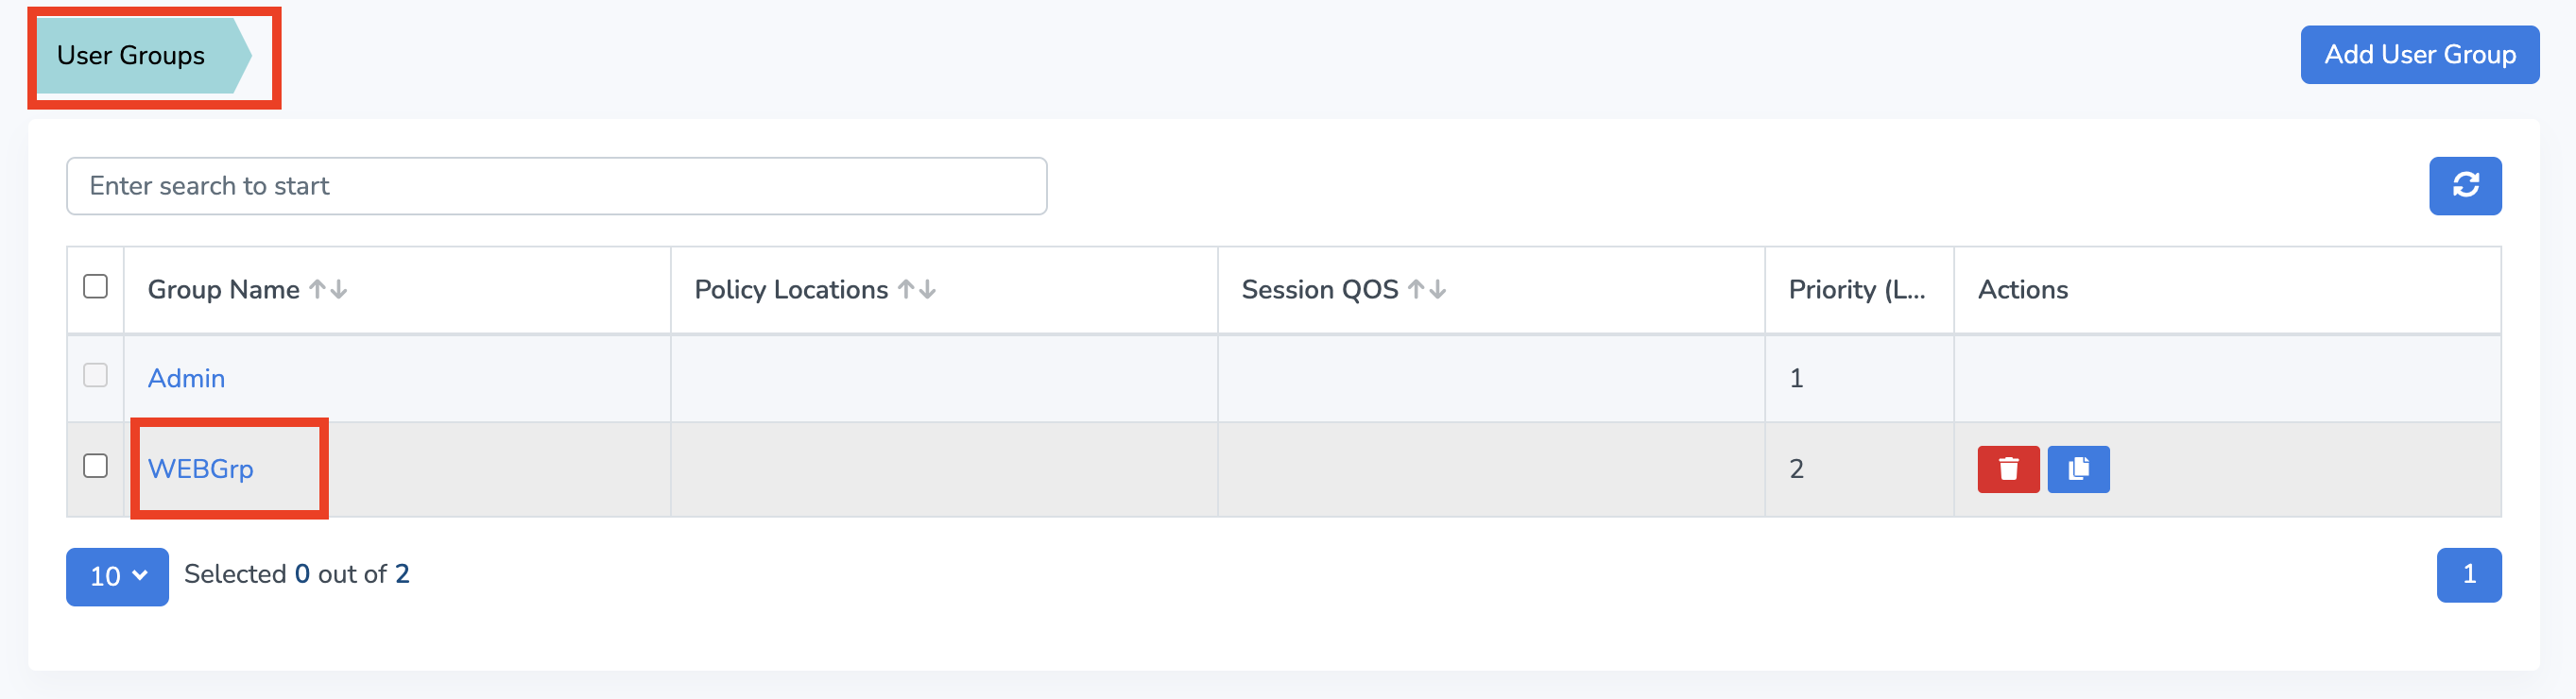
On Exium Admin Console, Click on Users box. Under User Groups page, you will see all the assigned groups are synced from Azure AD to Exium.
¶ 7. Verify SSO on Admin Console
If you are part of admin group, you can access admin console through Azure AD. you can enter your workspace name on service portal by entering the workspace name. Browser opens one more tab for Azure AD authentication. (Note: Some browsers block popups. You need to allow the popup to allow one more tab to be opened to take Azure AD authentication). Exium sign-in page redirects to Azure AD SSO authentication. On Successful Azure AD SSO authentication, User gets logged in to Exium.
If you have any issue during integration, contact us at support@exium.net or raise a ticket on https://exium.net/help-center/
If you would like to see how Exium can help defend your organization, contact us at hello@exium.net