¶ Deploy Cyber Gateway on a Virtual Machine
The CGW requires a single virtual machine (VM) to deploy on an VMWare ESXi host. For High-Availability (HA) deployment, you will need two VMs on two separate VMWare ESXi hosts.
- For Modern Workplace security use case, you will create a VM with at least two network interfaces (a LAN interface and a WAN interface). If you plan to leverage SD-WAN capability, you will need two WAN interfaces. Similarly, if you have multiple LANs, you can create as many LAN interfaces on the VM as you wish.
¶ Pre-requisites
- VMWare ESxi host with version 6.7 or above
- Valid Administrator credentials to deploy or manage VMs/Networks
- Ubuntu ISO - download it from here
- Download and store ISO in ESXi datastore
- Existing network configuration which provides Internet access
- Existing network configuration which provides connectivity to private resources
¶ How to Create a VM for the Cyber Gateway?
¶ Login to VMWare ESXi host
- Open a browser on you laptop
- Enter URL with IP of domain of your ESXi host [https://<IP-address-VMWare-ESXi-host>/ui]
- Provide credentials and login
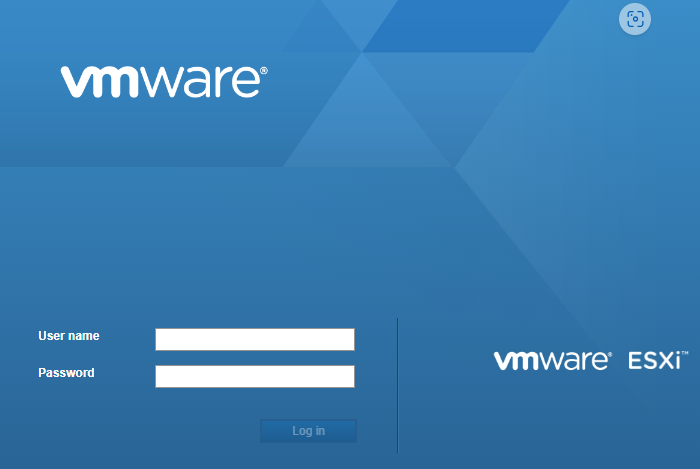
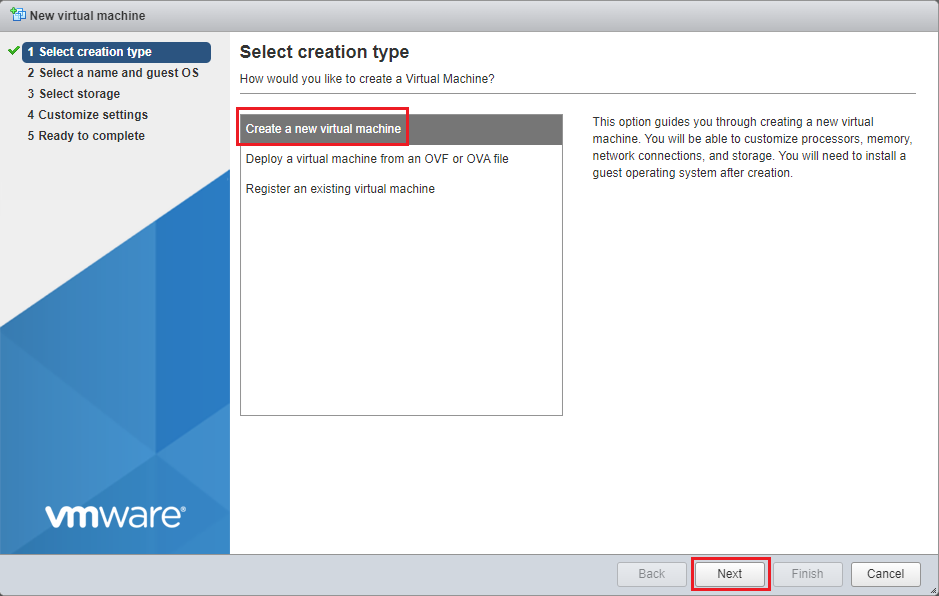
- After successful login, click on Create / Register VM

- Select Create a new virtual machine and click on Next
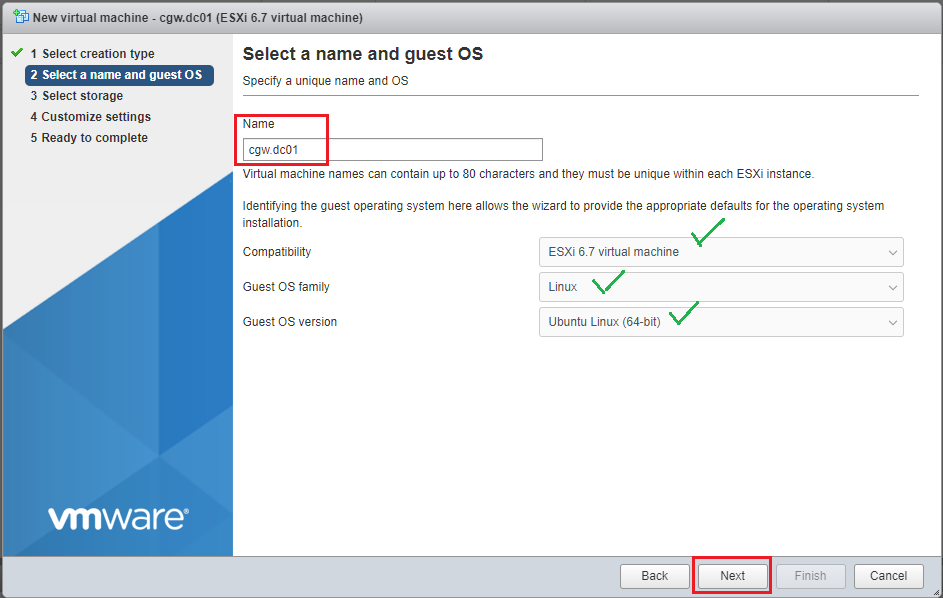
- Provide VM Name
- Select compatibility as per your ESXi host version
- Select Linux from drop down list of Guest OS family
- Select Ubuntu Linux (64-bit) from drop down list of Guest OS version
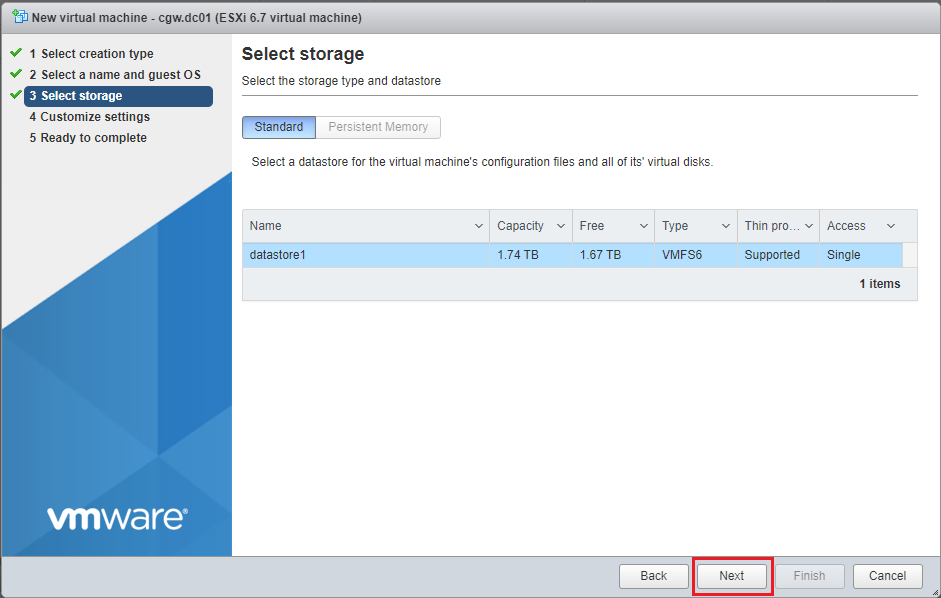
- Select Storage/Datastore and click on Next
- Customize settings, select CPU 1 and Cores per Socket 1
- Enable options for Hardware virtualization and Performance counters
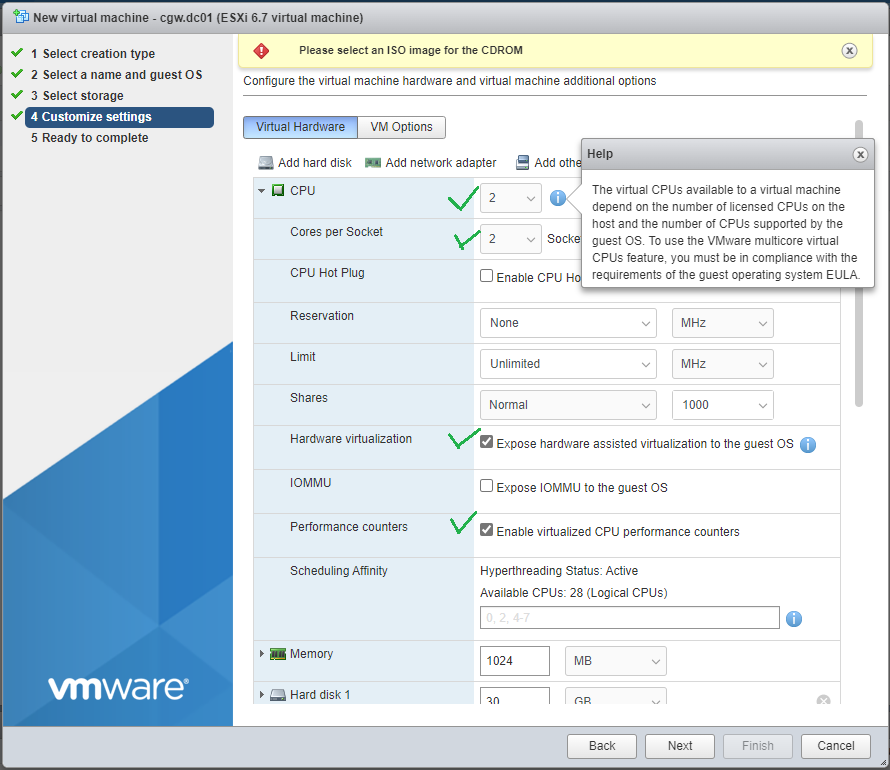
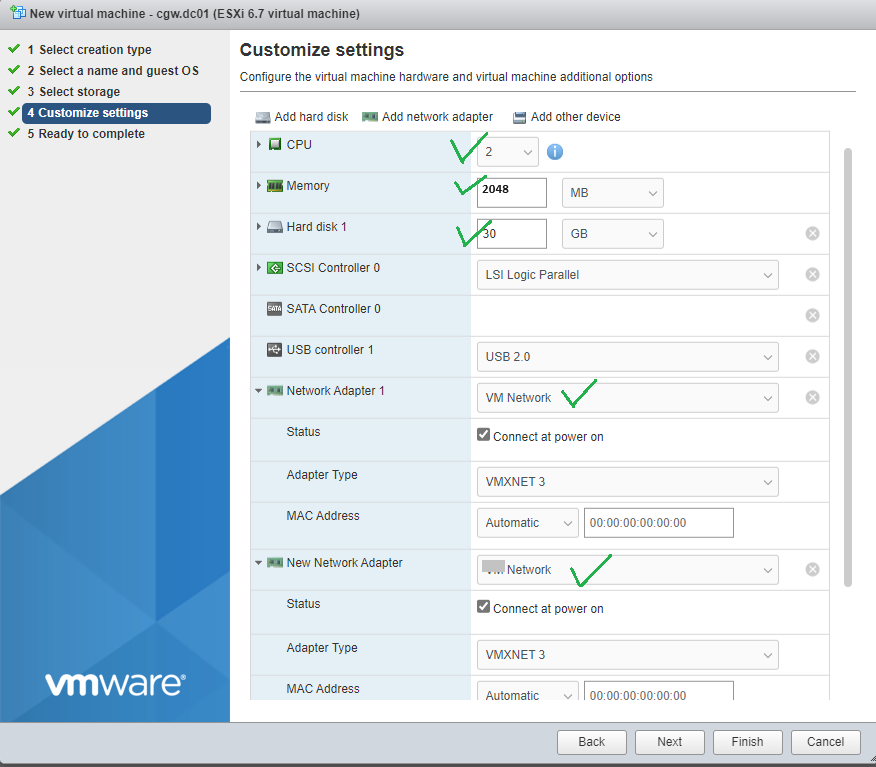
- Specify Memory [Recommended 1024MB]
- Specify Hard disk [Recommended 30GB]
- Specify Network Adaptor [Select from drop down] for WAN connectivity
- Click on Add network adapter to add additional vNIC for LAN connectivity to private resources
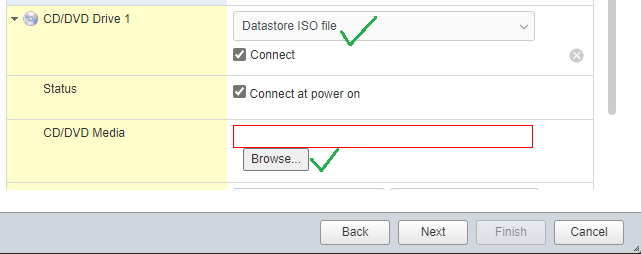
- Select Datastore ISO file from drop down list of CD/DVD Drive 1
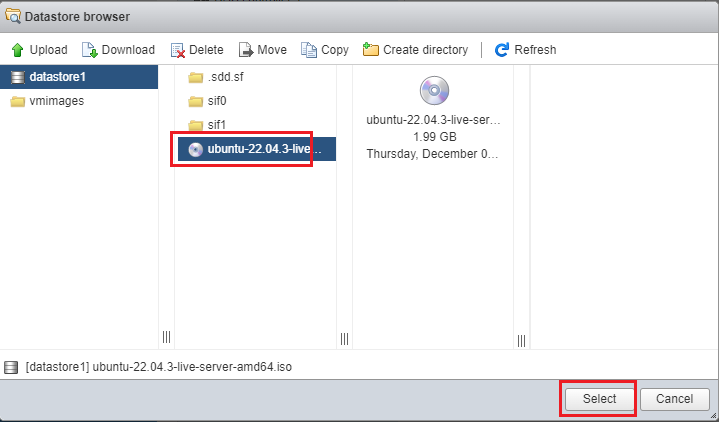
- Click on Browse… and select the ISO available in datastore
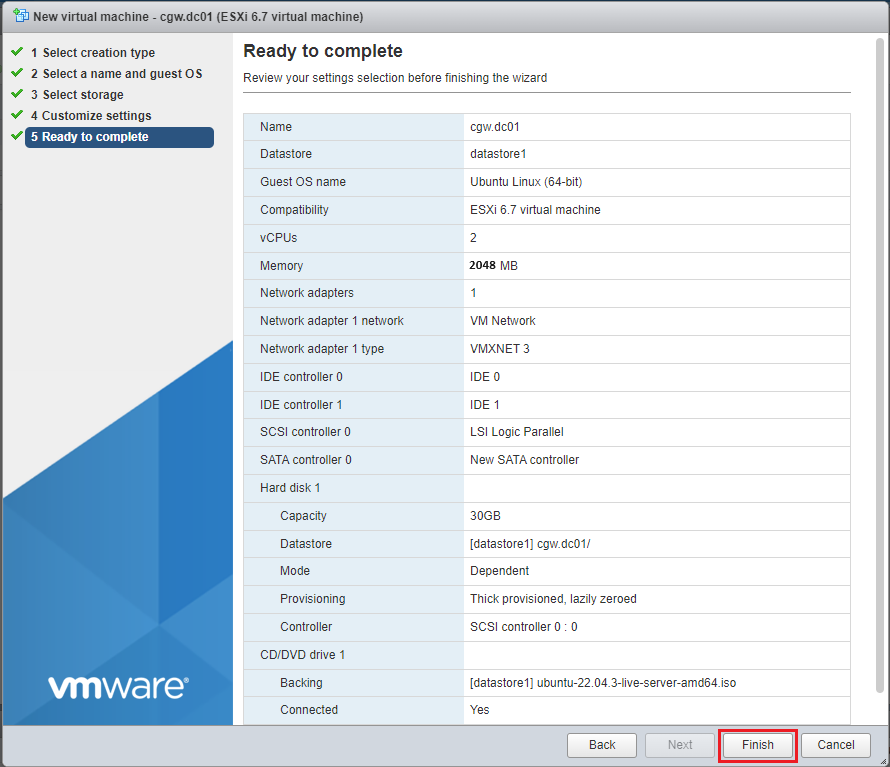
- Check the summary of the VM and click on Finish
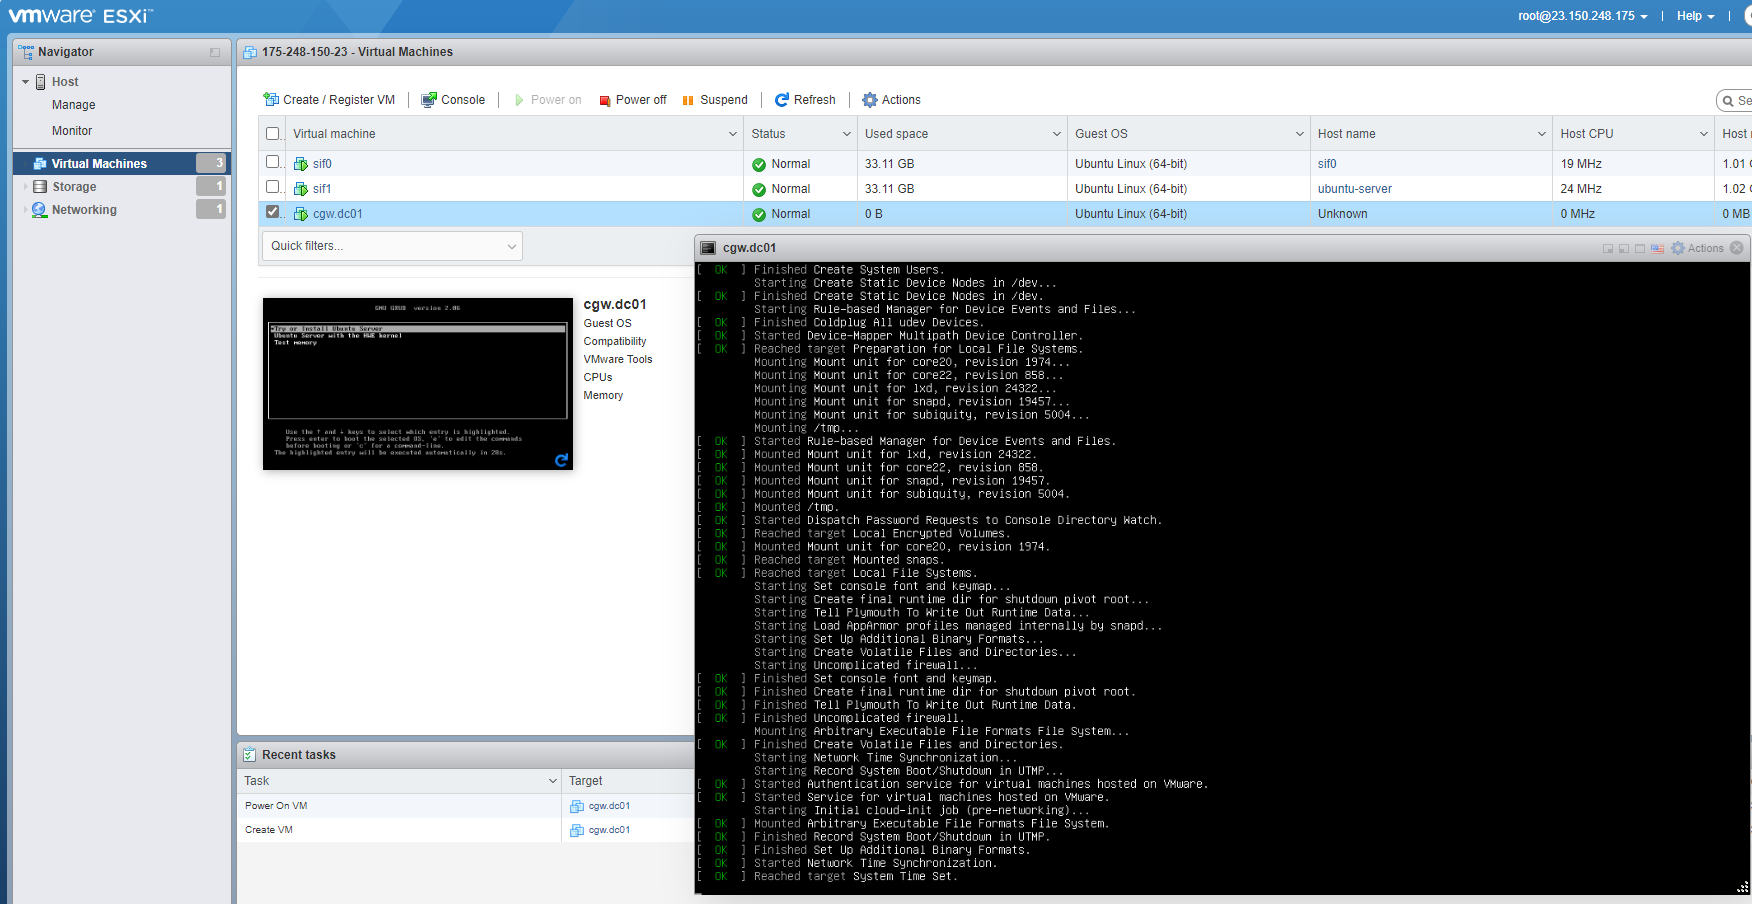
- Power On VM, and select “Try or Install ubuntu Server” and press Enter
If VM compatibility issues are faced or VM installer does not work, you can check Troubleshooting section placed at the bottom of this document.
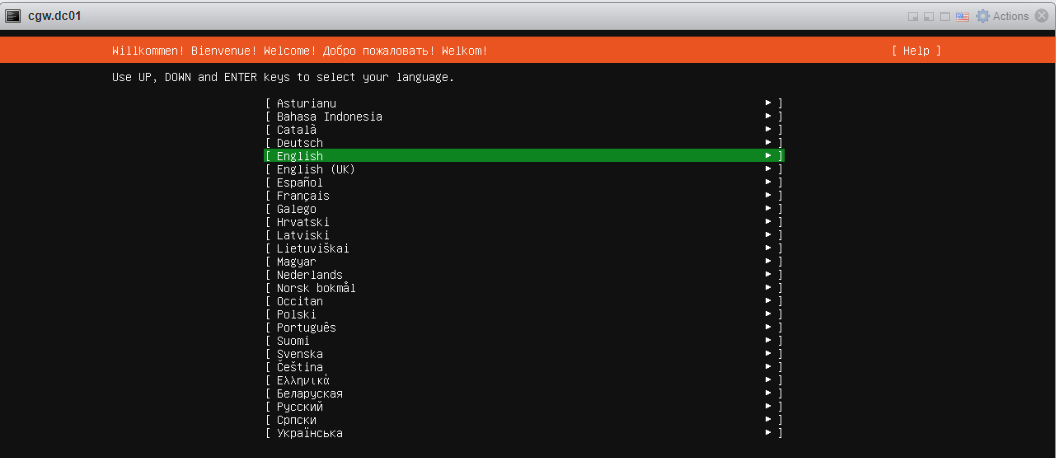
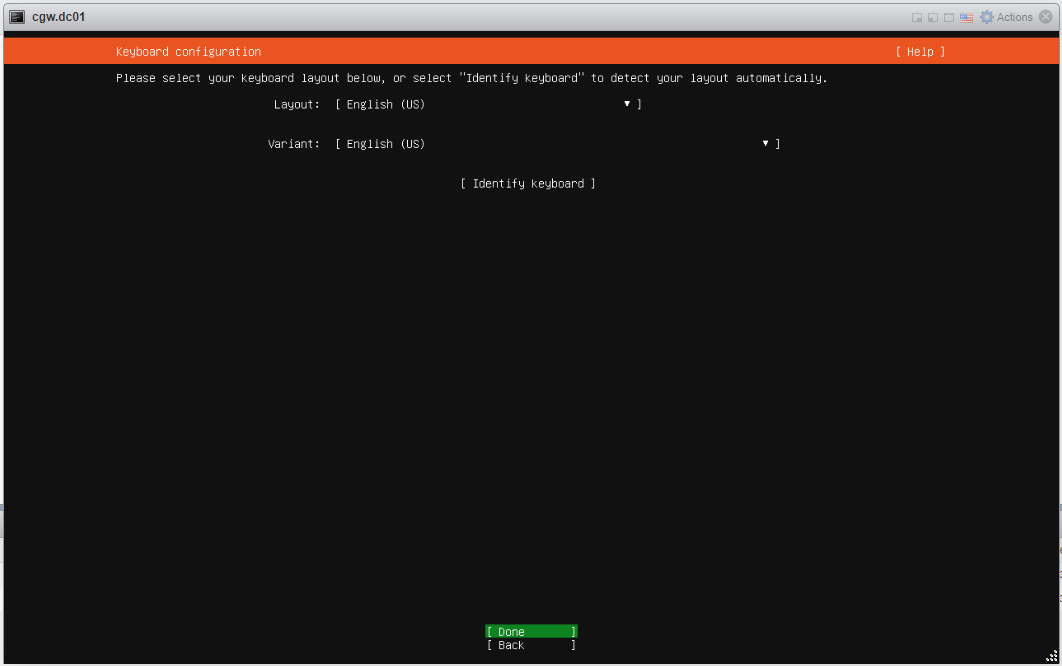
- Follow typical Ubuntu installation steps as UI displays. For reference, all the installation steps can be checked below:
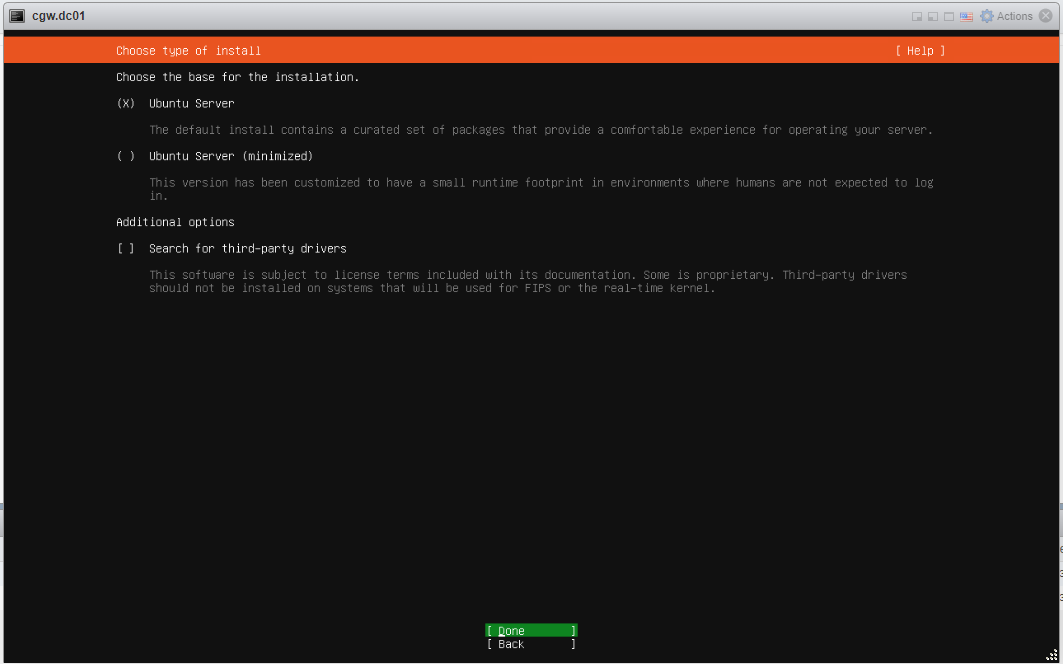
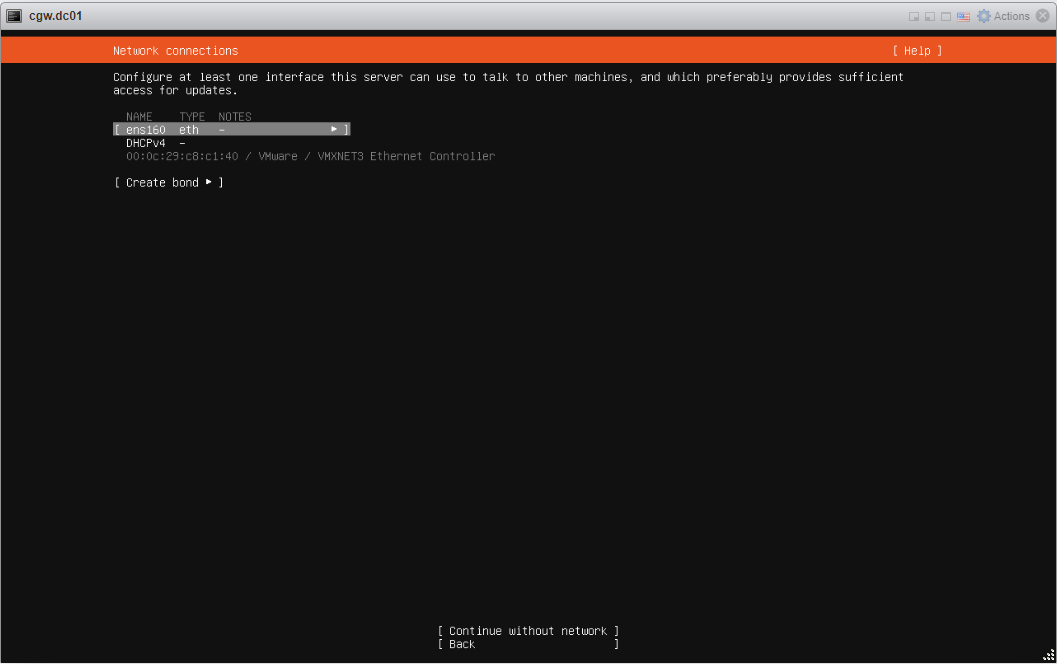
- In case of Multi/Dual interface, 2 network adapters will be displayed
- Both adapters must be configured separately with their suitable configuration for eg. WAN interface DHCP and LAN interface Manual etc.
- Select interface Name
- Press space button to expand
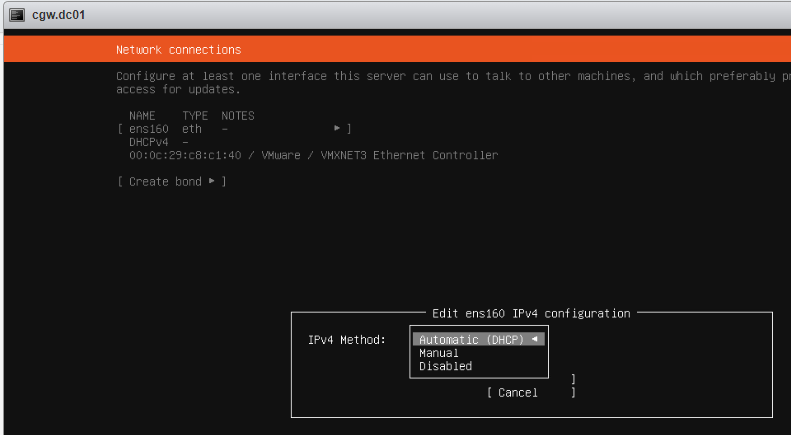
- Select Edit IPv4 and press space button to expand
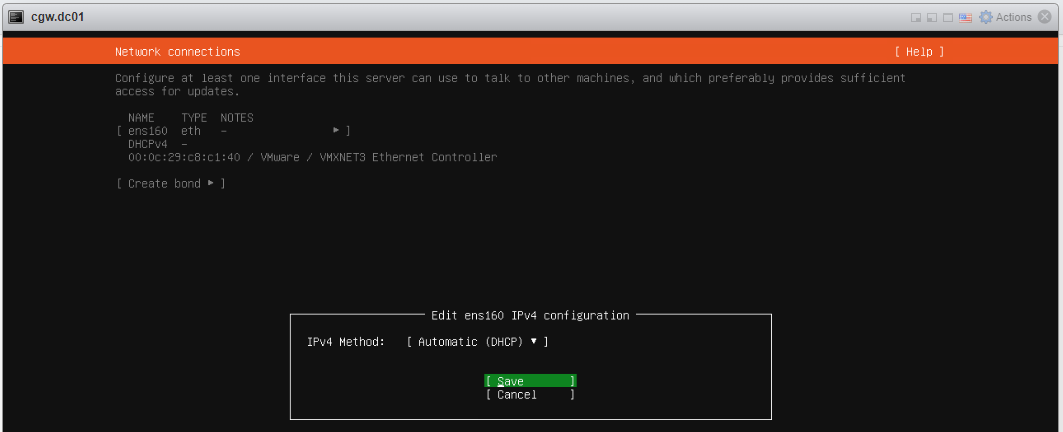
- If ESXi network provides DHCP IP then select Automatic (DHCP)
- If ESXi network does not provide DHCP IP, then select Manual and configure IP address
- Save configuration and continue

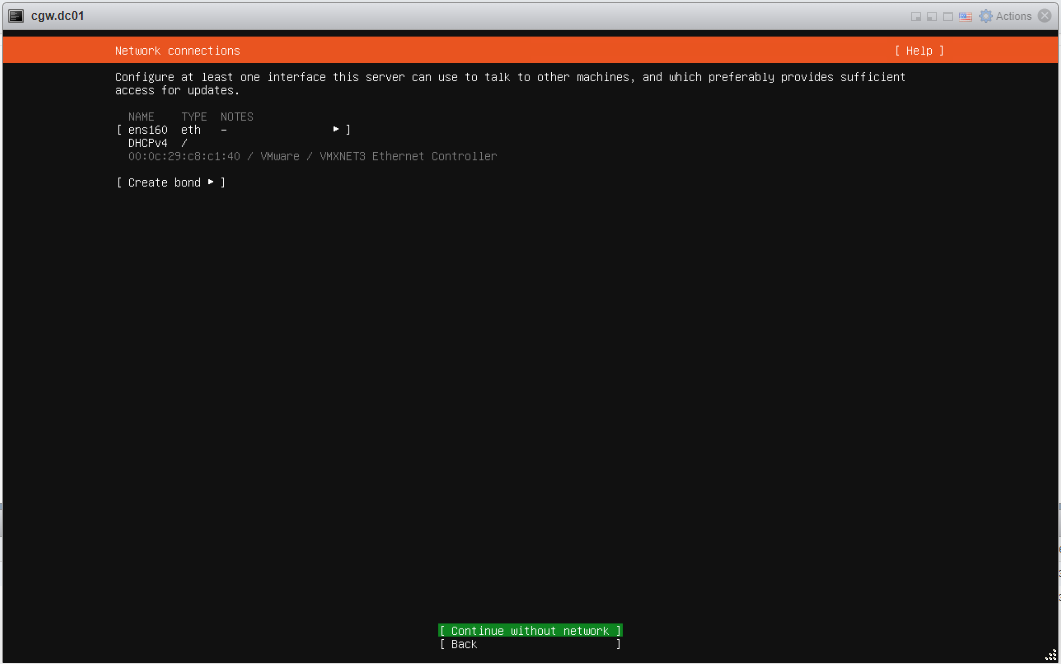
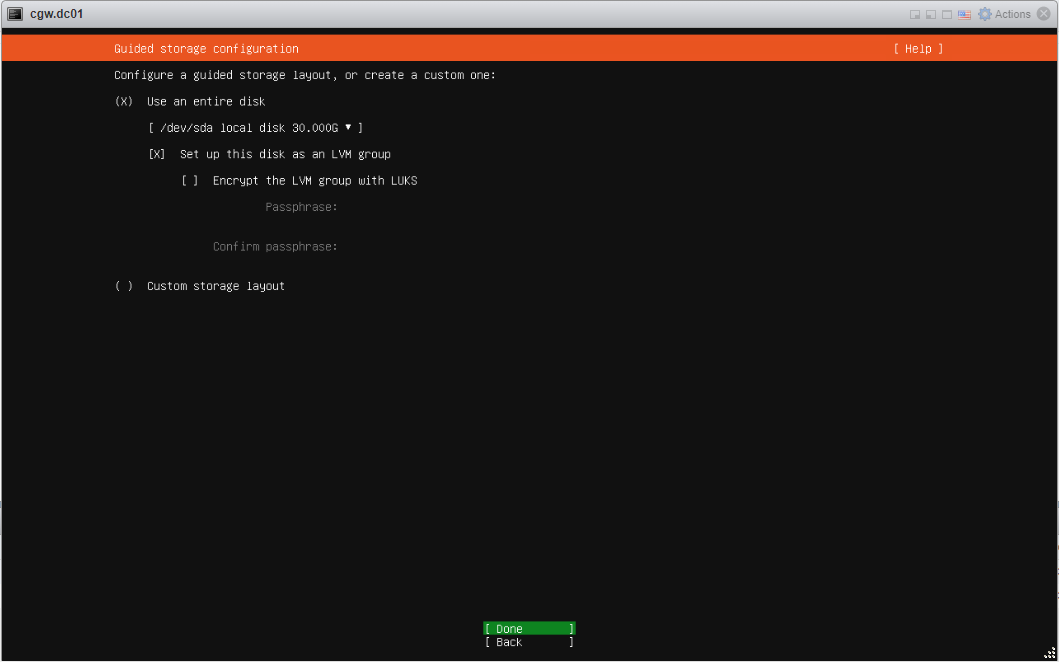
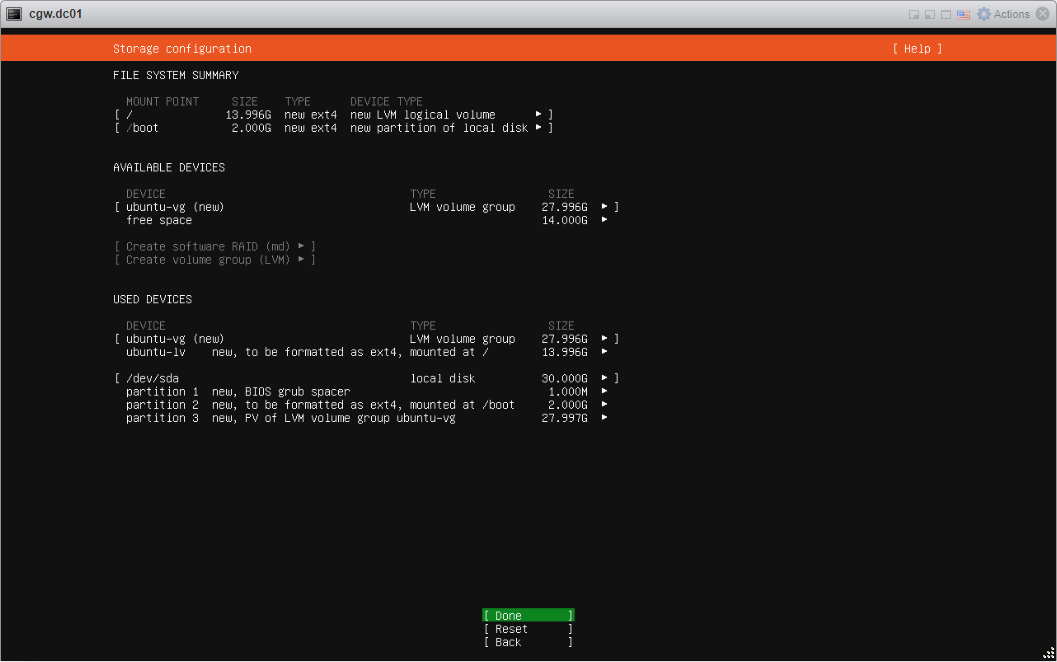
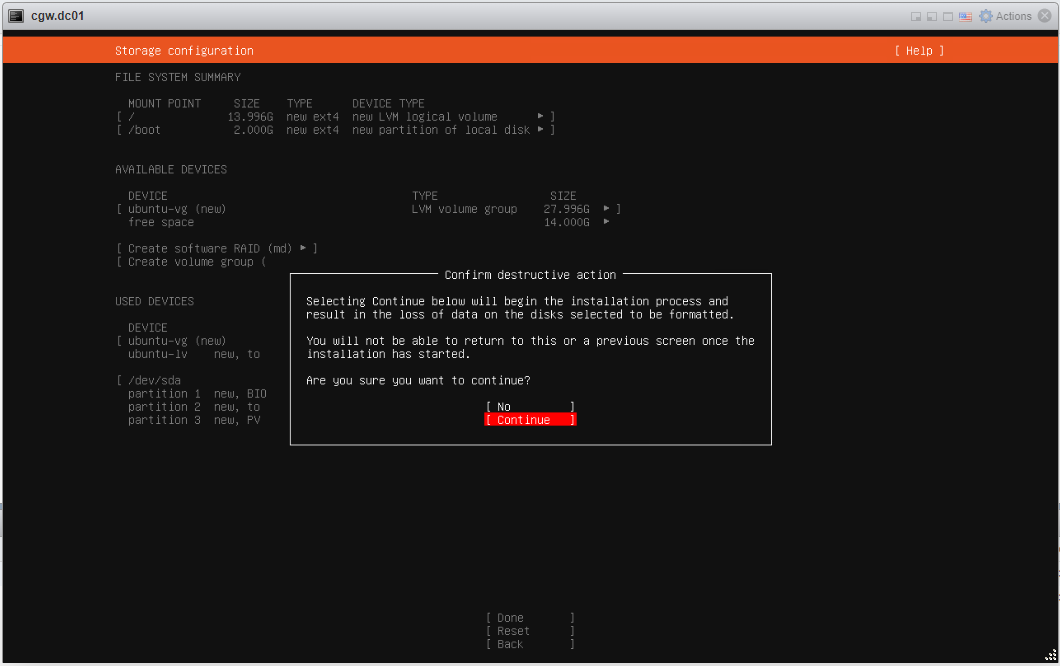
- Provide inputs, and specify username with password
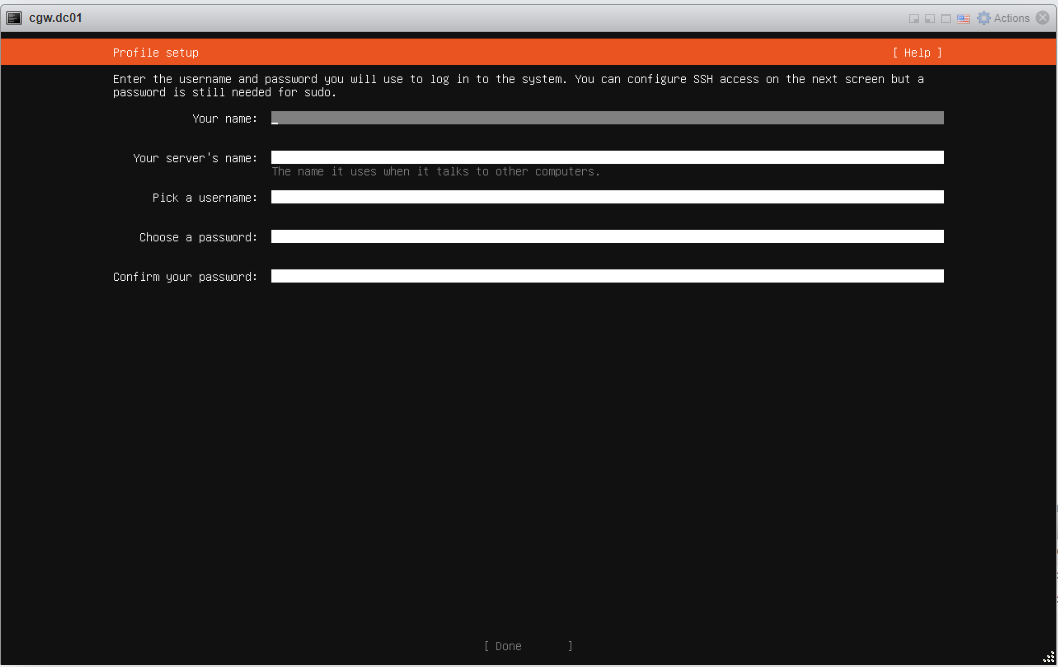
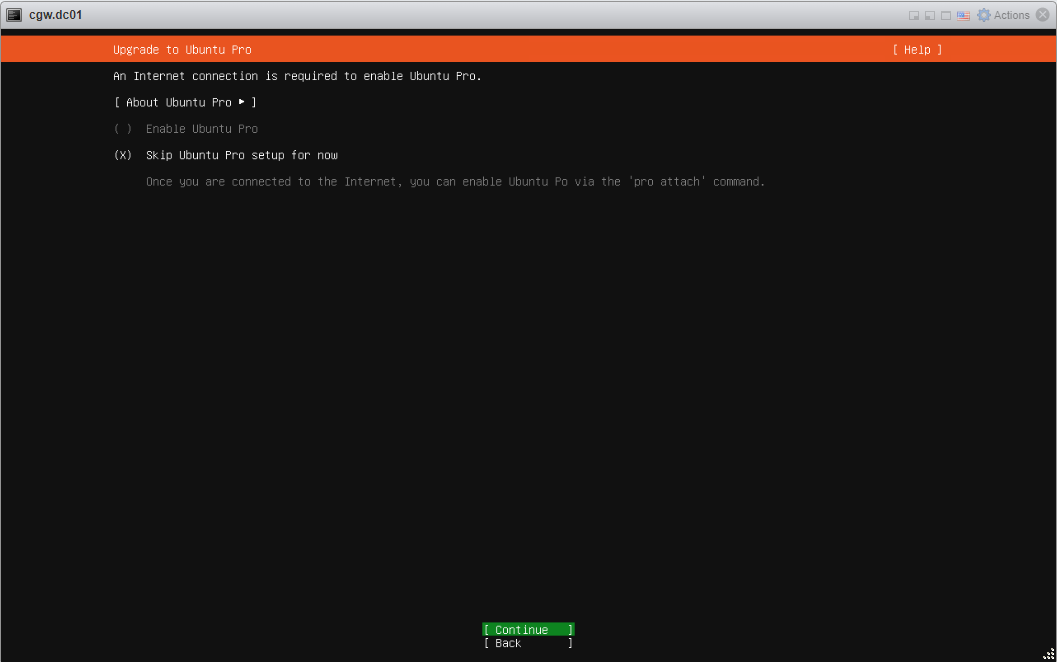
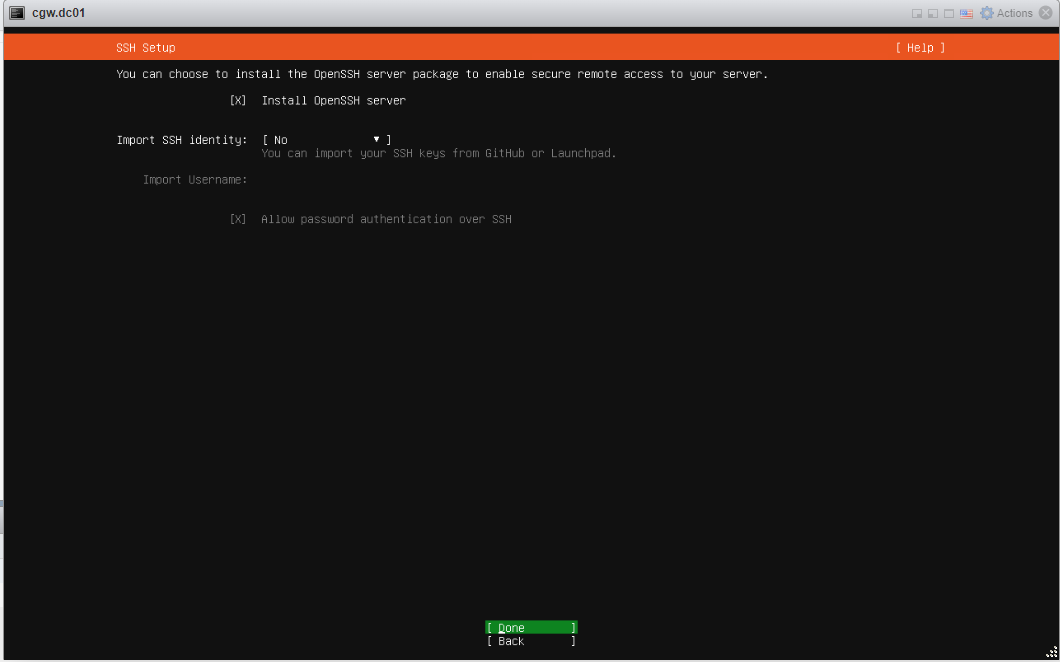
- Select Install Open SSH Server and press Done
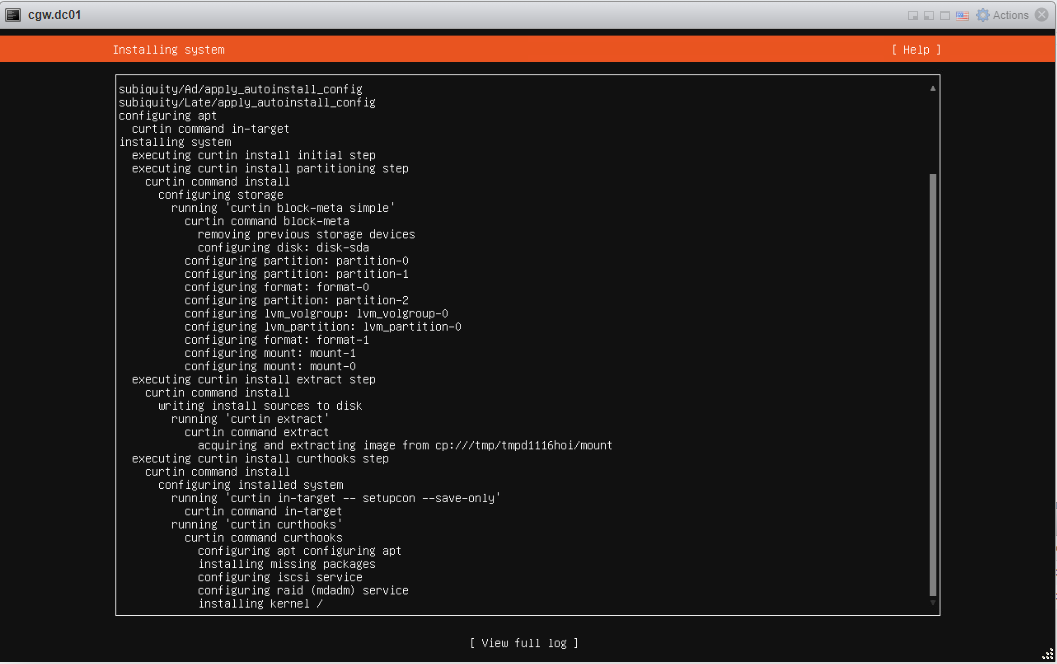
- Press enter on Reboot now, after installation/updates
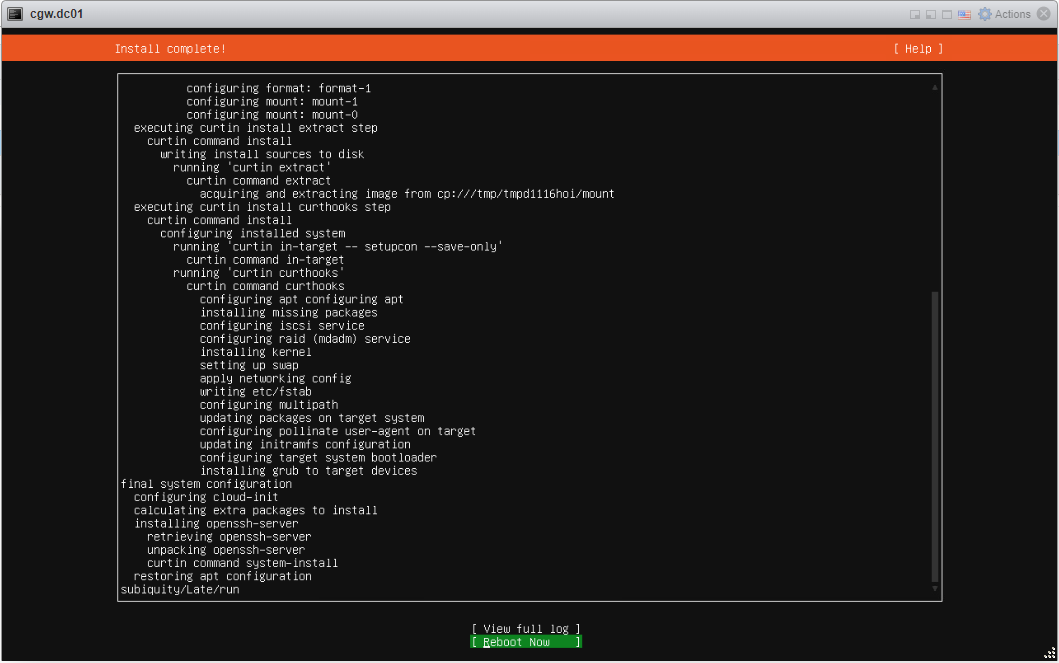
- Once VM boots, press Enter, when VM console displays Remove installation medium and press enter
- Login to VM using username and password which was created during installation
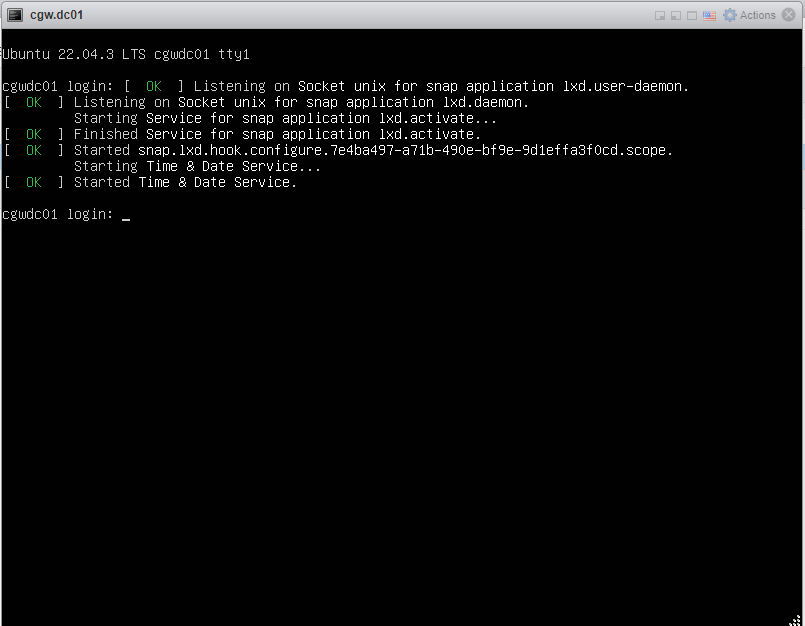
- After login check VM has IP addresses configured properly [Use ip addr command to check configuration]
- Check WAN connectivity [Use ping 8.8.8.8 and ping google.com]
- In case DNS resolution fails, add nameservers 8.8.8.8 entry in /etc/resolv.conf and try ping google.com again
- Check internal/private application servers on the LAN are accessible from the VM.
- Ping internal/private application server IP to verify connectivity
Internet / WAN connectivity is required to install CGW software and connect it to Cyber Mesh
- SSH to CGW VM IP, which will be required to copy command on VM terminal
In case VLAN is enabled and multiple VLAN ID/subnets configured to support different network requirements, make sure VLAN ID 4095 is configured on VMWare ESXi' VM's setting. It will pass all VLANs preserving VLAN tags.
¶ Create a Cyber Gateway
To create a Single-Interface Cyber Gateway (CGW-SIF), follow the steps below.
- Navigate to the MSP admin console -> Client Workspace
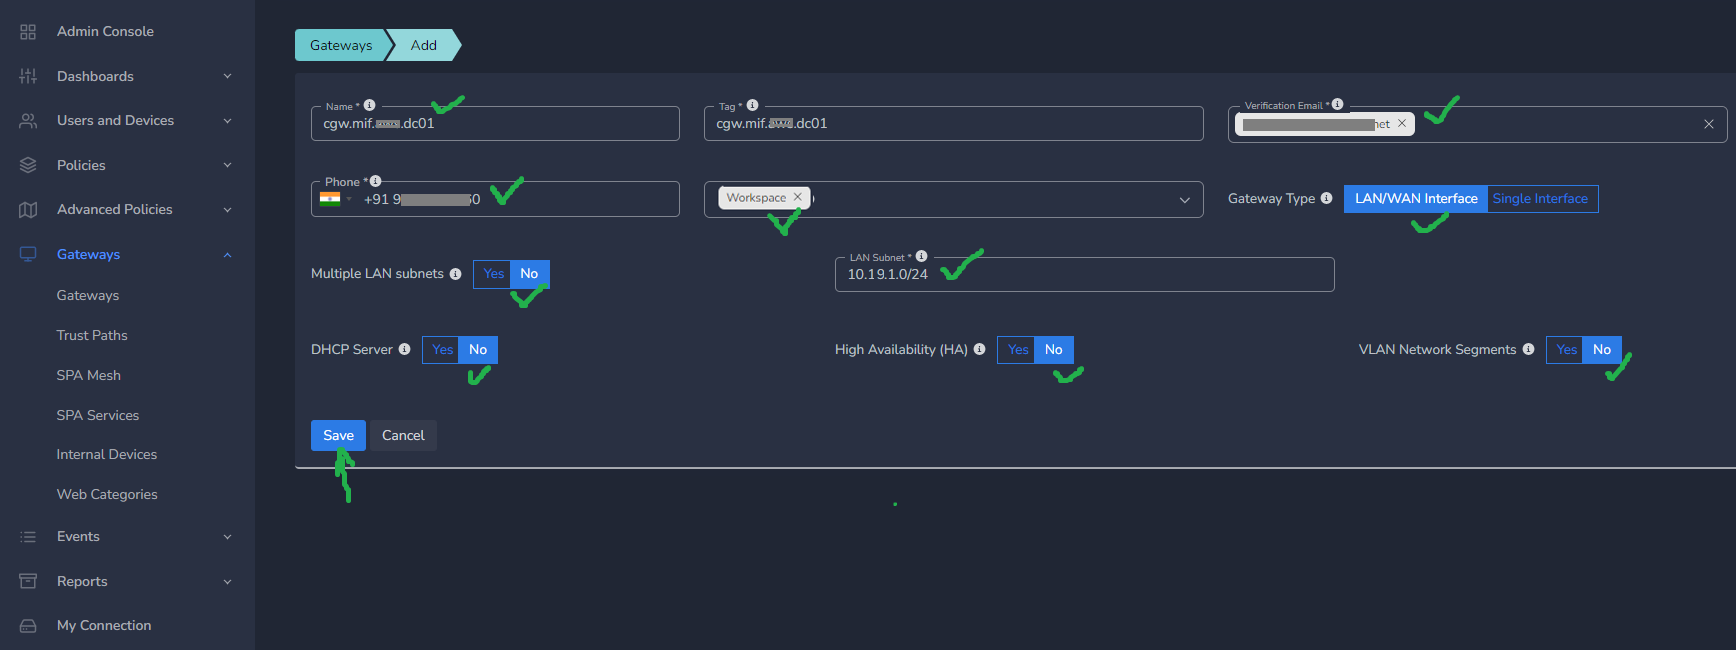
- Click on Gateways in the left menu bar → Add Gateway
- Make sure LAN/WAN Interface is selected
- Enter a name for the cyber gateway, admin email and phone number
- Specify the LAN Subnet, this is the subnet that you like to remotely access in the AWS cloud
- Select Allowed User Groups (you can give access to the whole organization or a select group)
- Mark DHCP Server with No. Mark HA and VLAN Network Segments as per requirements. [Recommended is no if they are not being used]
- Click Update
¶ Deploy the Cyber Gateway
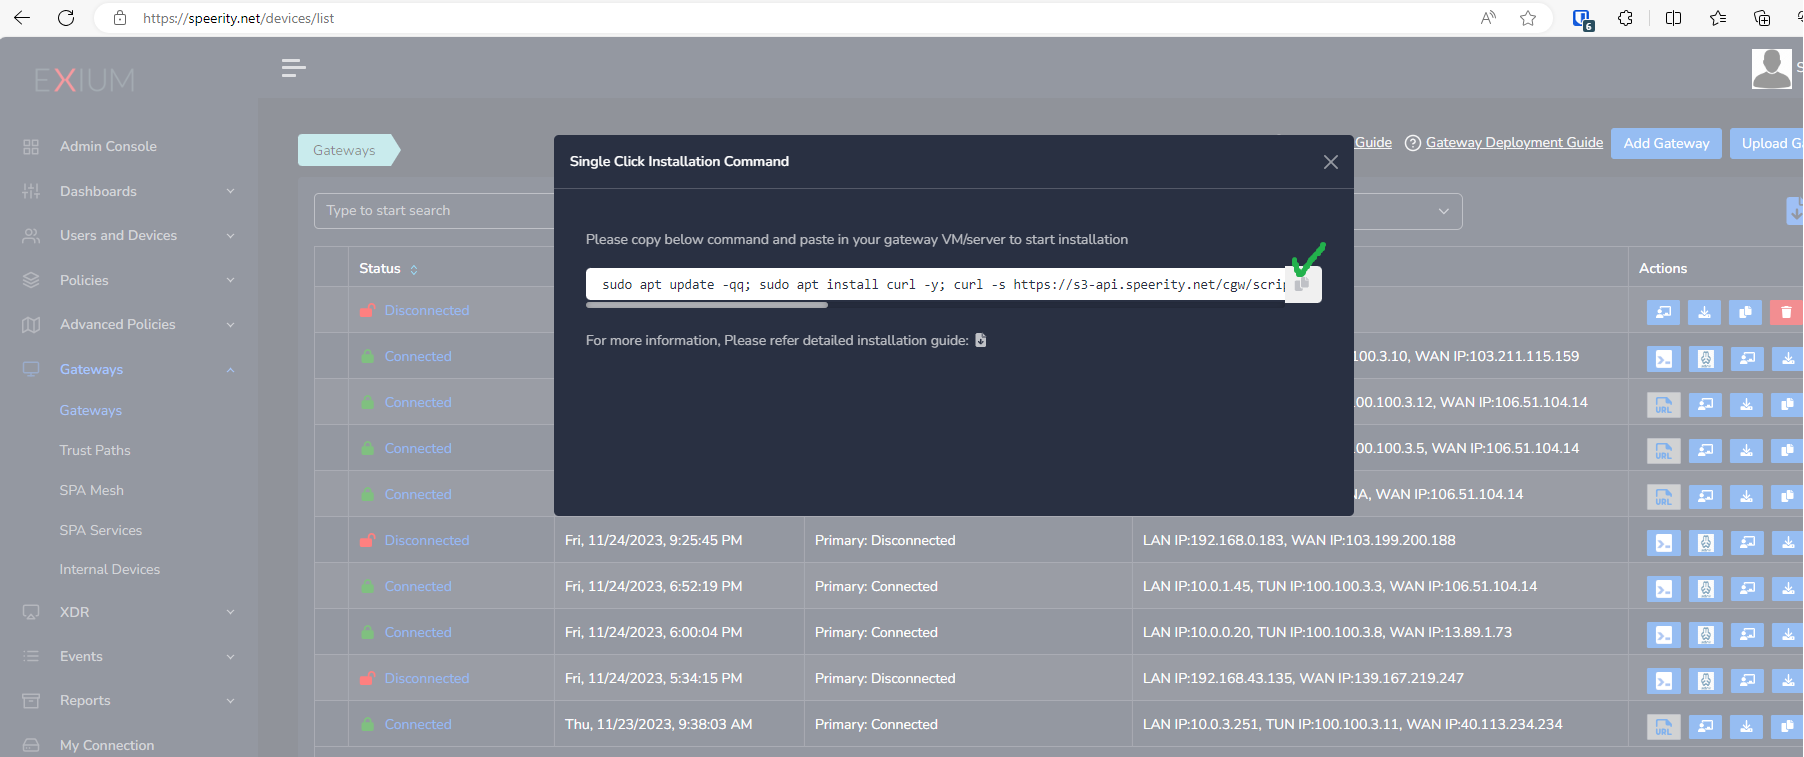
- Copy the Script for the cyber gateway you just created as shown in the screenshot below
- Paste the Script in the VM SSH console
- Press Enter
In case, you are unable to login to machine using SSH to copy and run CGW install command, then we recommend you to run pre-install script mentioned below. You have to type it on console, because copy paste won't work on some direct machine consoles.
bash <(curl -s https://s3-api.speerity.net/cgw/scripts/cgwctl.sh)Please share Workspace and CGW names with us on support@exium.net. We will push installation remotely.
The Cyber gateway deployment will start. At this time, you can leave the deployment running unattended. You will receive an email on the admin email that you specified earlier when the deployment is complete. You can also check the status of the cyber gateway in the Exium admin console. When cyber gateway is deployed successfully and connected, you will see a Green Connected Status as in the screenshot below.

Once the cyber gateway is deployed successfully and connected, you can start testing the Zero Trust Secure Private Access policies.
¶ Troubleshooting
- Check VM has “Expose hardware assisted virtualization to the guest OS” and “Enable virtualized cpu performance counters” both enabled
- Check virtualization technology is enabled on Host machine in BIOS settings
For eg. setup has below versions:
vSphere Standard v8.0.3.00400 build 24322831
4 hosts in DRS cluster w/EVC Merom Compatibility Enabled
All hosts are eSXI v8.0.3 Build 2402251On above setup if error says VM is incompatible, when enabling hardware virtualization on the VM, then you may follow below steps to resolve the issue.
- Upgrade EVC Mode from Merom to Nehalem Generation – it will fix the Intel-VT issue preventing VM spin up
- Change RAM allotted from 1GB to 4GB so that setup would quit soft locking halfway through
Generally, VM incompatibility error might be due to the EVC (Enhanced vMotion Compatibility) mode being set to Merom, which restricts VM compatibility to processors of that generation (Merom or equivalent). Since you're using vSphere 8.0.3 with newer hosts, the Merom EVC mode is likely limiting the instruction set features available to your VMs, causing compatibility issues, especially for VMs with newer guest OS or virtual hardware requirements.
- Check VM Hardware Compatibility: Ensure the virtual hardware version for the guest VM is compatible with the EVC mode. Newer virtual hardware versions may require a higher EVC mode than Merom.
- Adjust EVC Mode: If possible, set the EVC mode to a newer generation that aligns with the CPU models in your cluster while still allowing for vMotion compatibility. This would enable newer instruction sets and features for VMs, potentially resolving the compatibility issue.
- Confirm Host CPU Compatibility: Verify that all hosts in the cluster support the new EVC mode you intend to use. They need to be able to support the minimum CPU features of the new EVC baseline.
- VM Configuration Changes: Sometimes, setting the VM to a specific hardware version (one that aligns with the Merom compatibility) can work, although this may limit some capabilities of the guest OS.