¶ Create a Virtual Machine
In addition to the instructions provided here, at any time you can also refer to Google's instructions on Create a VM instance from a public image.
The recommended machine type and specification for the VM are provided below:
|
Machine Type |
CPU |
Memory |
Disk |
|---|---|---|---|
|
N1 (n1-standard-1) |
1 vCPU |
3.75 GB |
30 GB |
- In the Google Cloud console, go to the VM instances page, Go to VM instances
- Select your project and click Continue.
- Click Create instance.
- Specify a Name for your VM. For more information, see Resource naming convention.
- Select region
Optional: Change the Zone for this VM. Compute Engine randomizes the list of zones within each region to encourage use across multiple zones.
- Specify the Machine Type, recommended: N1 (n1-standard-1)
- Specify Boot Disk, leave selection to “PUBLIC IMAGES”
- Select operating system “ubuntu”
- Select version 22.04 LTS
- You can leave boot disk type to the default (Balanced persistent disk)
- Specify Size, (recommended 30 GB)
- Click on Create
- Go to DETAILS
- Select SSH (in browser SSH is fine, you should be able to copy/ paste the cyber gateway deployment commands in the browser SSH shell)
- Note the internal IP,
10.128.0.59in the example screenshot below. You will need to specify the subnet (Network Destination/ Trust path) when deploying the cyber gateway in the next steps. For example, if you just like to give remote Zero Trust access to the subnet that the cyber gateway is on, your subnet in /24 format will be10.128.0.0/24.
¶ Create a Cyber Gateway
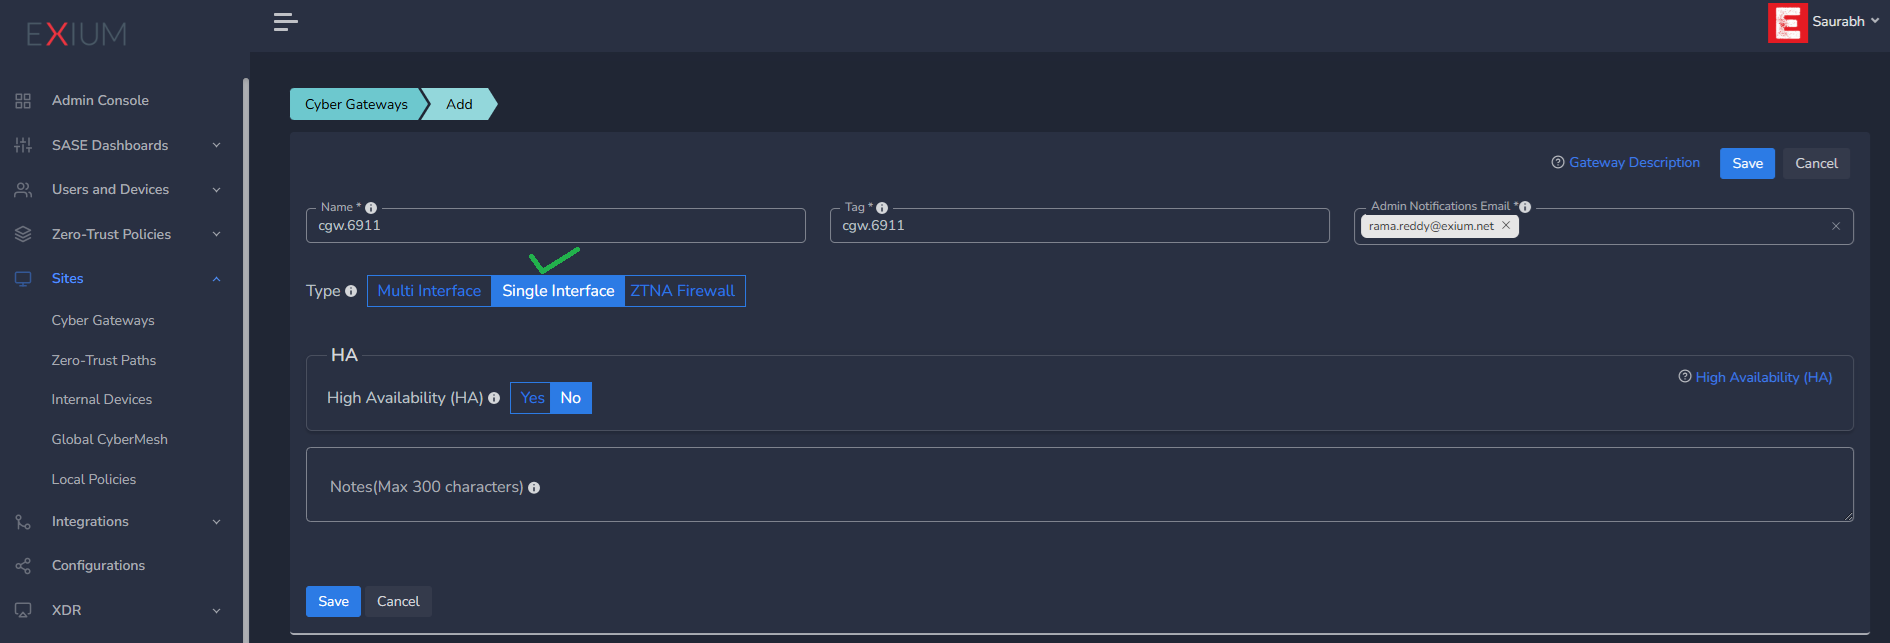
To create a Single-Interfce Cyber Gateway (CGW-SIF), follow the steps below.
- Navigate to the MSP admin console -> Client Workspace
- Click on Sites in the left menu bar → Add Gateway
- Make sure Single-Interface is selected
- Enter a Name for the cyber gateway, admin email to receive notifications or alerts
- Select User Groups if already created or skip if no there is no additional requirement, admin can add/delete user group association later also.
- Select HA yes, in case high availability is required
- Click Save
¶ Deploy the Cyber Gateway
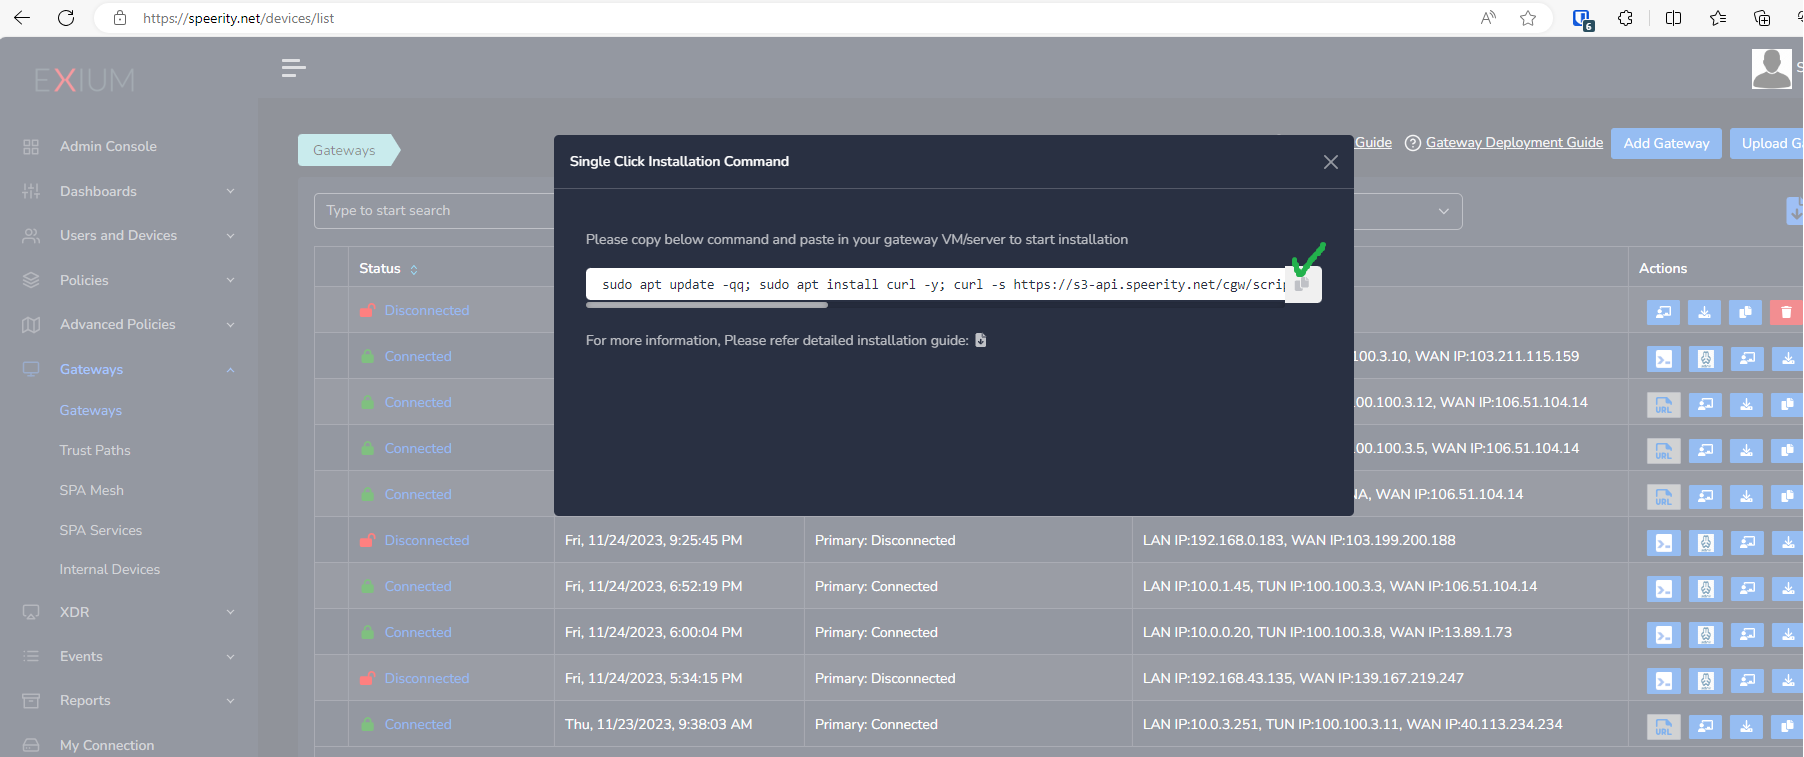
- Copy the install command for the cyber gateway you just created as shown in the screenshot below
- Paste the install command in the machine's SSH console/terminal
- Press Enter
In case, you are unable to login to machine using SSH to copy and run CGW install command, then we recommend you to run pre-install script mentioned below. You have to type it on console, because copy paste won't work on some direct machine consoles.
bash <(curl -s https://s3-api.speerity.net/cgw/scripts/cgwctl.sh)Please share Workspace and CGW names with us on support@exium.net. We will push installation remotely.
The CyberGateway deployment will start. At this time, you can leave the deployment running unattended. You will receive an email on the admin email that you specified earlier when the deployment is complete. You can also check the status of the cyber gateway in the Exium admin console. When cyber gateway is deployed successfully and connected, you will see a Green Connected Status as in the screenshot below.

Post successful deployment, subnet of the CyberGateway machine's interface will be added as a Trustpath automatically. It will be associated to “workspace” group category, i.e. all the users in workspace will be able to access the resources on that private subnet. You can edit group association any time as per requirement. You may create new user groups and associate them with the trust path.
Once the CyberGateway is deployed successfully and connected, you can start testing the Zero Trust Secure Private Access policies.
Additional trust paths can be added manually. In case additional trust paths have different next hops, then those can also be configured from admin console. In case additional trust path subnets are already accessible via Cybergateway's default gateway then next hop configuration is not required.
You can follow below steps to add additional trust path subnets with or without their next hop.
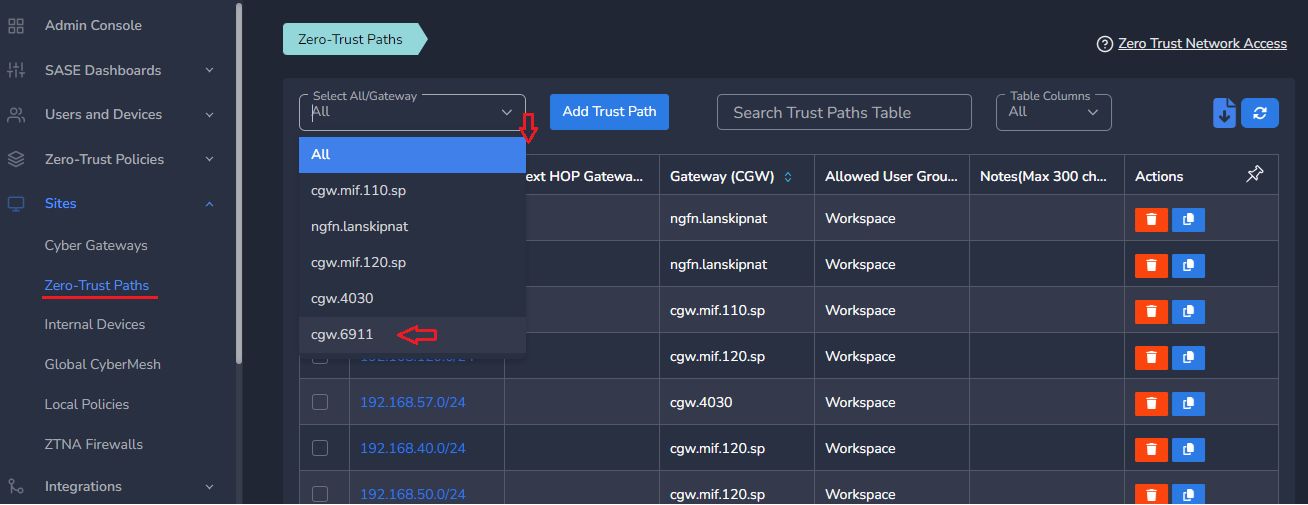
- Click on Zero-Trust Paths
- Select CyberGateway from drop down list
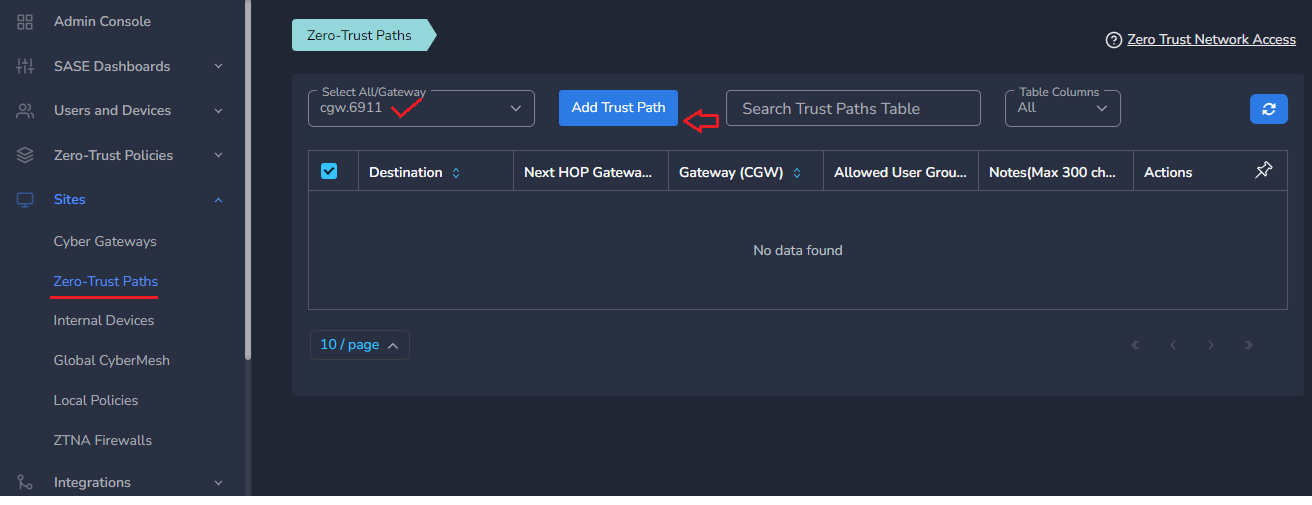
- Click on Add Trust Path
- Provide Network Destination or private subnet to allow access for remote users
- Provide Next HOP Gateway IP, if it is different from default gateway of CyberGateway machine
Make sure next hop gateway IP is accessible from CyberGateway machine, else route configuration will fail
- Select Allowed User Groups or leave workspace group associated in case whole organization is allowed to access that subnet
- Save the configuration [CGW will pull configuration, and routes will be added after few mins.]
- Additional trust path configuration can be modified later as per requirement or when the next hop changes
Do not add next hop configuration in the default trust path which is created automatically by CyberGateway post deployment.
¶ Uninstall CyberGateway
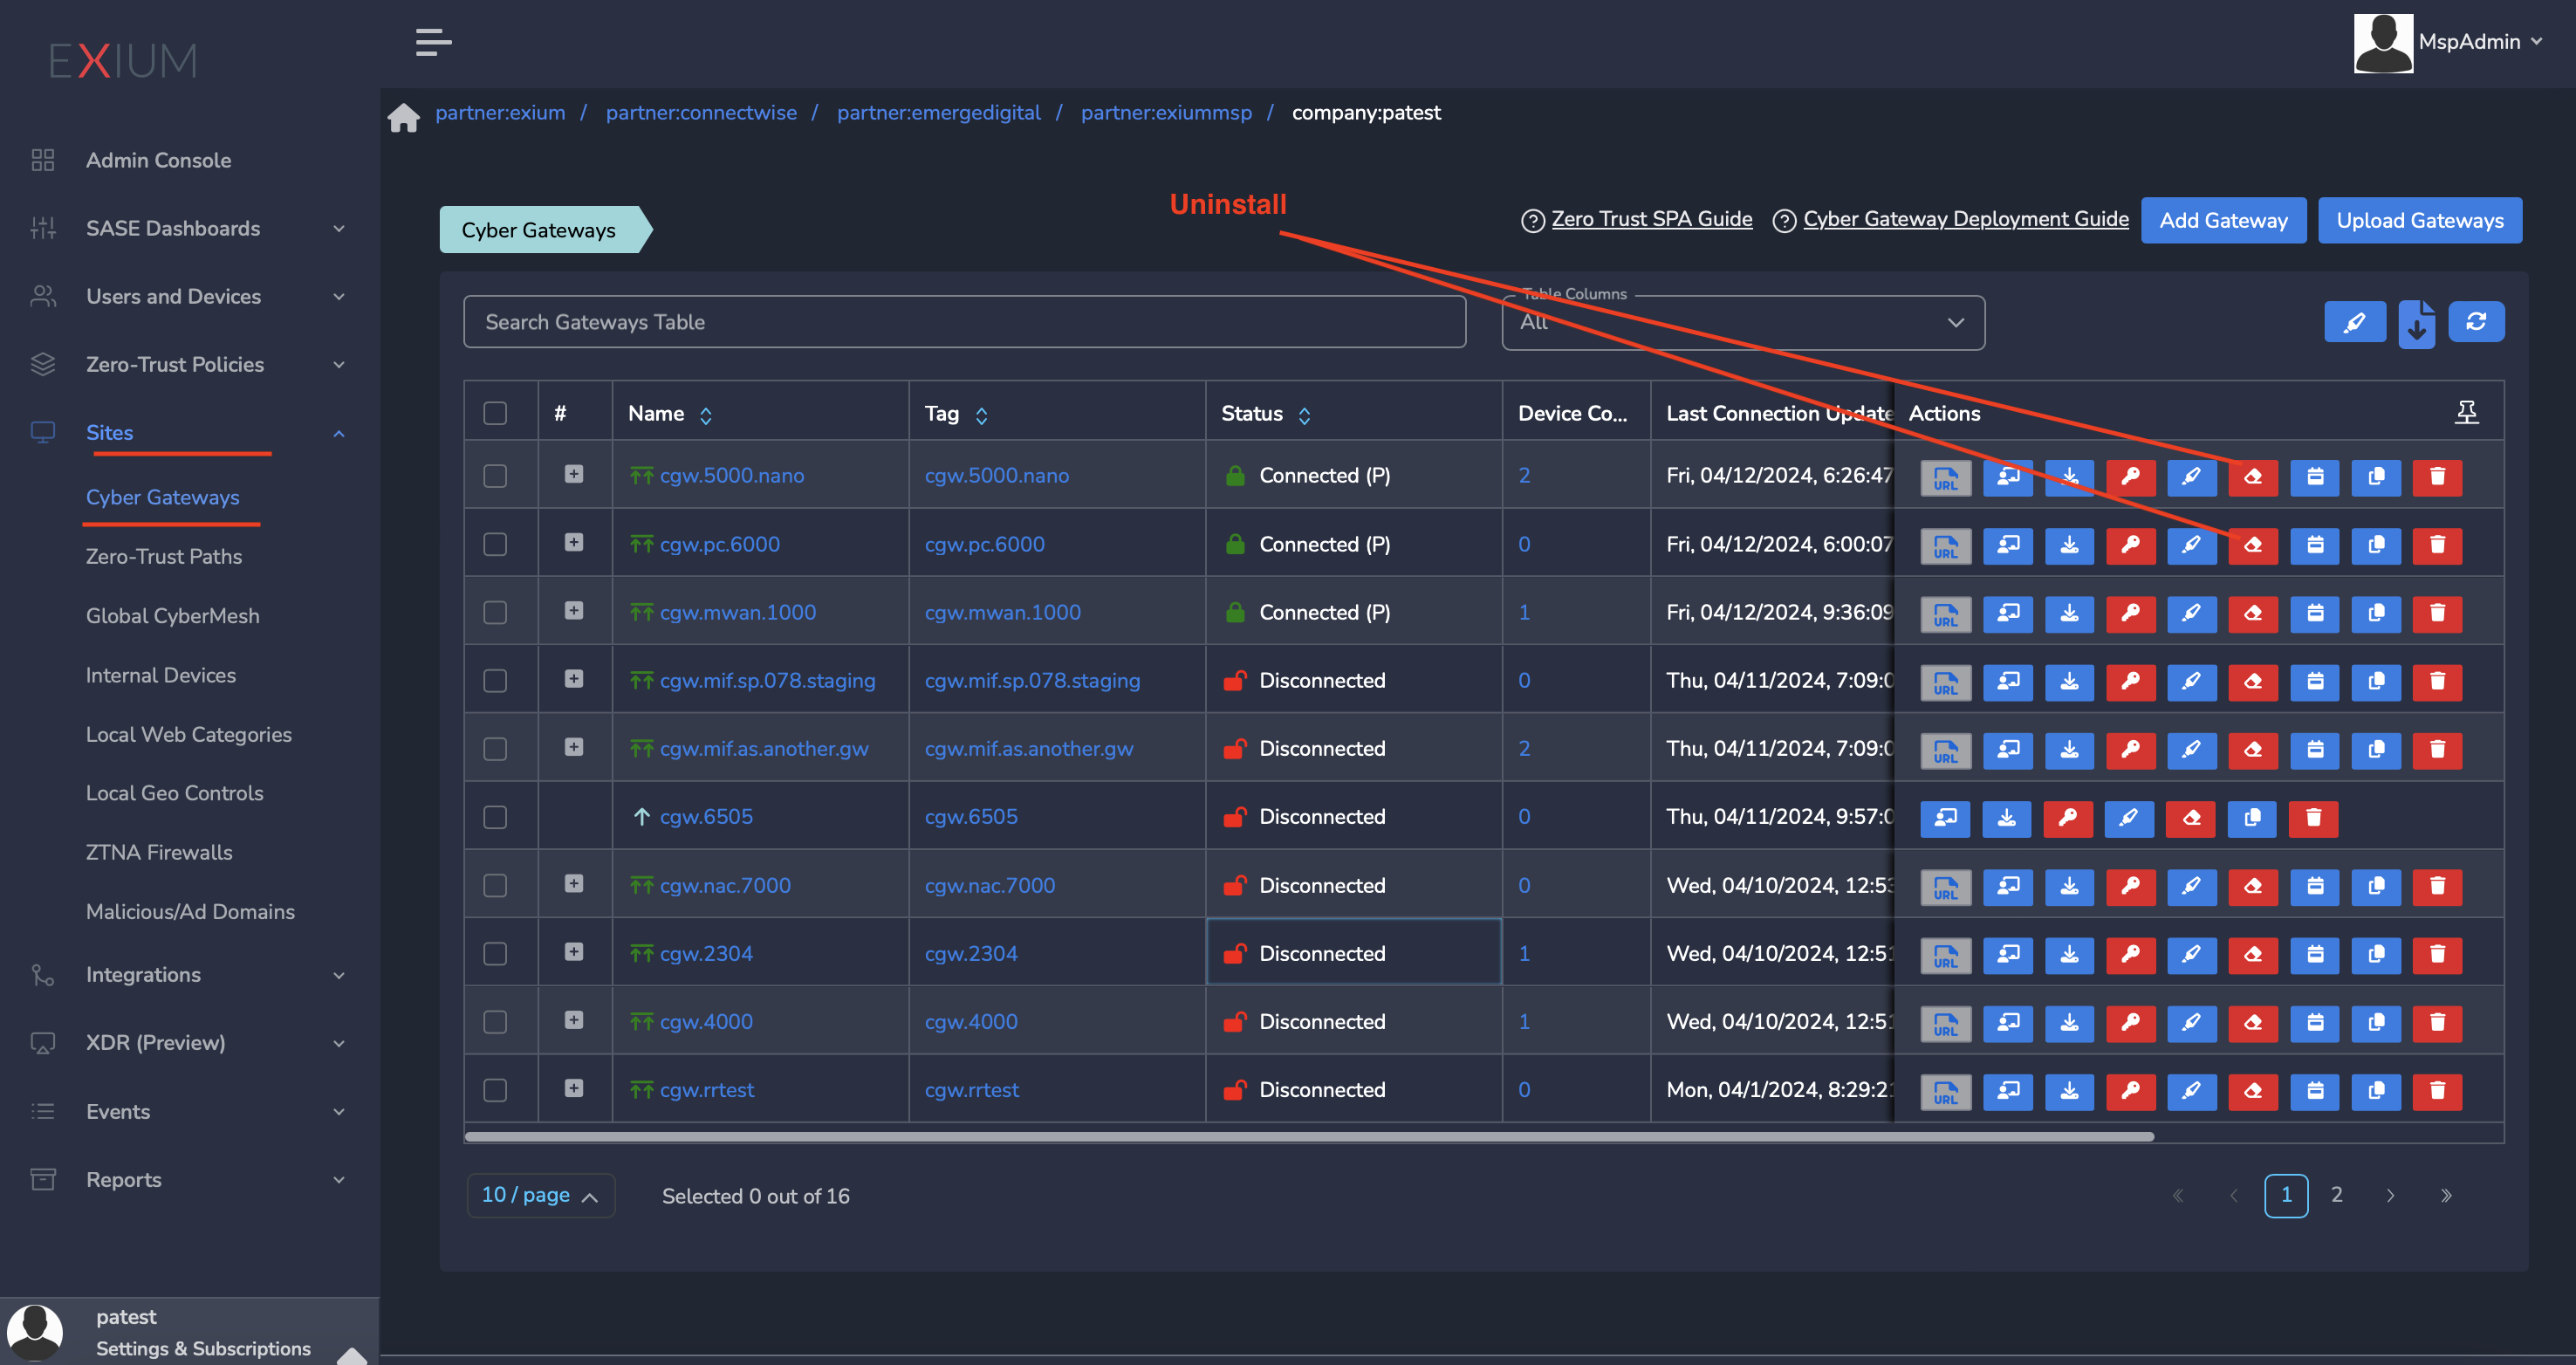
Uninstall can be done from admin console or using CGW CLI commands
¶ From Admin console
- Navigate to the MSP admin console -> Client Workspace
- Click on Sites → Cyber Gateways in the left menu bar
- Select the CyberGateway you want to uninstall and click on the icon show in screenshot
- It will take around 5 ~10 mins complete uninstallation
¶ On CyberGateway terminal using command line
To uninstall CyberGateway from CyberGateway system directly
- SSH to CyberGateway
- type “sudo -s” to switch to root
- Run following command on terminal to uninstall
cgw uninstall