¶ Step 1 - Welcome Email
Please follow the steps below for the Exium Android client installation and activation on an Android device.
You will receive an email with the subject line ‘Welcome [Workspace : customername]
Note: Open the welcome email in a computer as you will need to scan two QR codes displayed on the computer screen with your mobile device.
The graphic below shows what this email looks like.
Note that this email expires after a limited time. If it does expire, you can use the sign-in link at the bottom of the email to proceed or contact your IT admin.
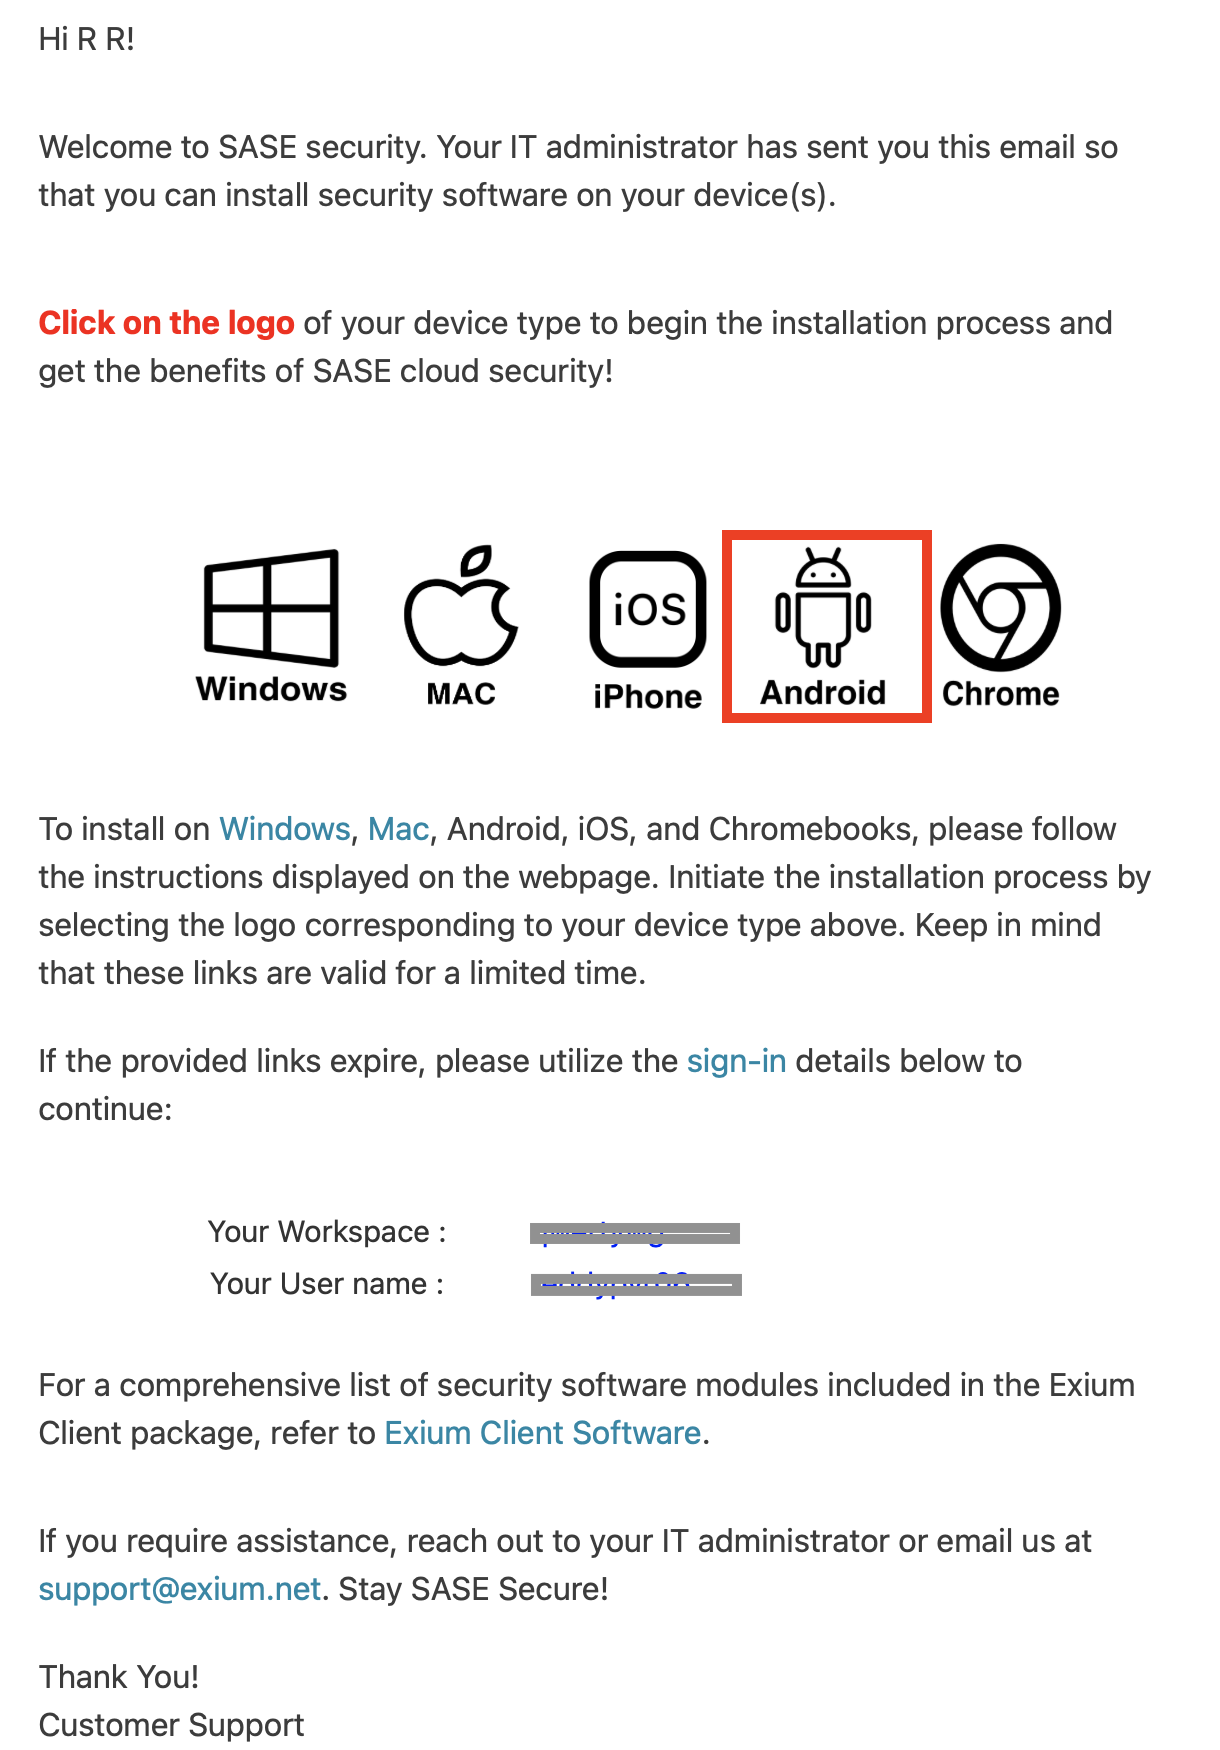
¶ Step 2 - Click on the Android Logo
You should open this email on your laptop even though you are installing the client on your Android Phone/Android Tablet. This email will give you QR codes that you will scan with your mobile device to complete the installation.
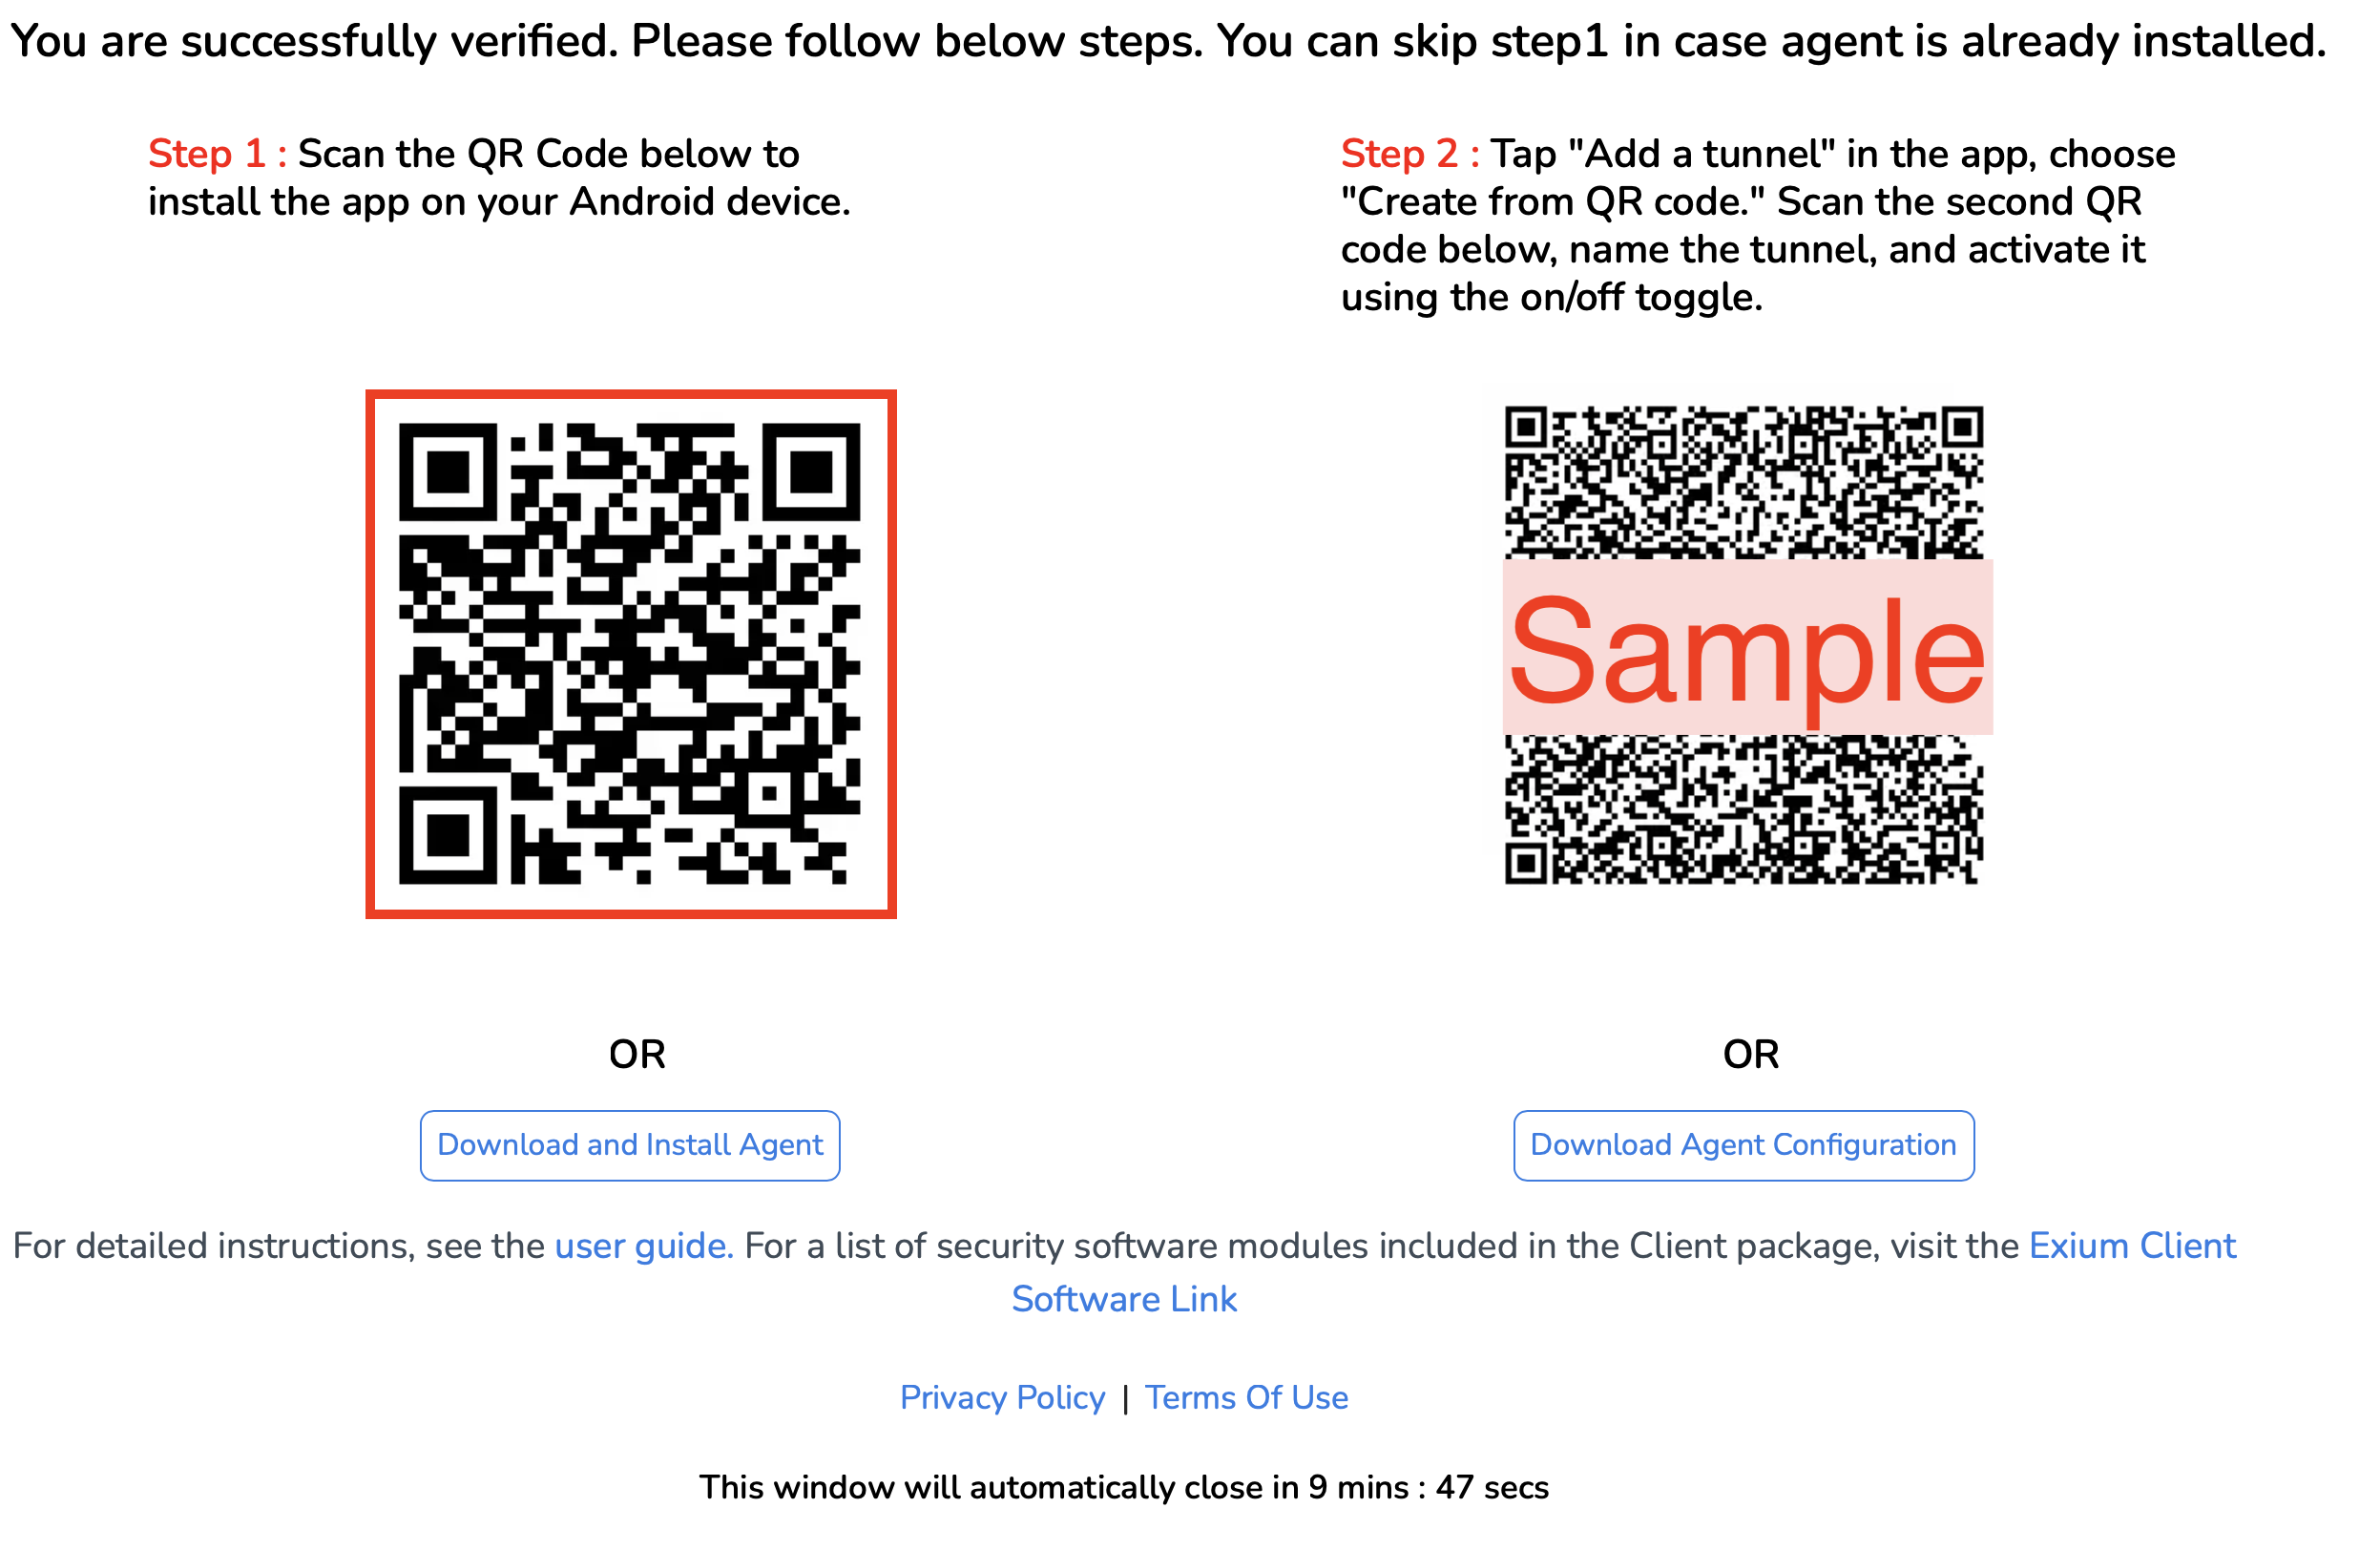
Click on the Android logo in the welcome mail; this will open a browser window (example shown below).
This web page includes two steps that you need to take. Keep the browser window open and refer back to this window for the next two steps.
¶ Step 3 - Install the Agent
Scan the first (top) QR code using your Android device. This will open Exium - SASE Agent app in Android Google Play Store. Click on GET button to install the agent.
¶ Step 4 - Install the Tunnel Configuration
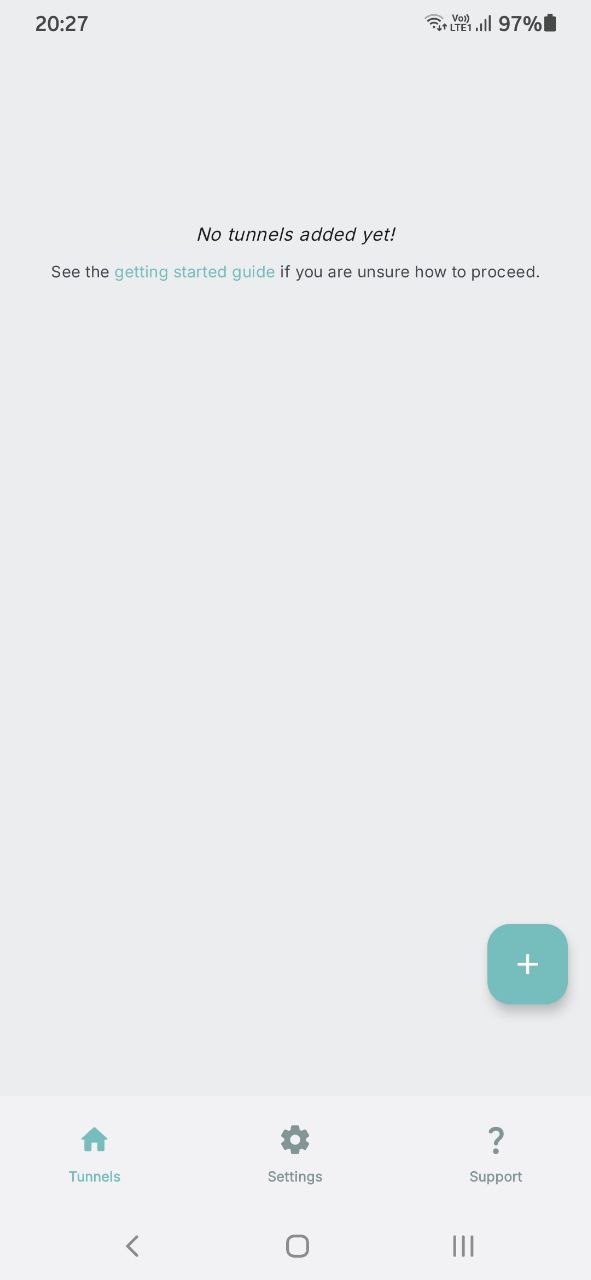
After installing the Exium SASE Agent application, open it.
Click on + icon in the bottom right corner, Click on Add from QR Code from the menu as shown below.

Once the tunnel is successfully added then you would see a connected tunnel and its respective details
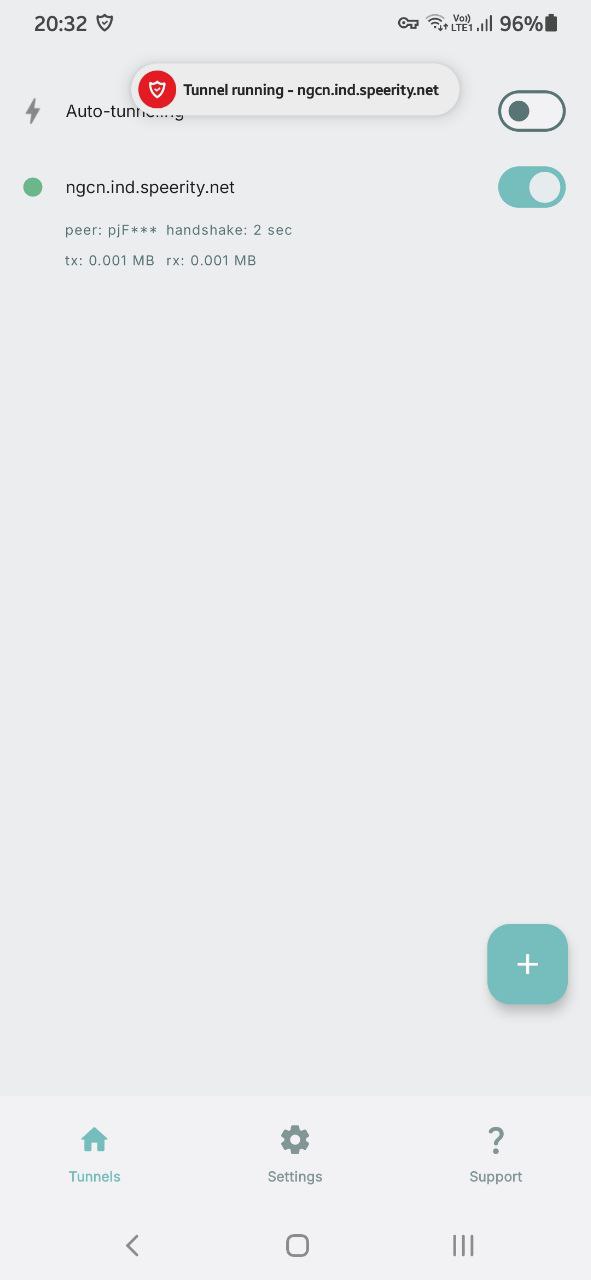

¶ Step 5 - Activate the Tunnel
After the tunnel is installed, activate this tunnel by selecting the on/off toggle. Once the toggle is green, you are connected to the tunnel. This protects your device online and allows you to securely connect to company resources.

Installation Complete!